
A Beginner’s Journey to Homemade Soap Making
Picture this: you’ve had a chaotic week. Between work, family commitments, and the endless to-do list, it’s easy to feel overwhelmed. Now imagine taking a moment just for yourself, transforming simple ingredients into beautifully crafted bars of soap that not only look good but also feel luxurious on your skin. Homemade soap isn’t just a gorgeous addition to your bathroom or a thoughtful gift; it can become a fulfilling self-care ritual. Here’s the truth: if you’ve ever wanted to learn how to make soap for beginners, you’re in the right place!
Don’t worry if you’ve never done anything like this before. Making soap from scratch isn’t just for the pros—it’s an exciting and rewarding process that anyone can enjoy. Grab a cup of tea, relax, and let’s dive into your ultimate guide for making cold process soap.
Getting Started with Cold Process Soap Making
Before we jump into the nitty-gritty, let’s take a moment to chat about what cold process soap making actually is. This method allows you to create soap using oils, lye, and other natural ingredients without applying heat externally. It sounds fancy, but once you get the hang of it, you’ll find it’s quite simple.
What You’ll Need
Ready to gather your supplies? Here’s a basic list to get you started on your soap-making adventure:
Ingredients:
- A selection of oils (like olive oil, coconut oil, and palm oil)
- Lye (sodium hydroxide)
- Distilled water
- Essential oils for fragrance (like lavender or eucalyptus)
- Natural colorants (like turmeric or clay)
Equipment:
- Scale (for measuring)
- Mixing bowls (preferably stainless steel or glass)
- Stick blender
- Soap mold (silicone molds work great)
- Safety gear (gloves and goggles)
- Thermometer (to check temperatures)
Tip: You can find most of these supplies at a local craft store or online.
The Cold Process Soap Recipe
Now that you have your supplies, here’s a simple recipe to follow. Remember, soap making does involve some chemical reactions (thanks to the lye), so it’s crucial to follow the instructions carefully for a successful batch.
Basic Cold Process Soap Recipe
Ingredients:
- 16 oz olive oil
- 16 oz coconut oil
- 16 oz palm oil
- 6.3 oz lye
- 14 oz distilled water
- 1-2 oz essential oils for fragrance (to your liking)
Instructions:
Safety First: Put on your safety goggles and gloves. Lye can be dangerous, so it’s essential to handle it with care.
Measure and Mix Lye: In a well-ventilated area, carefully measure out the lye and distilled water. Always add lye to water (never the other way around) to prevent a violent reaction. Stir until the lye dissolves. This mixture will heat up and emit fumes, which will dissipate as it cools. Set it aside in a safe place.
Melt Oils: In a large mixing bowl, combine your olive, coconut, and palm oils. Gently heat them until they are melted and combined. This can be done in a double boiler or microwave—just be careful not to overheat.
Cool Down: Let the lye and oil mixtures cool down until they reach between 95°F and 105°F. Use your thermometer to monitor the temperatures.
Combine: Once both mixtures are at the right temperature, slowly pour the lye solution into the oils while blending with your stick blender.
Blend Until Trace: Blend until you reach "trace." This is when the mixture thickens and leaves a trail on the surface when drizzled. It usually takes about 5-10 minutes of mixing.
Add Fragrance and Color: Now is the time to add your essential oils and any colorants if desired. Stir gently to combine.
Pour into Mold: Pour the soap mixture into your mold, making sure to tap it down gently to eliminate air bubbles.
Insulate and Wait: Cover the mold with a towel to insulate it, allowing it to saponify for 24-48 hours.
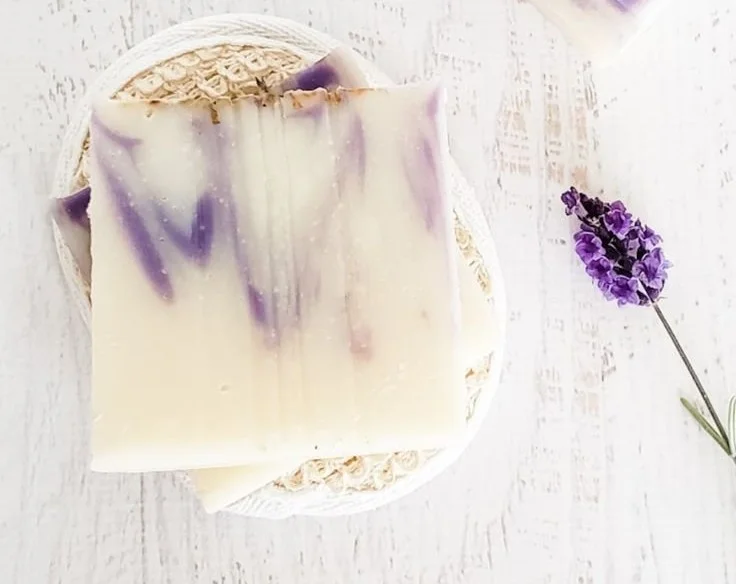
Unmold and Cure: After the waiting period, gently remove your soap from the mold and slice it into bars. Let the bars cure in a cool, dry place for about 4-6 weeks before using. This helps to ensure that all the lye has fully reacted.
Common Mistakes to Avoid
As with any new skill, there are common potholes you might encounter. Fear not! Here are a few mistakes often made by beginners and how to sidestep them:
Skipping Safety Gear: Trust me, safety goggles and gloves are your best friends in this process. The last thing you want is to accidentally get lye on your skin.
Incorrect Measurements: Soap making is all about precision. Make sure to weigh your ingredients with a scale, as inaccurate amounts can affect the potency and safety of your soap.
Rushing the Process: Resist the temptation to cut corners. Allow your soap to cure fully—you’ll be rewarded with better results.
Questions You Might Have
If you’re a beginner, it’s natural to have some questions floating around in your mind. Here’s a quick FAQ to help ease those worries.
Can I use different oils?
Absolutely! Experimentation is key in soap making. Just remember that different oils have different properties. Coconut oil can create a bubbly lather, while olive oil helps to moisturize.
What about colors and scents?
Feel free to get creative! You can use natural colorants like spirulina for green hues or activated charcoal for a striking black. Essential oils not only provide fragrance but also offer additional skin benefits.
How can I store my soap?
Store your cured soap in a cool, dry place, away from direct sunlight. A well-ventilated area is best to keep the bars dry and ready for use.
Bonus Self-Care Ideas
Making soap can be a wonderful addition to your self-care routine, but why stop there? Here are a few extra ideas to elevate your self-care game:
Create a Relaxing Atmosphere: Light some candles, play soft music, and carve out this time just for you.
Pamper Yourself: Once your soap is ready, treat yourself to a luxurious bath using your new creation!
Gift It: Homemade soap makes a personal, heartfelt gift. Consider packaging it beautifully for friends’ birthdays or special occasions.
Conclusion
Starting your soap-making journey can feel a bit daunting at first, but trust me, it’s a fulfilling process that brings joy not only to you but also to those around you. Just think about all the different scents, colors, and shapes you can create!
So, whether you’re hoping to dive into natural beauty, find a therapeutic hobby, or simply enjoy crafting something beautiful, making soap is an excellent way to reconnect with yourself and your creativity.
You might just find that this practice transforms your self-care routine, helping you unwind and feel pampered. And who knows? You could end up starting a new trend among your friends! So grab your supplies, roll up your sleeves, and let’s create a little magic in the kitchen together. Happy soap making! And remember, if you ever feel stuck, you’re not alone; we’re all learning together.