
The Warmth of Luminance Candles: A Cozy DIY Project
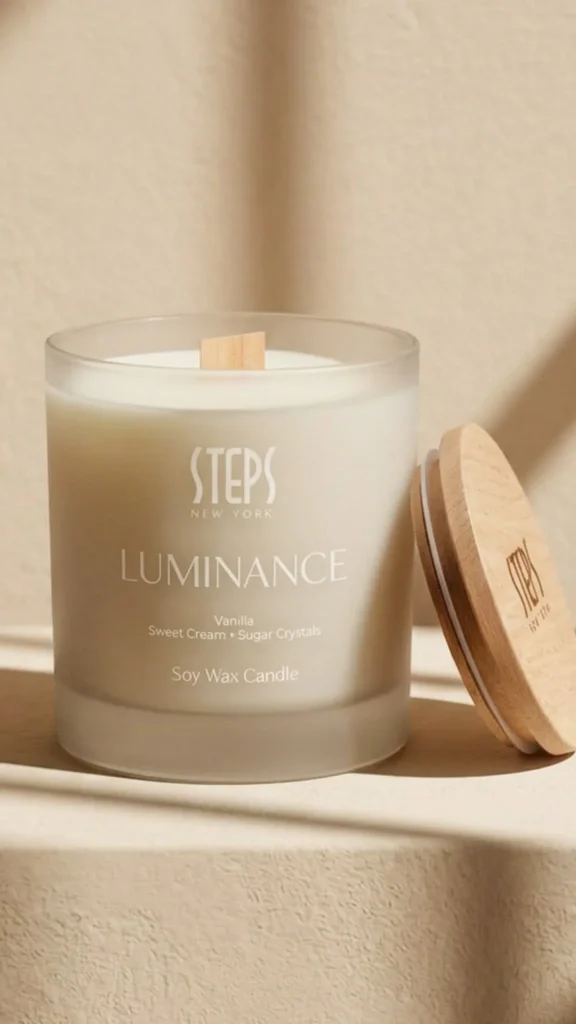
Creating your own candles can be one of the most rewarding DIY projects you take on. With a few easy steps, you can fill your home with delightful aromas and create a cozy ambiance. One standout fragrance to consider for your homemade candles is inspired by Midnight Blue Citrus—rich in creamy vanilla, sweet cream, and sugar crystals. This scent profile offers a warmth and comfort that will make any space inviting. Let’s dive into the world of candle-making and create a Luminance Candle that captures this delightful fragrance.
Why You Will Love This Recipe
Making your own Luminance Candle not only allows you to customize your environment but also gives you the chance to explore your creative side. The subtle crackle from the wood wick adds an extra touch of coziness, while the long-lasting fragrance ensures your space remains inviting for hours. Plus, one of the best parts about DIY candle-making is that you can adapt this recipe to suit any occasion.
Ingredients
Wax Type:
- 1 pound of soy wax (provides a clean and even burn)
Fragrance:
- 1 ounce of Midnight Blue Citrus inspired fragrance oil (sweet notes of vanilla, cream, and sugar)
Wick:
- 1 wooden wick (to create a soft crackling sound)
Note: The quantities mentioned are ideal for a medium-sized candle container.
Equipment
- Double boiler (or a microwave-safe container for a microwave)
- Candle thermometer
- Candle pouring pitcher
- Stirring stick
- Candle containers (choose a design that fits your space)
- Wick adhesive or hot glue gun (to secure the wick)
- Safety gloves
- Protective eyewear (especially if using a microwave)
Step-by-Step Instructions
Prepare Your Workspace:
- Ensure your workspace is clean and organized. Lay down newsprint or parchment paper to catch any spills.
Melt the Wax:
- Double Boiler Method: Fill the bottom pot with water and heat it on the stove. Place the soy wax in the top pot. Stir occasionally until fully melted, ensuring the temperature reaches between 170°F to 180°F.
- Microwave Method: Place the wax in a microwave-safe container and heat in 30-second increments, stirring in between, until melted.
Add the Fragrance:
- Once the wax is melted, remove it from heat and let it cool slightly (around 160°F). Add your fragrance oil, mixing well to ensure even distribution.
Secure the Wick:
- Use wick adhesive or hot glue to attach the wooden wick to the bottom of the candle container. Make sure it’s centered for an even burn.
Pour the Wax:
- Carefully pour the wax into your prepared container, leaving a small ¼ inch from the top.
Cool the Candle:
- Allow the candle to cool undisturbed for several hours (ideally overnight) at room temperature.
Trim the Wick:
- Once cooled, trim the wooden wick to about ¼ inch above the wax surface for optimal burning.
Tips for Success
- Burn Test: Conduct a burn test if making multiple candles. This helps to ensure the wick size works with your container.
- Stir Well: Stir the fragrance into the wax thoroughly for a consistent scent throw.
- Optimal Temperature: Avoid pouring when the wax is too hot (over 200°F) or too cold to prevent imperfections.
Common Mistakes to Avoid
- Waiting Too Long to Pour: If the wax cools too much, it can begin to harden, making pouring difficult.
- Incorrect Wick Size: A wick that’s too small can lead to poor scent throw, while one that’s too big may cause smoking or excessive sooting.
- Skipping the Cure Time: For the best fragrance release, allow your candle to cure for a few days before burning.
Variations and Customization Ideas
- Scent Combinations: Blend different fragrance oils to create your custom scent. Consider adding essential oils for added benefits.
- Coloring Your Wax: If desired, you can add candle dye during the melting process. Just be sure to use dyes specifically made for candle making.
- Decorative Elements: Incorporate dried flowers or herbs on top of your candles for a decorative touch while maintaining a clean burn.
Storage and Shelf Life
Store your Luminance Candles in a cool, dry place away from direct sunlight. When properly stored, homemade candles can last for up to a year.
Safety Tips
- Always work in a well-ventilated area.
- Keep flammable materials away from your workspace.
- Use safety gear when handling hot wax.
- Never leave burning candles unattended.
Frequently Asked Questions
Q1: Can I use paraffin wax instead of soy wax?
Yes, you can use paraffin wax; however, soy wax provides a cleaner burn and supports a longer-lasting scent.
Q2: How do I fix a wick that’s too small?
If you notice your candle is not burning well, you can try switching to a larger wick size for better performance.
Q3: Why is my candle not holding the fragrance?
This could be due to insufficient fragrance oil or pouring at too high a temperature. Ensure you add enough fragrance oil and cool the wax before pouring.
Q4: How can I remove excess wax from my tools?
Soak tools in warm, soapy water to soften the wax for easy removal.
Q5: Is it safe to burn candles with wooden wicks indoors?
Yes, wooden wicks can be safely burned indoors; ensure proper trimming and maintenance for a clean burn.
Conclusion
By following these simple steps and using the warm, sweet base of the Luminance Candle, you can create a cozy atmosphere in your home that resonates comfort and tranquility. Candle-making can be a delightful addition to your DIY projects, offering personal touches that store-bought options simply can’t match. So gather your materials, embrace your inner artisan, and enjoy the process of crafting your very own Luminance Candle!