
Imagine This Scene
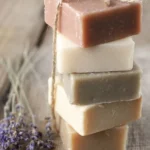
Picture yourself in a cozy corner of your kitchen, the warm glow of sunlight streaming through the window, and the sweet smell of essential oils wafting through the air. You’ve just pulled a fresh batch of homemade soap out of the mold, and as you slice it, you can’t help but feel a sense of accomplishment wash over you. You’ve taken a step towards nurturing your skin with natural ingredients, and it feels amazing. Sound familiar? If you’ve ever thought about diving into the world of soapmaking but didn’t know where to start, you’ve landed in the right place.
In this guide, we’re going to explore the simple joys of making your own soap with an easy natural soap recipe. Whether you’re looking to create a spa-like experience in your shower or gift your handmade creations to loved ones, I’ll walk you through each step with warmth and encouragement. Let’s get started!
Why Make Your Own Soap
You might be wondering, why go through the trouble of making soap at home? Well, here’s the truth: when you craft your own bars of soap, you control the ingredients. Mass-produced soaps often contain chemicals and preservatives that aren’t just harsh on the skin but can also affect your overall wellness. By opting for homemade soap, you can ensure that every ingredient feels just right for you.
Here are a few perks of soapmaking:
- Customization: Don’t like lavender? Try citrus! Allergic to a common additive? You can easily omit it.
- Cost-Effective: Once you’re set up, the materials last for multiple batches, making it budget-friendly.
- Eco-Friendly: You can use sustainable ingredients and packaging, minimizing your environmental footprint.
- Therapeutic: The process is meditative, a wonderful way to destress and practice self-care.
Gather Your Supplies
Before we dive into the actual process, let’s talk about what you’ll need. Here’s a simple list of supplies you’ll want to gather:
Tools
- Digital Scale: Accurate measurements are crucial in soapmaking.
- Heat-Resistant Containers: For mixing oils and lye.
- Stick Blender: This helps emulsify the oils and lye together smoothly.
- Soap Mold: You can purchase one or use a silicone mold if you’re starting small.
- Safety Gear: Goggles and gloves are essential when working with lye to protect your skin and eyes.
Ingredients
- Olive Oil (10 oz): A gentle and moisturizing base.
- Coconut Oil (4 oz): For lather and cleansing properties.
- Palm Oil (4 oz): Adds hardness to the soap bar.
- Lye (Sodium Hydroxide, 2.3 oz): This is your alkaline component, crucial for saponification.
- Distilled Water (6 oz): Mixes with the lye to create a lye solution.
- Essential Oils (optional): For fragrance (lavender, rosemary, or citrus are great choices).
- Natural Colorants (optional): Like turmeric or spirulina to give your soap a pop of color.
The Soapmaking Process
Now that you’ve got everything laid out, let’s get into the nitty-gritty of soapmaking. Ready? Here we go!
Step 1: Prepare the Lye Solution
First off, safety first! Always wear your gloves and goggles.
- Measure the distilled water in a heat-resistant container.
- Weigh the lye separately. This is where precision comes into play.
- Slowly add the lye to the water (never the other way around). Stir gently until it dissolves, and be prepared for some heat. Let this lye solution cool.
Step 2: Melt the Oils
While the lye solution cools, you can start melting your oils.
- Combine the olive oil, coconut oil, and palm oil in a pot.
- Heat gently until everything is melted and well mixed. Aim for a temperature between 90°F and 110°F.
Step 3: Mix Lye with Oils
When both the oils and lye solution are around the same temperature, it’s time to combine them.
- Pour the lye solution into the melted oils.
- Use your stick blender to mix until you reach “trace,” which is a state where the mixture thickens enough to leave a trail on the surface.
Step 4: Add Fragrance and Color
Here comes the fun part! This is where your creativity can shine.
- Add essential oils or colorants at this stage. If you’re using essential oils, 1 oz per batch is a good starting point.
- Mix thoroughly until everything is evenly distributed.
Step 5: Mold it Up
Now it’s time to pour the soap into your mold.
- Carefully pour the soap mixture into your mold, making sure to tap the mold gently to remove air bubbles.
- Cover the mold with a towel to keep it warm and allow it to saponify for 24-48 hours.
Step 6: Cutting and Curing
Once your soap has hardened, it’s time to unveil your creation!
- Remove the soap from the mold and cut it into bars.
- Let the bars cure in a cool, dry place for 4-6 weeks. Curing allows the soap to harden more and ensures all lye is neutralized.
Quick Beauty Tips for Soapmaking
- Start simple: If you’re a newbie, don’t complicate things with too many additives.
- Keep a notebook: Document your recipes and tweaks for future batches.
- Experiment: Once you’re comfortable, try different oils and additives for unique properties.
Common Mistakes to Avoid
Even seasoned soapmakers can stumble, so here are a few pitfalls to watch out for:
- Not measuring accurately: Soapmaking is a science. Even a small miscalculation can affect the outcome.
- Skipping safety gear: Always prioritize your safety when handling lye.
- Rushing the process: Soapmaking is an art. Take your time to enjoy each step.
What If It Doesn’t Work?
You might be worried about what happens if your soap doesn’t come out as you envisioned. You’re not alone in that! Sometimes, the soap can be too soft or too hard, but every batch is a learning opportunity. Embrace it!
If it doesn’t harden properly, you can always re-batch the soap by melting it down and adjusting the formula. Let’s be honest — this might just be part of the creative process, much like any other DIY endeavor.
FAQs About Soapmaking
Can I use any type of oil?
While you can experiment with different oils, each has unique properties. Stick to tried-and-true oils like olive, coconut, and palm for beginners.
How long does homemade soap last?
With proper curing and storage, homemade soap can last up to a year. Just keep it dry between uses!
Where do I find lye?
Lye can often be found in hardware stores or online. Just make sure to read the label carefully to ensure it’s pure sodium hydroxide.
Bonus Self-Care Ideas
While you’re on this creativity kick, why not nurture yourself further? Pair your soapmaking sessions with some other self-care activities:
- Enjoy a hot cup of herbal tea while you craft.
- Put on your favorite calming music to set the mood.
- Reflect in a journal after making your soap to celebrate your accomplishment.
Best Routine for Busy Women
Let’s be real — life can get hectic. Here’s how you can fit soapmaking into your busy schedule:
- Set aside a couple of hours on a weekend to make your soap.
- Incorporate it into a self-care day where you pamper yourself afterward.
- Batch make small gifts for friends and family for the upcoming holidays!
Conclusion
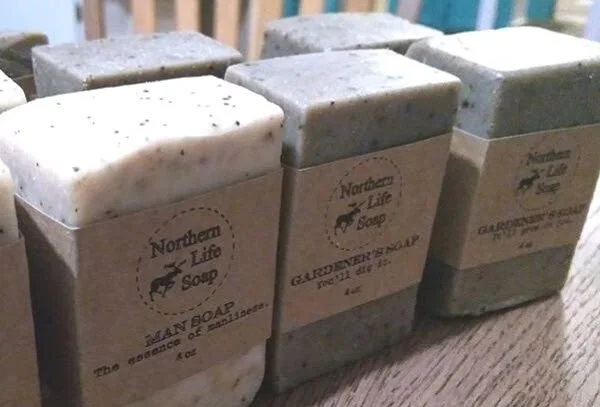
Making your own soap is not just about the product; it’s a journey into self-care that opens doors to creativity and mindfulness. As you embark on this delightful endeavor, remember that it’s perfectly okay to make mistakes along the way. Each bar of soap tells a story, and each experience shapes your journey as a maker.
So, grab your supplies and start your soapmaking adventure today! I believe in you, and I can’t wait for you to experience the satisfaction of holding a beautiful, homemade bar of soap in your hands. Happy soapmaking!