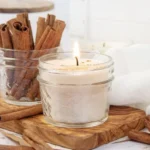

Discovering the Art of Coffee Bean Candles
Imagine this: it’s a cozy Sunday morning. You’re wrapped in your favorite blanket, the sun streams through the window, and there’s a soft hum of jazz playing in the background. As you sip your freshly brewed coffee, the comforting aroma fills the room, wrapping you in warmth like a gentle hug. Now, what if I told you that you could capture that comforting coffee scent in a candle? That’s right, coffee bean candles are not only a delightful DIY project but also an easy way to bring a little cozy magic into your home. Let’s dive in and explore how to make your very own coffee bean candles, and trust me, your self-care routine will thank you.
Why Coffee Bean Candles?
You might be wondering, “Why should I bother making my own candles?” Honestly, the answer is simple yet profound: it’s about setting the mood and creating an atmosphere that brings you joy.
Aromatherapy benefits: When you light a candle infused with coffee beans, you’re not just lighting a wick. You’re enveloping your space in the rich aroma of freshly ground coffee, which can energize your day. Plus, the calming flicker of a candle adds a serene touch to your space.
Personalization: Making candles gives you full control over the materials you use—no unwanted chemicals or artificial fragrances here. You choose the quality of the wax, the type of coffee beans, and any additional scents you’d like to incorporate. What could be more empowering?
Creative expression: This isn’t just a crafty project; it’s your canvas. You can create these candles not just for yourself but as thoughtful gifts for friends who share your love for coffee. What’s better than a handmade gift that smells as delightful as it looks?
What You’ll Need to Get Started
Before we roll up our sleeves, let’s make sure you have everything you need to embark on this aromatic journey. Here’s your shopping list:
- Soy wax or beeswax: Each has its perks, but soy wax is generally easier to work with as it’s a clean-burning option.
- A double boiler or a microwave-safe container: You’ll need this for melting the wax.
- Coffee beans: Whole beans are the star of the show, but choose quality beans for better results.
- Candle wicks: Make sure to pick wicks appropriate for the size of your candle container.
- Essential oils (optional): If you want to amp up the scent, consider pairing coffee with vanilla or cinnamon oils.
- Containers or molds: Glass jars, metal tins, or silicone molds work beautifully.
Got your materials? Great, we’re ready to get crafty!
Step-by-Step Guide to Making Coffee Bean Candles
Let’s be honest here: crafting can sometimes feel overwhelming, especially if you’re a busy woman juggling a million things. But don’t worry, I’m here to walk you through every step of the process, ensuring it’s as enjoyable as that first sip of coffee in the morning.
Step 1: Prepare Your Workspace
There’s something soothing about a tidy space, especially when you’re about to create something special. Clear a flat surface and cover it with newspaper for any wax spills. Gather all your materials so you won’t have to rush around in the middle of pouring.
Step 2: Melt the Wax
In a double boiler (or microwave), gradually melt your wax until it reaches about 170-180°F. Keep an eye on it—if you’re using a microwave, it could take just a few minutes. Stir gently to ensure even melting.
Quick Tip: Keep a thermometer handy! Temperature is crucial for getting that perfect pour.
Step 3: Add Essential Oils
Once your wax is melted, it’s time to tailor the scent. If you’re using essential oils, this is the moment to mix them in. A few drops go a long way, so start with something gentle. You might want to experiment with combinations that suit your vibe.
Step 4: Prepare Your Containers
Take your candle containers and line the bottom with a handful of coffee beans. Not only will they infuse the candle with aroma, but they’ll also look stunning peeking through the melted wax.
Step 5: Attach the Wick
If your wick isn’t self-adhesive, you can use a little melted wax to secure it to the bottom of your container. Make sure it’s centered so that your candle burns evenly.
Step 6: Pour the Wax
Once your wax is ready and your wick is in place, carefully pour the melted wax into the container. If you’re adding more coffee beans on top for a lovely finish, it’s best to do so before the wax hardens.
Pro Tip: Leave a little space at the top of the container for a more polished look.
Step 7: Let It Cure
Patience is key here! Allow your candle to cool completely for a few hours. This is where the magic happens—your coffee bean candle needs time to solidify and set.
Step 8: Trim the Wick
Once fully hardened, you may want to trim the wick to about ¼ inch above the wax. This will ensure a steady, controlled flame when it’s time to light your creation.
Step 9: Light and Enjoy
Now, the moment we’ve been waiting for. Light your beautifully crafted coffee bean candle, sit back, and revel in that heartwarming aroma. You’ve turned a simple project into a delightful self-care moment!
Common Mistakes to Avoid
Even crafty souls can have hiccups in their creative journey. Here are a few missteps to dodge:
- Using too much fragrance: It might seem tempting, but using excessive essential oils can overpower the beautiful smell of your coffee beans. Stick to a little to enhance, not dominate.
- Not letting it cure long enough: If you’re in a hurry and light your candle too soon, it could burn unevenly or not release its full aroma.
- Skipping wick trimming: This little step is crucial for a safe and pleasant burning experience, ensuring your candle doesn’t create soot.
Bonus Self-Care Ideas
Making your own coffee bean candles not only brightens your home but can also be a moment of self-care. Here are a couple of extra tips to keep the good vibes rolling:
- Create a Spa Day at Home: Pair your candle with a warm bath or some quiet meditation time. Light it while enjoying a good book or your favorite show.
- Incorporate a Coffee Ritual: As you light your candle each morning, take a moment to breathe in the aroma and set your intentions for the day. It’ll become a cherished routine.
FAQs
How long do coffee bean candles last?
With proper care, your coffee bean candles can last anywhere from 20 to 50 hours, depending on their size and wax type.
Can I use different types of beans?
Absolutely! The world of coffee is diverse. Try blending in roasted beans with different flavor profiles for a unique twist.
What else can I add?
Feeling adventurous? Add dried flowers or herbs like lavender or rosemary for an added layer of scent and beauty.
Conclusion
There you have it—a cozy guide to creating your own coffee bean candles. By now, you should feel excited and ready to dive into this creative project. Remember, every time you light one of these candles, you’re not just illuminating your space; you’re also embracing a moment of self-care and tranquility.
So, next time you find yourself yearning for that comforting coffee aroma, you’ll know how to bring it to life right in your own home. As the familiar scent fills the air, let it remind you that you deserve little moments of joy each day.
Now, go on—get crafting! Your cozy Sunday mornings are about to get a whole lot better.