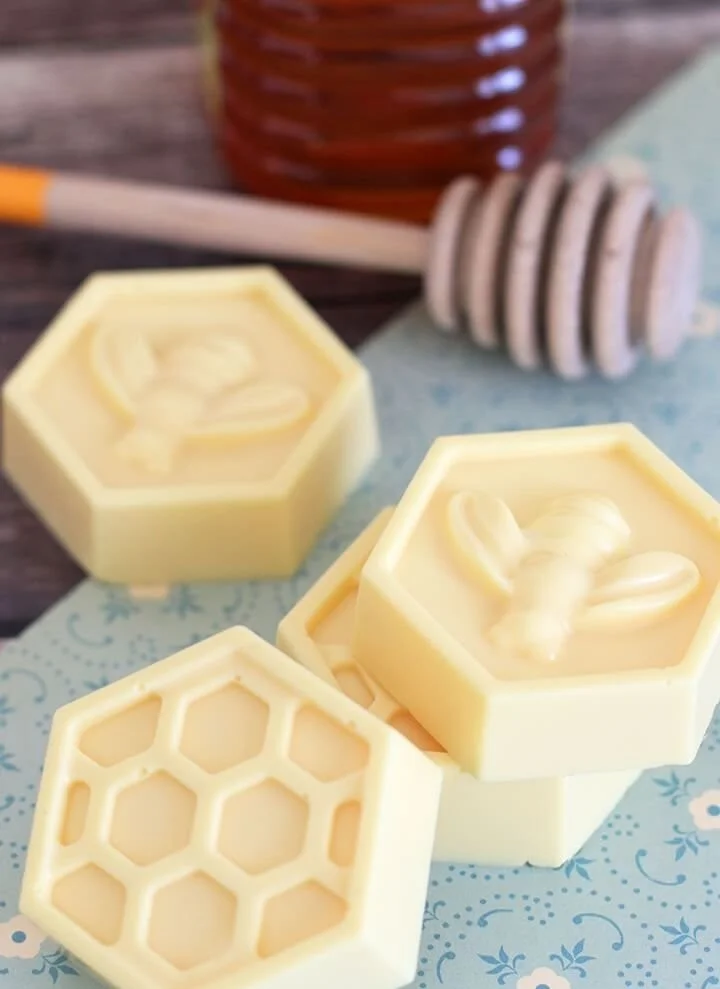

Create Your Own Easy DIY Milk and Honey Soap in Just 10 Minutes!
If you’re looking for a simple way to introduce yourself to soap making, this easy DIY Milk and Honey soap is just what you need! Packed with the nourishing benefits of goat’s milk and honey, this delightful homemade soap can be made in as little as 10 minutes. Whether you keep it for yourself or gift it to friends and family, everyone will appreciate the skin-loving ingredients and the thoughtful gesture.
Why You Will Love This Recipe
- Quick and Simple: With only 10 minutes required for preparation, you can whip this up even on a busy day.
- Natural Benefits: Goat’s milk is rich in vitamins and minerals, while honey offers moisturizing properties that your skin will thank you for.
- Customizable: You can easily adjust the scent or add color to this soap to make it uniquely yours.
- Perfect Handmade Gift: A charming and practical gift idea that’s sure to impress.
Ingredients
To make your own Milk and Honey soap, you will need:
- 1 lb (16 oz) of Goat’s Milk Soap Base (melt and pour variety)
- 3 tablespoons of Honey (preferably raw for the best skin benefits)
- Optional: Essential oils for fragrance (20-30 drops, depending on preference)
- Optional: Natural colorants (like mica or clay pigments)
Equipment
Before you begin your DIY project, gather the following equipment:
- Microwave-safe bowl or a double boiler
- Soap mold (silicone molds work great)
- Spatula for mixing
- Measuring spoons
- Thermometer (optional)
- Cutting board and knife (for cutting the soap base, if needed)
Step-by-Step Instructions
Step 1: Cut Your Soap Base
- Start by cutting your goat’s milk soap base into small, even cubes. This will help it melt evenly and quickly.
Step 2: Melt the Soap Base
- Place the soap cubes into a microwave-safe bowl.
- If using a microwave, heat in 30-second intervals, stirring in between, until fully melted. If using a double boiler, heat gently over simmering water until the soap base is completely melted.
Step 3: Add Honey and Optional Ingredients
- Once the soap base is melted, remove from heat. Add the honey and stir until thoroughly combined.
- If you’re adding essential oils, do so at this stage. Mix well to ensure even distribution.
Step 4: Pour into Molds
- Carefully pour the mixture into your soap molds. You can fill them to the top or leave a little space if you’d like to add colorants or additional layers.
Step 5: Allow to Set
- Allow the soap to cool for about 1-2 hours at room temperature until it is fully solidified.
Step 6: Unmold and Enjoy
- Once hardened, gently pop the soap out of the molds. Your Milk and Honey soap is now ready to use or gift!
Tips for Success
- Use a thermometer if you’re unsure about the temperature of the soap base; it should be just hot enough to melt, not boiling.
- Mix thoroughly to avoid any separation of ingredients.
- Pour slowly to minimize bubbles, or spritz the top with rubbing alcohol to reduce them if they do form.
Common Mistakes to Avoid
- Overheating the Soap Base: Keep a close eye while melting; too much heat can create burnt soap.
- Skipping the Honey: Honey adds not only skin benefits but also a lovely texture. Don’t leave it out!
- Using the Wrong Mold: Make sure your molds are specifically meant for soap making to avoid damage.
Variations and Customization Ideas
- Scent Profiles: Experiment with different essential oils like lavender, eucalyptus, or citrus to create unique scent combinations.
- Additive Herbs: Consider adding dried herbs like lavender buds or calendula petals for a botanical touch.
- Color Variants: Mix in natural colorants like turmeric for a sunny yellow or spirulina for a lovely green hue.
Storage and Shelf Life
Store your finished Milk and Honey soap in a cool, dry place away from direct sunlight. Properly stored, your soap can last for several months. If you live in a humid area, consider wrapping it in parchment paper to keep it dry.
Safety Tips
- Always use heat-resistant gloves when handling hot materials.
- Ensure your workspace is well-ventilated, especially if you’re working with essential oils.
- Keep all ingredients out of reach of children and pets.
Frequently Asked Questions
Q1: Can I use regular milk instead of goat’s milk?
A1: You can, but goat’s milk offers more nutrients and is gentler on the skin, making it a preferable choice.
Q2: Can I add color to my soap?
A2: Yes! You can add natural colorants like clays or micas tailored specifically for soap making.
Q3: How long does it take for the soap to fully cure?
A3: Since this is a melt and pour recipe, the soap doesn’t require curing. It’s ready to use once it’s set.
Q4: Are there any preservatives needed for this soap?
A4: No preservatives are necessary for this type of soap, as it will generally be used quickly.
Q5: Can I use this soap on my face?
A5: Yes, but if you have sensitive skin, always carry out a patch test first.
Q6: How should I package my homemade soap for gifting?
A6: Consider wrapping them in cellophane or placing them in a decorative box tied with twine for a rustic charm.
Conclusion
Making your own Milk and Honey soap is not only a fun and rewarding DIY project, but it also offers incredible skin benefits thanks to its natural ingredients. Whether you’re new to crafting or a seasoned pro, this quick recipe allows for creativity and customization that results in fabulous soap you’ll be proud to use or give as a thoughtful gift. So gather your supplies and get started on your soap-making journey today!