
Embracing Self-Care with Natural Chamomile Soap
Picture this: it’s a sunny afternoon, you’ve just wrapped up a hectic morning of errands and chores, and you’re finally settling into a moment just for you. Maybe you’re curled up on the couch with a warm mug of chamomile tea, or perhaps you’re planning a soothing bath to wash the day away. We’ve all been there, haven’t we? You’re craving some ultimate self-care, something that not only nourishes your skin but lifts your spirits too.
Here’s the truth: making your own soaps can be a beautiful, creative outlet and a lovely addition to your personal care routine. If you’re looking to learn a natural and gentle way to pamper yourself (or even create heartfelt gifts), then let’s dive into making natural chamomile soap.
The Magic of Chamomile
Chamomile isn’t just a relaxing tea. This powerful flower, with its sweet aroma and calming properties, works wonders for your skin too. It’s known for its anti-inflammatory and antioxidant benefits, making it perfect for all skin types, including sensitive. Whether you’re dealing with dryness, irritation, or just want to maintain that healthy glow, incorporating chamomile into your skincare routine is a game changer.
But how can you harness this magical ingredient in your soap? Glad you asked! Let’s walk through a simple natural chamomile soap recipe and provide some guidance on making your own delightful bars at home.
What You’ll Need
To whip up your chamomile soap, you’ll need a few key ingredients that you can find at your local craft store or online. Here’s your shopping list:
Ingredients
- 8 oz. of base oils: Options include olive oil, coconut oil, and palm oil.
- 3 oz. of lye (sodium hydroxide).
- 6 oz. of distilled water.
- 2 cups of chamomile tea (strongly brewed and cooled).
- 1 oz. of chamomile essential oil (for fragrance).
- 1 tablespoon of dried chamomile flowers (for aesthetics and added benefits).
Equipment
- Soap-making mold (silicone molds work great).
- Digital scale.
- Heat-safe mixing bowl.
- Safety goggles and gloves (always prioritize safety!).
- Stick blender.
- Measuring cups and spoons.
- A thermometer (to monitor temperatures).
- A spatula for mixing.
Step-by-Step Guide to Chamomile Soap Making
Step 1: Prepare Your Workspace
Let’s be honest—soap-making can be a bit messy, so it’s crucial to have your space organized. Lay down some newspaper or old towels to catch any spills, and make sure you have everything you need within reach.
Step 2: Brew the Chamomile Tea
Start by making a strong brew of chamomile tea. Use about two tablespoons of dried chamomile flowers for every cup of boiling water. Let it steep for about 20 minutes, and then strain out the flowers. Allow it to cool completely while you prepare your other ingredients.
Step 3: Measure the Ingredients
Make sure to weigh your oils and lye accurately. Precision is key in soap-making. Measure your water in one cup and your lye in a separate bowl.
Step 4: Mix Lye and Water Safely
Put on your safety goggles and gloves. Slowly add your lye to the water (never the other way around, as it can create dangerous fumes). Stir until fully dissolved and let it cool to about 100-110°F.
Step 5: Heat Your Oils
In a separate heat-safe bowl, gently heat your base oils until they’re combined and warm (around 100-110°F). This will help emulsify the lye solution when you blend them together.
Step 6: Combine Lye and Oils
Once both the lye and oils are at the same temperature, slowly pour the lye mixture into the oils while using a stick blender to blend them together. Blend until you reach “trace”—this means the mixture will leave a trail on the surface when drizzled.
Step 7: Add Chamomile Tea and Essential Oil
Now that you have a lovely soap batter, it’s time to add that fragrant chamomile tea and essential oil. Stir gently to incorporate. If you like, add the dried chamomile flowers for an extra touch.
Step 8: Pour into the Mold
Carefully pour your soap batter into the soap mold, using your spatula to scrape every delicious drop from the bowl. Tap the mold gently to help release any air bubbles.
Step 9: Insulate and Wait
Cover your soap with a towel or plastic wrap to help insulate it as it cools. Let it sit for 24 to 48 hours to harden.
Step 10: Cut and Cure
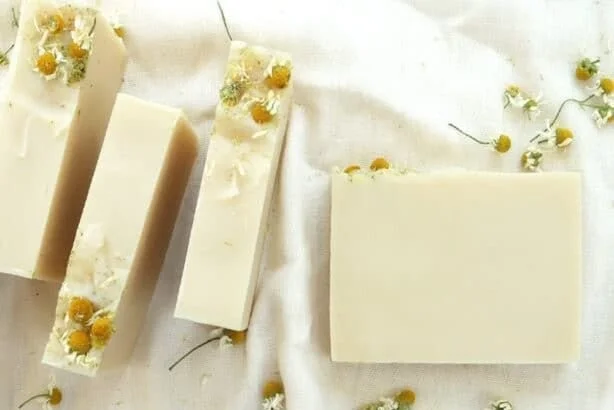
Once firm, remove the soap from the mold and cut it into bars. These bars need to cure for about 4–6 weeks. This allows the saponification process to complete and the soap to become mild and ready for use.
Common Mistakes to Avoid
- Incorrect Lye Measurement: Always measure your ingredients carefully. Too much or too little lye can affect the quality of your soap drastically.
- Skipping Safety Gear: Don’t neglect your goggles and gloves. Lye is caustic and can be harmful if it comes into contact with skin.
- Not Allowing Enough Curing Time: You might be eager to use your soap, but proper curing is essential for achieving its best quality.
Quick Beauty Tips for Your Chamomile Soap
- Store in a Cool, Dry Place: Keep your chamomile soap in a cool, dry place to extend its shelf-life.
- Pair with Other Natural Ingredients: Consider adding elements like honey or oatmeal for even more benefits.
- Experiment with Scents: Try incorporating other essential oils, such as lavender or bergamot, to create unique blends that suit your mood.
FAQs About Natural Soap Making
Can I use other herbal teas?
Absolutely! Feel free to experiment with other soothing herbs like lavender or green tea.
What if I don’t have a soap mold?
If you don’t have a mold, you can use silicone baking trays or even cardboard boxes lined with parchment paper.
Is homemade soap suitable for sensitive skin?
Chamomile soap is great for sensitive skin, but always patch test to ensure no adverse reactions occur.
Bonus Self-Care Ideas
Making your chamomile soap is just the beginning! Consider rounding off your self-care routine with:
- A relaxing bath ritual with flower petals.
- Evening relaxation techniques like meditation or gentle yoga.
- A skincare routine that follows with nourishing oils like jojoba or almond oil post-soap.
Best Routine for Busy Women
Let’s face it; life can get chaotic, and it’s easy to let self-care slip through the cracks. Here’s a simple routine for you:
- Morning Skincare: Cleanse, tone, and moisturize with your chamomile soap.
- Afternoon Pick-Me-Up: Brew a cup of chamomile tea for a calming break.
- Evening Reflection: Wind down with a calming bath, incorporating chamomile soap and candles.
Ending Thoughts on Chamomile Soap Making
What if you could look forward to your skincare routine every day? Making your natural chamomile soap isn’t just about washing away dirt; it’s a gentle reminder to prioritize self-care amidst your busy schedule. Every time you lather up with your homemade soap, you’re not only treating your skin but also embracing a little moment just for you. So gather your supplies, channel your inner creator, and get ready to indulge in the soothing embrace of chamomile. Remember, this isn’t just about soap—it’s about embracing the joy of self-care.
You’re not alone in this journey, and every small step counts toward a more fulfilling, nurturing routine. Let’s keep celebrating the little joys together. Happy soap making!