
How to Make Easy Homemade Sea Salt Scrub for Glowing Skin, Hands, Body, and Feet
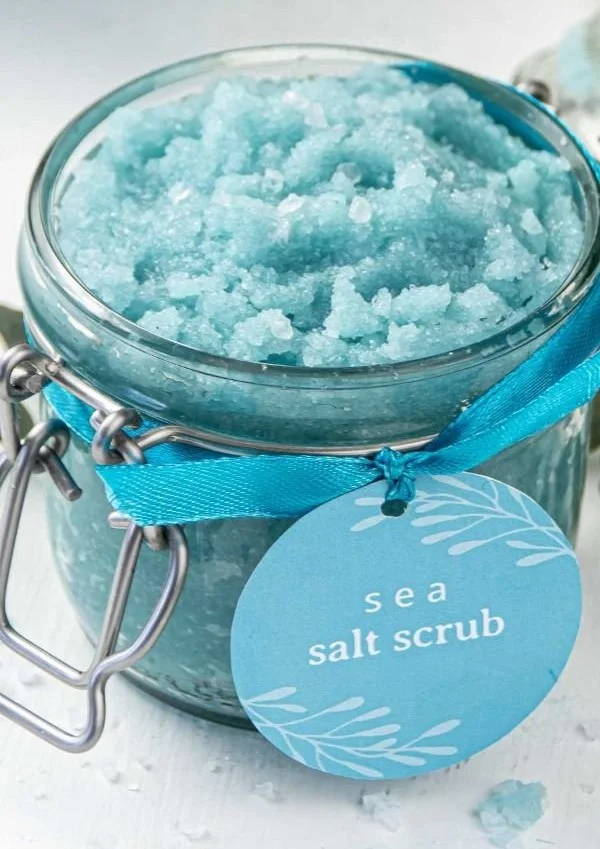
Are you looking to pamper your skin with a luxurious scrub that will leave it feeling soft and radiant? Making your own homemade sea salt scrub is a fantastic way to achieve healthy, glowing skin using natural ingredients. In this guide, I’ll walk you through the process of creating a delightful exfoliating sea salt scrub infused with organic moisturizing coconut oil and zesty lemon-lime essential oils. You’ll love how easy it is to make and the benefits it brings to your skin!
Why You Will Love This Recipe
- Natural Ingredients: This scrub is made from simple, organic ingredients that nourish your skin.
- Exfoliating Power: Sea salt acts as a natural exfoliant, sloughing off dead skin to reveal a fresh, glowing complexion.
- Customizable: You can easily tailor the recipe to suit your needs by experimenting with different essential oils, salts, and additional ingredients.
- Affordable: Creating beauty products at home not only saves money but also ensures you’re using high-quality components.
- Great Gift Idea: Your homemade sea salt scrub makes a wonderful gift; simply add a pretty label and package it nicely!
Ingredients
For this easy homemade sea salt scrub, you will need:
- 1 cup of sea salt (choose from Epsom, pink Himalayan, or Dead Sea salt)
- ½ cup of organic coconut oil (melted)
- 10-15 drops of lemon-lime essential oil (for scent and skin benefits)
- Optional: A few drops of food coloring for aesthetic appeal
Equipment
You’ll need the following equipment to make your scrub:
- Mixing bowl
- Spoon or whisk for stirring
- Clean, airtight container for storage (glass jars work well)
- Optional: Measuring cups and spoons
Step-by-Step Instructions
Making your sea salt scrub is simple! Follow these steps:
- Prepare the Coconut Oil: If your coconut oil is solid, gently melt it in a small saucepan over low heat or in the microwave until it’s liquefied (but not hot).
- Mix the Ingredients: In a mixing bowl, combine the sea salt and melted coconut oil. Stir well until the salt is fully coated with the coconut oil.
- Add Essential Oils: Next, add the lemon-lime essential oil to the mixture. Stir to incorporate the essential oil thoroughly.
- Optional Coloring: If you want to add visual appeal, mix in a few drops of food coloring until you achieve the desired shade.
- Transfer to Container: Once mixed, transfer the scrub to an airtight container, like a glass jar.
- Label and Store: Optionally, create a pretty label that includes the product name and date. Store it in a cool, dark place.
Tips for Success
- Choose Your Salt Wisely: Epsom salts are great for muscle relaxation; pink Himalayan salt is mineral-rich, and Dead Sea salt is known for its therapeutic properties. Pick according to your preference!
- Temperature Check: Ensure the coconut oil is cool enough before mixing it with salt to prevent the salt from dissolving.
- Test Essential Oils: Before using the essential oil, do a patch test on a small skin area to avoid irritation.
Common Mistakes to Avoid
- Using Hot Oil: If your coconut oil is too hot, it can dissolve the salt and reduce the scrub’s effectiveness.
- Overmixing: Mixing too vigorously can break down the salt crystals and diminish their exfoliating power.
- Storing in a Warm Place: Keep the scrub stored in a cool, dark area to prevent the coconut oil from going rancid.
Variations and Customization Ideas
- Add Exfoliating Extras: Include ingredients such as finely ground coffee, oatmeal, or sugar for additional exfoliation.
- Enhanced Scent Options: Experiment with other essential oils like lavender, eucalyptus, or peppermint for varied aromatic experiences.
- Color It Up: Use natural colorants like turmeric (for yellow) or beet juice (for pink) instead of artificial food coloring.
Storage and Shelf Life
Your homemade sea salt scrub can be stored in an airtight container for up to six months. Make sure to check the scrub for any off smells or appearances before use, as natural oils can eventually go rancid.
Safety Tips
- Patch Test Essential Oils: Always conduct a skin patch test for any essential oil before applying to larger areas, especially if you have sensitive skin.
- Avoid Sensitive Areas: Do not use the scrub on broken or irritated skin and avoid using it on your face, as sea salt can be too abrasive.
- Use Cautiously in Tub: If using in the bath, be cautious as the oil can make surfaces slippery.
Frequently Asked Questions
Can I use table salt instead of sea salt?
While table salt can be used, it is finer than sea salt and may not provide the same level of exfoliation. We recommend sticking to sea salts for the best results.
How often should I use this scrub?
For optimal results, use the scrub 1-2 times a week, depending on your skin type. Sensitive skin should use it less frequently.
What if my scrub becomes too hard?
If your scrub hardens, simply add a teaspoon of warm water and stir until it reaches your desired consistency.
Can this scrub be used on my feet?
Absolutely! This scrub is excellent for exfoliating and softening feet, especially when used in a foot soak.
Is it safe for all skin types?
This scrub is suitable for most skin types, but if you have sensitive skin, consider reducing the amount of essential oil or performing a patch test first.
How can I make this a gift?
For gifting, use decorative jars, add a homemade label, and perhaps include instructions for use. It makes a lovely present for friends or family.
Conclusion
Creating your own homemade sea salt scrub for glowing skin is a rewarding and enjoyable DIY project. You’ll love how simple it is, and your skin will thank you for it! With natural ingredients, this scrub not only exfoliates but also hydrates and revitalizes, leaving you feeling rejuvenated. Now that you have all the tips, tricks, and instructions needed, I encourage you to give this project a try! Happy scrubbing!