
Create Your Own Beautiful Candles with This Simple DIY Candle Making Tutorial
Making your own candles at home is not just a cost-effective and creative way to decorate your space, but it also allows you to tailor each candle to your unique style and scent preferences. Whether you’re aiming to add a cozy ambiance to your living room or gift someone a handmade treasure, this DIY candle making tutorial will guide you through the simple steps to create beautiful homemade candles that will charm anyone who sets their eyes on them.
Why You Will Love This Recipe
Crafting your own candles can be a delightful experience that offers a satisfying sense of accomplishment. You’ll appreciate:
- Personalization: Choose your favorite colors, fragrances, and containers to create candles that reflect your personality.
- Affordability: Making candles at home is often more economical than buying luxury candles.
- Gift Potential: Handmade candles make thoughtful gifts for birthdays, holidays, or as a "just because" surprise.
Now, let’s dive into the details of crafting your own delightful candles!
Ingredients
Before you begin, gather the following ingredients:
- Wax: 1 pound of soy wax flakes (or any wax of your choice, such as beeswax)
- Fragrance oil: 1 to 2 ounces (select your favorite scent; e.g., lavender, vanilla, or citrus)
- Dye chips (optional): A few chips for color, if desired
Equipment
You’ll need the following equipment to get started:
- Double boiler or a microwave-safe container for melting the wax
- Thermometer: To check the wax temperature
- Wicks: Cotton or wooden wicks (make sure they are the appropriate size for your molds or jars)
- Containers: Glass jars, tins, or silicone molds
- Stirring utensil: A wooden stick or spoon
- Pouring pitcher (optional): For easy pouring of melted wax
- Scale: To measure wax and fragrance oil accurately
- Wick holder: To keep the wick centered while the wax hardens (you can improvise with a chopstick or pencil)
Step-by-Step Instructions
1. Prepare Your Workspace
Clear your work area and cover surfaces with newspaper or a drop cloth to catch any wax spills. Ensure it’s well-ventilated.
2. Measure Your Wax
Using a scale, measure out 1 pound of wax flakes. Remember, for smaller containers, you may need to adjust the amount.
3. Melt the Wax
Use a double boiler to melt the wax. Heat the water in the bottom pot and place the wax in the upper pot. Stir occasionally until fully melted, reaching a temperature of about 170°F to 180°F.
Tip: If using a microwave, start with 30-second bursts and stir in between to prevent overheating.
4. Add Fragrance and Dye
Once the wax is melted, remove it from the heat. Allow it to cool slightly to around 160°F, then carefully add 1 to 2 ounces of fragrance oil and dye chips, if using. Stir gently for a couple of minutes to distribute the fragrance evenly throughout the wax.
5. Secure the Wick
Attach the wick to the bottom of your container using a bit of melted wax or a wick sticker. Ensure it stands upright.
6. Pour the Wax
Slowly pour the melted wax into your container, leaving about half an inch of space from the top. Be cautious around the wick as you pour.
7. Let It Cool
Allow the wax to cool and harden completely for several hours. Do not disturb the wick during this time to prevent it from shifting.
8. Trim the Wick
Once the candle is fully set, trim the wick to about 1/4 inch above the surface of the wax.
Tips for Success
- Temperature: Always monitor the wax temperature for the best results, particularly before adding fragrance and pouring.
- Fragrance Load: Too much fragrance oil can make the candle smokey. Stick to recommended amounts.
- Wick Size: Make sure to use the appropriate wick size for your container to ensure an even burn.
Common Mistakes to Avoid
- Not measuring your wax and fragrance properly can lead to poor scent throw or wax overflowing.
- Skipping the cooling phase before pouring can cause uneven finishes.
- Using the wrong wick size can result in tunneling, where the candle burns down the middle without consuming the edges.
Variations and Customization Ideas
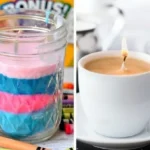
- Layered Candles: Pour different colored wax layers for a visually appealing effect.
- Botanical Add-ins: Add dried flowers, herbs, or spices into the wax for a rustic look.
- Scent Blending: Combine different fragrance oils to create your signature scent.
Storage and Shelf Life
Store your candles in a cool, dry place away from direct sunlight. Properly made candles can last up to a year if stored correctly.
Safety Tips
- Always work in a well-ventilated area when melting wax and adding fragrance oils.
- Use heat-resistant containers for pouring the hot wax.
- Keep a fire extinguisher handy while working with open flames.
- Never leave melting wax unattended.
Frequently Asked Questions
1. Can I use essential oils instead of fragrance oils?
Yes, but keep in mind that essential oils may not hold their scent as strongly in the candle once burned.
2. How do I know which wick size to use?
Refer to the manufacturer’s guideline based on the diameter of your container; they often provide wick size recommendations.
3. What should I do if my candle has an uneven top?
Use a heat gun or hairdryer to gently remelt the surface and smooth it out.
4. Can I reuse old candle wax?
Yes, but make sure to clean it thoroughly as residual scents can affect the new candle.
Conclusion
Creating beautiful, personalized candles at home is an enjoyable and fulfilling craft that anyone can learn. With this simple DIY candle making tutorial, not only can you add a cozy ambiance to your home décor, but you’ll also gain the skills to make thoughtful handmade gifts. Grab your supplies, unleash your creativity, and enjoy the rewarding process of candle making. Happy crafting!