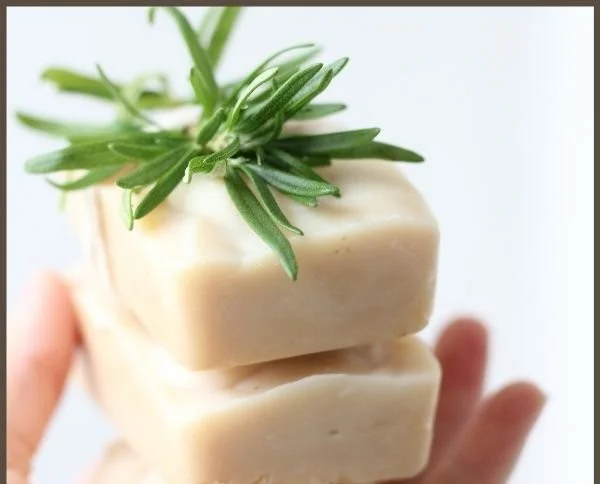

Embracing the Art of Homemade Rosemary-Mint Goat Milk Soap
Imagine walking into your bathroom and being greeted by the uplifting aroma of rosemary and mint, a fragrant blend that invigorates the senses and calms the mind. It’s a simple dream, yet it encapsulates the beauty of making your own soap. Recently, I decided to step outside my usual comfort zone and experiment with a new essential oil blend: rosemary and mint. Trust me, it was a delightful journey I can’t wait to share with you! You may also find Easy Homemade Eucalyptus Candle Recipes For Calm Moms useful.
In this guide, we’ll explore how to create your very own Rosemary-Mint Goat Milk Soap using canned goat milk, something I never thought I would do. You’ll find it empowering to create your own skin-loving soap that feels luxurious while also being budget-friendly and free from harsh chemicals. Let’s dive in and embrace the beauty of homemade soap!
Understanding the Benefits of Goat Milk Soap
Before we jump into the process, let’s chat a little bit about why goat milk soap is worth your time. Goat milk is naturally rich in vitamins, fats, and proteins that can nourish and rejuvenate your skin. Many people find that this creamy soap helps to hydrate and soothe dry skin, making it an excellent choice for all skin types.
Also, there’s something wonderfully satisfying about making your own soap. Think about it: you’re not just crafting a product; you’re creating a little bar of self-care that you can enjoy or gift. If you’re just starting, you might want to read about some easy steps for beginners in soap-making to get the ball rolling.
What You’ll Need to Get Started
Ingredients
- Canned Goat Milk: This will be your base. Make sure to choose a quality product for the best results.
- Lye: Essential for the saponification process (it’s what turns oils into soap).
- Olive Oil: Great for moisturizing.
- Coconut Oil: Adds lather and hardness to your soap.
- Castor Oil: Enhances the bubbles in your final product.
- Essential Oils: You’ll need rosemary and mint for that refreshing scent.
- Colorants: Optional, if you want to add a fun pop of color.
Equipment
- Soap mold (silicone molds work wonderfully)
- Safety goggles and gloves
- A scale (for accurate measurements)
- A stick blender
- Thermometer
Preparing for Soap Making
Before you begin, it’s essential to prepare your workspace. Make sure you’re in a well-ventilated area since lye can release fumes. Safety first, right? Wearing goggles and gloves, keep your ingredients measured and organized, so you can quickly grab them as needed.
Additionally, I recommend watching a few videos on the cold process of soap making. They’ll give you a visual understanding of what to expect and what common mistakes to avoid. And who knows? You might find inspiration for your own blends!
Step-by-Step Guide to Making Rosemary-Mint Goat Milk Soap
Step 1: Prepare the Lye Mixture
- Measure your lye and goat milk properly. It’s crucial to measure them accurately. As a general guide, aim for a ratio that balances your oils and liquid.
- Mix the lye with the goat milk. Note that this will get hot, so ensure you’re in a safe environment. Stir gently until all the lye is dissolved. Let it cool.
Step 2: Melt the Oils
- Combine your oils. In a large mixing bowl or pot, combine the coconut oil, olive oil, and castor oil. Heat them gently until they’re completely melted and combined.
- Check the temperature. You want your oils to be around 100-110°F for best results.
Step 3: Combine Lye and Oils
Once both mixtures (lye and oils) have cooled to a similar temperature, slowly pour the lye mixture into the oils. Use your stick blender to blend until you reach "trace," where the mixture starts to thicken, and you can leave a trail on the surface.
Step 4: Add Essential Oils
Here’s where the magic happens! Add your rosemary and mint essential oils. The ratio can vary, but a good starting point is around 0.5 to 1 ounce for every pound of oils you used. Blend well to ensure the fragrance is evenly distributed.
Step 5: Pour and Cure
- Pour the soap mixture into your mold and tap it down to eliminate any air bubbles.
- Let it sit. Cover with a towel and let it cure for 24-48 hours. After this period, you can remove it from the mold and cut it into bars.
Step 6: Cure the Bars
Your soap needs to cure for about 4-6 weeks. This time allows it to harden and ensures that the lye has fully saponified. During this period, store the bars in a cool, dry place.
Tips for a Successful Soap Making Experience
- Be attentive: Soap making requires precision, so always double-check your measurements.
- Experiment with scents: Don’t hesitate to tweak the essential oil ratios based on your personal preference.
- Use high-quality ingredients: It’ll make a world of difference in your soap’s texture and aroma.
If you find yourself falling in love with the soap-making process, you might also enjoy creating lovely scented candles. There are some easy steps for cozy homemade candles that would beautifully complement your bath routine!
Final Thoughts on Your Aromatic Masterpiece
Once your Rosemary-Mint Goat Milk Soap is ready, there’s nothing quite like the feeling of using a product you’ve made with your own two hands. Indulge in the luxurious lather, and enjoy the invigorating scent every time you step into your shower. It’s a small act of self-care that can elevate your daily routine.
Conclusion
Creating your own soap can be a rewarding experience, blending creativity with self-care. Whether you opt for this DIY goat’s milk soap recipe for smooth, nourished skin, or follow a more traditional approach, it’s all about finding what works for you. If you’re curious about more recipes and techniques, consider checking out How to Make Goat Milk Soap for a basic understanding, or dive into the specifics with this comprehensive cold process recipe. Embrace the journey, and happy soap-making!