
Watermelon Soap: A Fun and Refreshing Summer Project
Imagine this: it’s a warm summer afternoon, and you’re looking for a creative project that not only brightens your day but also brings a splash of joy to your bathroom routine. Sounds perfect, right? Picture making colorful, fragrant watermelon soap that not only looks adorable but leaves your skin feeling fresh. Let’s talk about why this is a classic summer project and how you can create your own watermelon soap masterpiece. You may also find Back To School Nails Easy Designs Moms Kids useful.
The Allure of Watermelon Soap
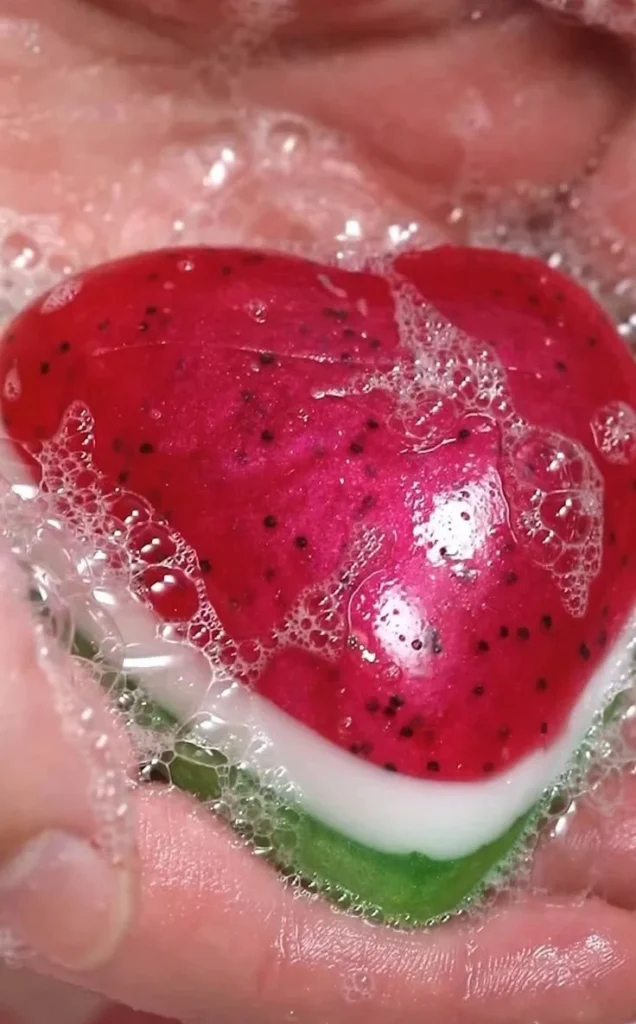
There’s something undeniably fun about watermelon-themed crafts. The vibrant green and pink colors, the irresistible scent—it’s like capturing summer in a bar of soap! Watermelon soap makes a great gift for friends and family while also doubling as an excellent self-care treat for yourself. You might be wondering what makes watermelon soap so special beyond its looks. The truth is, creating this soap is an engaging process that combines creativity with a bit of science.
Why Melt and Pour?
When it comes to making soap, especially if you’re new to it, the melt-and-pour method is undoubtedly the easiest and most accessible way to dive in. No need for lye or complex processes—just melt the base, mix in your colors and fragrances, and pour it into a mold. For watermelon soap, it’s all about layering to mimic the delicious fruit. And believe me, the results are worth it!
The Key to Perfect Layers
Achieving that lovely layered look requires a bit of patience and some handy tips. Here’s a great starting note: to layer your soap successfully, you’ll need to ensure that your earlier layers are cooled slightly before adding the next. This is particularly important when working with the luscious red base and the cheerful green top. Waiting gives that gorgeous melon-like appearance a chance to shine. It’s a good idea to use isopropyl alcohol between layers to help them adhere nicely.
Essential Ingredients for Watermelon Soap
Creating beautiful watermelon soap only requires a few simple ingredients. Here’s your shopping list:
- Melt-and-pour soap base (I recommend glycerin for a nice clear look)
- Colorants (red and green for a classic watermelon appearance)
- Fragrance oil (watermelon-scented, of course!)
- Molds (you can use silicone molds for easier removal)
- Poppy seeds (for texture and to represent watermelon seeds)
If you’re interested in exploring other beautiful DIY projects, check out this guide on easy DIY coffee candles as well!
Step-by-Step Guide to Making Watermelon Soap
Now that you’re geared up let’s dive into the step-by-step process to create your watermelon soap.
What You’ll Need
Soap Base
- Choose one that’s clear or white based on your desired look.
Colorants
- Red for the base and green for the rind.
Fragrance Oil
- Watermelon fragrance or any fruity scent you love.
Molds
- Silicone molds are the easiest to work with.
Step 1: Melting the Soap Base
Start by chopping your melt-and-pour soap base into small cubes to help it melt evenly. Place the cubes in a microwave-safe bowl or a double boiler. Heat it in the microwave in short bursts, stirring in between until completely melted. Just be careful not to overheat!
Step 2: Adding Colors and Scents
Once melted, divide the soap into two bowls. In one bowl, add a few drops of red colorant and your chosen watermelon fragrance. In the other bowl, add green colorant for the rind. Stir each mixture well until the colors are vibrant.
Step 3: Layering the Soap
Now comes the fun part—layering! Pour the red mixture first into your molds, filling them halfway. Let this layer cool slightly (but not completely) before spritzing it with isopropyl alcohol. This step promotes adhesion for the next layer.
Once your red layer is slightly hardened (think tacky but firm), pour in the green mixture carefully on top. The key is not to pour too fast; otherwise, you might disrupt the red layer underneath. Again, spritz the middle layer with alcohol before topping it with the green layer, creating a seamless bond.
Common Mistakes to Avoid
Even the most seasoned crafters can make mistakes when crafting soap, especially with layering. Here are some pitfalls to sidestep:
- Pouring too quickly: Patience pays off here. Allow each layer to cool adequately before pouring the next.
- Using too much colorant: A little goes a long way with colorants, so don’t overdo it unless you’re going for a bold hue.
- Skipping the alcohol: It’s not just an extra step; this is vital for the layers to adhere properly.
Bonus Self-Care Ideas
Let’s be honest, self-care goes beyond just using lovely soaps. Here are a few additional ideas to pamper yourself:
- Set up a relaxing bath time with your homemade products.
- Light up a calming candle while enjoying a face mask—try these easy homemade eucalyptus candle recipes for a soothing atmosphere.
- Create a spa day with friends where everyone can make their own versions of soap!
Enjoying Your Watermelon Soap
After allowing the soap to cool for at least a few hours (or overnight if you’re feeling patient), carefully remove it from the molds. You’ll be greeted with a beautifully layered, eye-catching creation that smells delicious!
Feel free to cut your soap into slices or leave it as is. Either way, you’re in for a treat. The poppy seeds provide a fun, realistic touch, mimicking watermelon seeds, and the fragrance will leave your hands feeling fresh all day long.
Wrapping It Up
You’ve not only embraced your creativity but also created a delightful product to enhance your daily routine. The joy of crafting something beautiful and practical can be incredibly fulfilling. Watermelon soap is perfect for enjoying on your own or giving as a thoughtful gift.
Conclusion
As you embark on this creative journey, why not also check out other refreshing recipes, like this 5 Minute, Easy Watermelon Sorbet to enjoy while you craft? You could also explore an exciting new Watermelon Cold Process Soap Tutorial for a deeper dive into soap making. If you’re interested in a larger project, the Watermelon Cold Process Soap Project offers an engaging experience too. Enjoy crafting and share your summer creations with confidence!