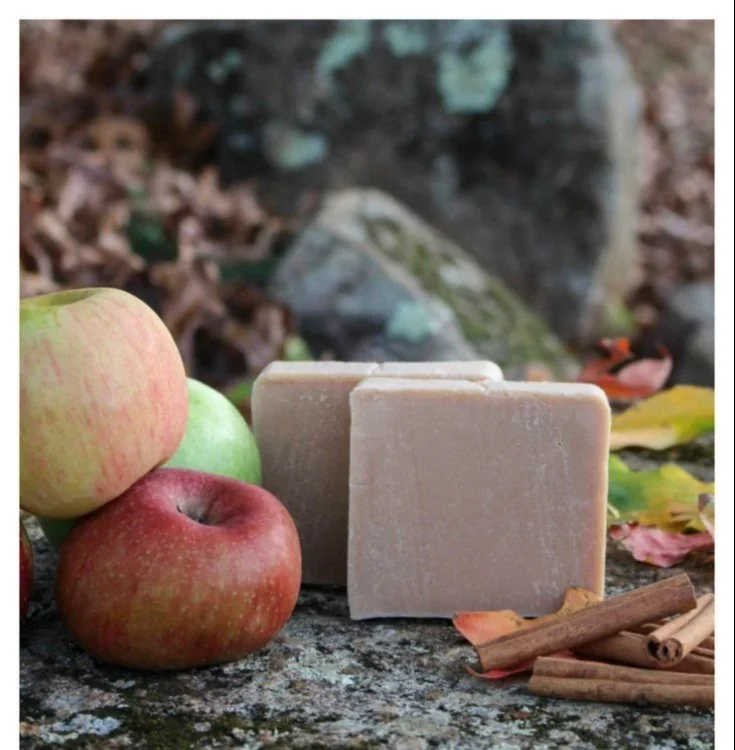

How to Make Apple Cider Soap: A Cold Process and Palm-Free Simple Natural Soap Recipe
Making your own soap can be a delightful experience, and what better way to embrace the fall season than with a refreshing apple cider soap? This cold process recipe is not only simple but also palm-free, ensuring a sustainable choice that’s good for you and the planet. Follow along as we guide you through every step of this delightful DIY project.
Why You Will Love This Recipe
Apple cider soap combines the warm, soothing scents of the fall with the moisturizing properties of natural ingredients. This recipe will leave your skin feeling soft and invigorated, plus it makes for an excellent homemade gift. As you create this lovely soap, you’ll also enjoy the wonderful aroma of apples, spices, and sweetness wafting through your space. So, roll up your sleeves and let’s dive into the world of soap making!
Ingredients
To make this cold process apple cider soap, you will need the following ingredients:
- Distilled Water: 4.5 oz (127 g)
- Lye (Sodium Hydroxide): 2.1 oz (60 g)
- Olive Oil: 3.6 oz (102 g)
- Coconut Oil: 3.6 oz (102 g)
- Shea Butter: 3.6 oz (102 g)
- Castor Oil: 1.4 oz (40 g)
- Apple Cider (Unfiltered): 3 oz (85 g)
- Essential Oils (optional): For fragrance, consider using essential oils like cinnamon and clove (approximately 0.5 – 1 oz total)
- Colorants (optional): Such as natural clays or mica powders to enhance the aesthetic of your soap.
Equipment
You’ll need a few essential tools to make your apple cider soap successfully:
- Digital Scale: For accurate measurements of oils and lye.
- Heat-Resistant Mixing Bowls: One for the lye solution and another for oils.
- Stick Blender: For mixing the soap batter.
- Thermometer: To monitor the temperature of your oils and lye.
- Safety Gear: Protective goggles and gloves to handle lye safely.
- Soap Mold: Silicone molds or a wooden soap mold lined with parchment paper.
- Spatula: For scraping out the bowls and mixing.
- Spoon or Whisk: For stirring the mixture as needed.
Step-by-Step Instructions
Preparation Overview
Preparation Time: 30 minutes
Making Time: 1 hour
Approximate Yield: 6-8 bars (depending on mold size)
Instructions
Prepare Your Workspace: Make sure your work area is clean and free from distractions. Have all your equipment ready to go.
Wear Safety Gear: Put on goggles and gloves before handling lye, as it can cause burns if it comes into contact with skin.
Make the Lye Solution:
- Measure 4.5 oz (127 g) of distilled water in a heat-resistant bowl.
- Slowly add 2.1 oz (60 g) of lye to the water (never the other way around), stirring gently until fully dissolved. This mixture will be hot, so let it cool to about 100-110°F (37-43°C).
Prepare Your Oils:
- Weigh the olive oil, coconut oil, shea butter, and castor oil.
- Combine them in a separate heat-resistant bowl and heat gently until the coconut oil and shea butter are fully melted. Allow to cool to about 100-110°F (37-43°C).
Mix the Lye and Oils:
- When both the lye solution and oils are around the same temperature, carefully combine the lye solution into your oils. Use a stick blender to blend until you reach a light trace (this means the mixture is thick enough to leave a trail on the surface).
Add Apple Cider and Fragrance:
- Stir in the apple cider and any essential oils if using, mixing until evenly incorporated.
Pour into the Mold:
- Pour the soap mixture into your prepared mold. Tap the mold lightly to remove any air bubbles.
Insulate and Cure:
- Cover your mold with a towel to insulate it, helping the gel phase to develop. Allow the soap to sit for 24-48 hours.
Unmold and Cut:
- Once hardened, gently remove the soap from the mold and cut it into bars using a sharp knife.
Cure Time:
- Place the cut bars on a drying rack and allow them to cure for about 4-6 weeks before use to ensure they are safe and mild for your skin.
Tips for Success
- Measure Accurately: Correct measurements are vital in soap making, especially with lye.
- Temperature Control: Keeping your lye and oils within the right temperature range ensures proper saponification.
- Blend Gently: Avoid blending too vigorously, as this may lead to overheating the soap batter.
Common Mistakes to Avoid
- Using the Wrong Water: Always use distilled water for your lye solution to avoid impurities.
- Skipping Safety Gear: Protecting yourself while handling lye is crucial, so do not skip wearing gloves and goggles.
- Not Waiting Long Enough: Proper curing time is essential; don’t rush this step, as uncured soap can be harsh on the skin.
Variations and Customization Ideas
- Color: Incorporate natural colorants like turmeric or spirulina to give your soap a unique hue.
- Exfoliation: Add oatmeal or poppy seeds for gentle exfoliation.
- Fragrance: Experiment with different essential oil blends, like vanilla with orange or even herbal scents like rosemary and mint.
Storage and Shelf Life
Store your soap bars in a cool, dry place away from direct sunlight. They should last for up to 12 months, but it’s best to use them within 6 months for optimal quality.
Safety Tips
- Handling Lye: Always add lye to water—never the reverse—to prevent violent reactions. Mix in a well-ventilated area.
- Avoiding Contact: Be careful when stirring the lye solution to prevent splashes.
Frequently Asked Questions
1. Can I use other liquids instead of apple cider?
Yes! You can substitute apple cider with other liquids like herbal teas or juices, though the proportions may require adjustments.
2. What happens if my lye solution is too hot?
If the lye solution is too hot, allow it to cool before combining with oils. High temperatures can affect the saponification process.
3. Can I speed up the curing process?
Unfortunately, there’s no shortcut for curing. Proper saponification takes time to ensure the soap is mild and safe for your skin.
4. How can I tell when my soap is ready to use?
Your soap is ready to use after a full 4-6 week curing period. It will feel hard and should no longer smell of lye.
5. Is it necessary to use a stick blender?
While it speeds up the process, a stick blender is not compulsory. You can mix by hand, but it will take longer to reach trace.
Conclusion
Making apple cider soap at home is a fulfilling project that yields delightful, moisturizing bars of soap. The process not only allows for creativity with scents and colors but also provides a uniquely personal touch to your skincare routine or gift-giving endeavors. Whether you’re a seasoned soap maker or a curious beginner, this recipe is sure to be a hit. Happy soap making, and let the warm, inviting aroma of apple cider fill your home!