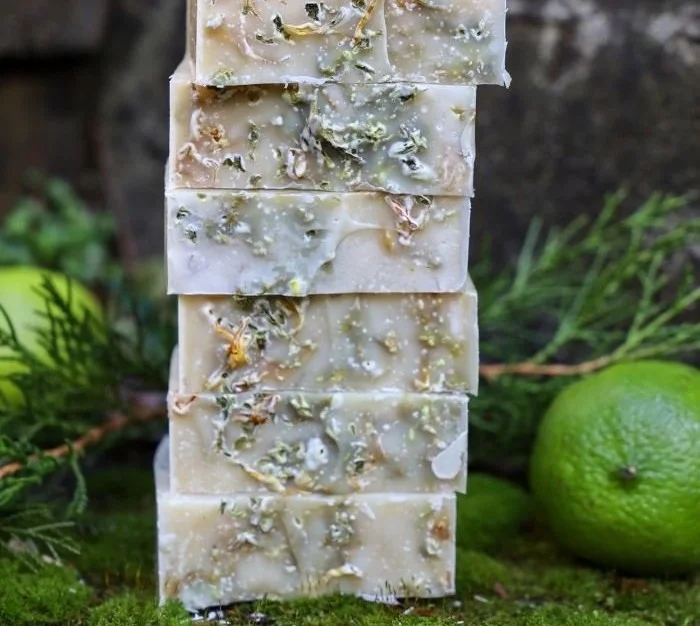

Creating a Refreshing Masculine Lime and Cedarwood Soap
Making your own soap at home is a gratifying and creative endeavor that allows you to create personalized products tailored to your preferences. This lime and cedarwood soap recipe will awaken your senses and invigorate your skin, making it perfect for cool winter days. The energizing scent of lime combined with the warm, woody aroma of cedarwood results in a fresh masculine fragrance that is sure to delight. In this article, you’ll find everything you need to successfully craft your own soap, from ingredients and equipment to tips for customization and safety.
Why You Will Love This Recipe
- Refreshing Scent: Lime provides a zesty kick, while cedarwood offers an earthy, comforting base—perfect for creating that refreshing masculine vibe.
- Skin Benefits: The ingredients chosen in this soap recipe not only smell fantastic but also benefit the skin, helping to deodorize and revitalize, especially during colder months.
- Simple Process: Whether you’re a seasoned soap maker or a complete novice, this recipe is easy to follow, allowing you to enjoy the creative process without feeling overwhelmed.
- Personalization: You can adjust the scent and additives to suit your preferences, ensuring that each batch is unique and special.
Ingredients
This recipe uses the cold process method for making soap. Here’s what you’ll need:
- 16 oz Olive Oil
- 16 oz Coconut Oil
- 16 oz Palm Oil
- 16 oz Distilled Water
- 6.76 oz Sodium Hydroxide (Lye)
- 1 oz Lime Essential Oil
- 1 oz Cedarwood Essential Oil
- Optional: Natural colorants (like spirulina or turmeric) for aesthetic appeal.
Equipment
Before you start, gather the following tools:
- A digital kitchen scale (for precise measurements)
- Heat-resistant glass or plastic mixing bowls
- Immersion blender
- Soap mold (silicone molds work well)
- Safety goggles and gloves (for handling lye)
- Stick thermometer (to monitor temperatures)
- Mask (to avoid inhaling lye fumes)
- Measuring spoons
- Spatula
- Dish towel or apron
Step-by-Step Instructions
Preparation and Safety:
- Ensure your workspace is well-ventilated. Wear your safety goggles and gloves while handling ingredients, especially sodium hydroxide.
- Measure out 16 oz of each oil (olive, coconut, and palm) and set aside.
- Measure 16 oz of distilled water in a heat-resistant bowl.
Mix Lye Solution:
- Carefully add the sodium hydroxide to the water. Never add water to lye. Wear your mask during this process, as fumes may arise. Stir until fully dissolved and set aside to cool to about 110°F.
Melt Oils:
- In a separate bowl, combine all your oils. Gently heat them in a microwave or double boiler until completely melted.
Combine Lye and Oils:
- Once both the lye solution and oils are at a temperature of about 100-110°F, slowly pour the lye solution into the oils while mixing with an immersion blender.
Blend to Trace:
- Blend until you reach “trace,” where the mixture thickens to the consistency of pudding—this usually takes a few minutes.
Add Scent:
- After reaching trace, add the lime and cedarwood essential oils. Blend again gently for a few seconds to incorporate.
Pour into Molds:
- Carefully pour the soap mixture into your prepared molds. Tap the molds lightly to release any air bubbles.
Cure the Soap:
- Cover the molds with a towel to keep the heat in. Allow the soap to sit for 24-48 hours until it hardens.
Unmold and Cut:
- Once firm, carefully remove the soap from the molds and cut into bars.
Cure the Bars:
- Place the cut bars on a rack in a cool, dry location to cure for 4-6 weeks. This step allows the lye to neutralize completely.
Tips for Success
- Temperature Check: Both your lye solution and oils should ideally be at similar temperatures when combined.
- Stick Blending: Alternate between blending and stirring with a spatula, preventing splashing and promoting an even mix.
- Using Colorants: If using natural colorants, add them at trace to achieve a beautiful hue.
Common Mistakes to Avoid
- Incorrect Measurements: Always use a scale for accuracy—mishaps in measurements can affect the soap’s quality.
- Not Curing Long Enough: Ensure the soap cures the full duration. Cutting it too early may lead to a harsh final product.
- Poor Ventilation: Avoid lye fumes by working in a well-ventilated area and using protective gear.
Variations and Customization Ideas
- Scent Modification: Experiment with different essential oils like eucalyptus or tea tree for varied scents and properties.
- Additives: You can include natural exfoliants like oatmeal or coffee grounds for texture and added benefits.
- Color Customization: Use mica powders or natural powders like spirulina for coloring.
Storage and Shelf Life
Store your finished soap bars in a cool, dry place, away from direct sunlight. When stored correctly, they can last up to a year or more. Keeping them in a container or wrapped can help maintain their scent and prevent them from getting dusty or discolored.
Safety Tips
- Handling Lye: Always wear gloves and goggles, never breathe in lye dust or fumes, and store lye securely away from children and pets.
- Correct Technique: Always follow the recipe closely; soap-making involves chemical reactions that can be dangerous if mishandled.
Frequently Asked Questions
1. Can I use substitute oils?
Yes, but avoid oils that are liquid at room temperature (like canola) as they don’t saponify well. Stick with solid or semi-solid oils for the best results.
2. What if my soap turned out too soft?
This can happen if the recipe wasn’t followed accurately. Ensure proper measurements for lye and oils.
3. Can I use fragrance oils instead of essential oils?
Yes, fragrance oils can be used, but they may contain synthetic ingredients. Always check the label for skin safety.
4. How do I know when my soap is ready to use?
After 4-6 weeks of curing, your soap should be ready to use once fully hardened and any strong lye smell is gone.
5. How can I tell my soap is safe for skin?
Ensure you’ve measured the lye correctly and allowed proper curing time, which neutralizes any remaining lye.
Conclusion
Creating your own lime and cedarwood soap is not only satisfying but also a wonderful way to personalize your skincare routine with natural ingredients. With a straightforward recipe and some creativity, you can enjoy a refreshing and revitalizing soap that leaves your skin feeling great. And don’t forget, soap-making is an art, so feel free to experiment with scents and textures to find what you love best. Grab your ingredients and tools today, and embark on an enjoyable DIY project that brings a touch of fresh masculinity to your daily routine! Happy crafting!