
Imagine coming home after a long, exhausting day, and soaking in a warm bath surrounded by lovely scents and beautiful little soaps you made yourself. Does that sound blissful? We’re always looking for simple and meaningful ways to bring creativity and wellness into our daily lives, aren’t we? If you’re searching for a fun and creative project, diving into the world of melt-and-pour soap-making might just be your next favorite hobby. Plus, the possibilities are endless when it comes to design, color, and scent.
This isn’t just about creating visually appealing soaps; it’s also a way to make thoughtful gifts for loved ones or even to spice up your own self-care routine. If you’ve ever felt overwhelmed by complicated DIY projects, I promise this one is not only simple but incredibly rewarding. Let’s talk about what melt-and-pour soap-making is, and I’ll even link you to some great resources to help you get started.
What is Melt-and-Pour Soap?
Melt-and-pour soap is a type of soap-making that allows you to create your own bars without the inconvenience of handling lye or any other complicated processes. It’s perfect for beginners and those of us who might not want to dive into the advanced techniques right away. The process involves melting pre-made soap bases, pouring them into molds, and adding any desired colors, scents, or additives.
You might be wondering, "What are the benefits of creating my own soap?" Well, it’s not just about the fun—customizing your soap allows you to control what goes on your skin. Whether you have sensitive skin or simply want to avoid certain chemicals, making your own soap can lead to better choices in your skincare routine. And you’ll likely enjoy the moments spent creating something uniquely yours.
Choosing the Right Soap Base
When selecting a soap base, consider your goals and preferences. There are several options available, including:
- Glycerin-based soap: This is a popular choice because it’s generally mild and works well for sensitive or dry skin.
- Shea butter soap: Perfect for those looking to hydrate and nourish their skin, shea butter has natural moisturizing properties.
- Goat’s milk soap: Known for its nourishing qualities, goat’s milk soap is perfect for a creamy, rich texture that feels luxurious on the skin.
Each type of base offers different textures and benefits; it all depends on what you’re hoping to achieve. Once you’ve selected your base, gather your add-ins! Think fun colors, aromatic scents, or even exfoliants like ground oatmeal or coffee.
Getting Started with Your First Batch
Let’s get into the nitty-gritty of how to make your first batch of melt-and-pour soap. Here’s a straightforward guide to help you create a lovely soap that you’ll be proud to use or share.
Supplies You’ll Need
- Melt-and-pour soap base: Pick your favorite.
- Microwave-safe container: For melting the soap.
- Soap molds: You can use silicone molds for ease of removal.
- Fragrance oil or essential oils: Choose scents that make you happy.
- Colorants: Soap dyes or natural colors like turmeric or beetroot powder.
- Mixing tools: A spoon or stick for stirring.
Steps to Follow
Melt the Soap Base: Cut the soap base into small cubes and place them in your microwave-safe container. Heat in 30-second intervals, stirring in between until you reach a completely melted consistency.
Add Color and Fragrance: Once your soap is melted, add your colorants and fragrance oil. It’s essential to mix well to ensure an even distribution.
Pour into Molds: Carefully pour the mixture into your molds. This is where you can get creative—consider layering colors or adding small embeds like dried flowers or herbs.
Let It Set: Allow the soap to cool and harden completely. This usually takes a few hours, though you may speed it up by placing them in the refrigerator.
Unmold and Enjoy: Carefully remove your soap from the molds. Your gorgeous, custom creations are now ready for use!
Tips for Making Your Soap Unique
Want your soap to stand out even more? Here are a few tips to make your creations truly one-of-a-kind:
- Experiment with Textures: Try adding ingredients like honey for a luxurious feel or sandalwood powder for a gentle exfoliating effect.
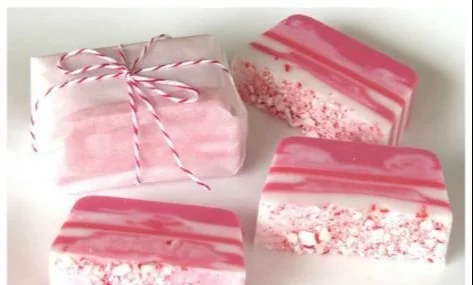
- Play with Layers: Pour a small amount of melted soap into the mold, let it set slightly, then pour another color on top for a layered effect.
- Personalize Gifts: Whether it’s for a birthday or just because, consider adding a little personalized tag or using seasonal molds to make the gift feel even more special.
You can also explore other DIY projects that can complement your soap-making journey, like making cozy candles to brighten your space. For that, check out these DIY candle ideas for some inspiration.
Common Mistakes to Avoid
Like any creative pursuit, it’s easy to make a few beginner mistakes when diving into soap-making. Here are some common pitfalls to keep in mind:
- Skipping Safety: Always use heat-resistant containers, and be cautious with hot soap. A little care can prevent burns.
- Overheating the Soap: If the soap base gets too hot, it can boil and cause bubbling, which could result in uneven textures. Always melt in short bursts of time.
- Not Measuring Additions: Adding too much fragrance oil can negatively impact the hardness of your soap. Stick to the recommended amounts to achieve the best results.
Knowing these small tips and tricks can save you a lot of frustration and help make your soap-making experience much more enjoyable.
Exploring New Ideas
Once you’ve mastered the basics, consider exploring creative variations. How about seasonal or themed soaps? For instance, incorporating pumpkin spice for fall or lavender and chamomile for a calming springtime soap can make great additions to your repertoire. You might even find yourself getting a little hooked on creating seasonal collections!
If you’re looking for more inspiration, there are numerous resources available online. You can check out some wonderful eucalyptus candle recipes that can perfectly accompany your custom soaps in a relaxing bath setting.
Conclusion
In the end, melt-and-pour soap making is a beautiful way to express creativity and indulge in self-care. It’s about connecting with yourself and the joy of crafting something lovely that you can use or share. If you’re ever feeling uninspired, remember that there are always fresh ideas and new projects waiting for you. For instance, you can explore 38 free melt-and-pour soap recipes that can ignite your creative spark.
Moreover, if you’re feeling overwhelmed, it’s okay to take a step back. Everyone has moments when self-care seems like too much (trust me, you’re not alone). You can always check out a heartfelt post like I’m Failing – Bower Power for a reminder that it’s fine to start small or just rest. Finally, enriching your routine with ideas from DIY beauty makes everything feel a little brighter. So go ahead, start creating, and enjoy the bliss of your well-deserved indulgence!