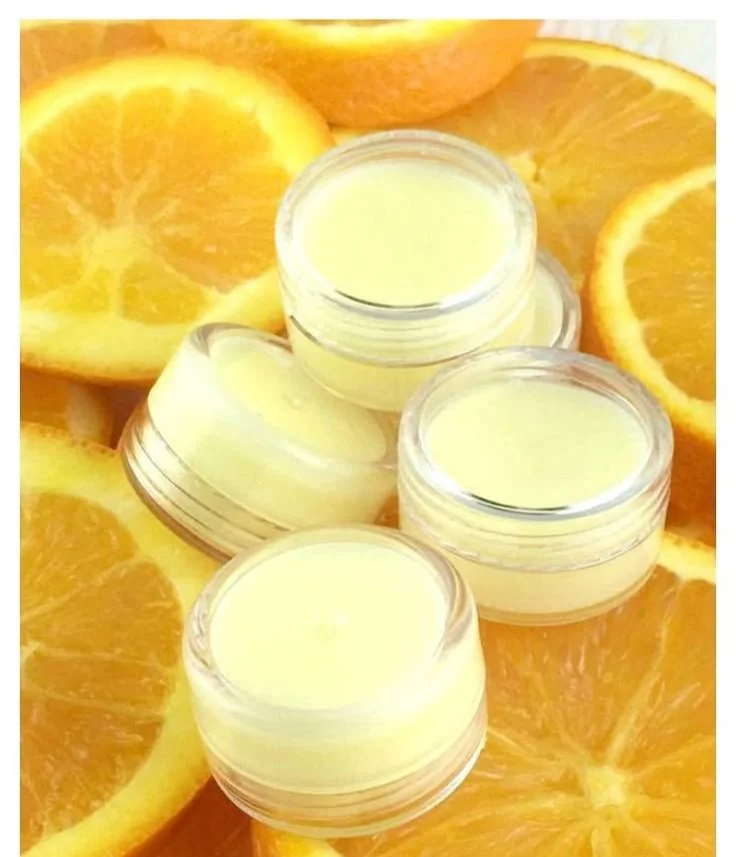

Juicy Orange Creamsicle Lip Balm: A Non-Toxic DIY Delight
Creating your own lip balm can be one of the most satisfying and enjoyable DIY projects, especially when you’re using vibrant flavors like orange creamsicle. This delightful lip balm is not only easy to make but also free from harmful toxins, making it a perfect choice for anyone looking to embrace natural beauty products. In this guide, I’ll walk you through the entire process, from gathering your ingredients to enjoying your handmade lip balm.
Why You Will Love This Recipe
- Simple Ingredients: The ingredients are natural and easy to find, making the recipe accessible for beginners.
- Customizable: You can tweak the flavors, colors, and even the texture to suit your preferences.
- Perfect for Gifts: This lip balm makes a wonderful homemade gift for friends and family.
- Non-Toxic: You can rest easy knowing that your self-care routine is free from chemicals.
Ingredients
Here’s what you’ll need to create your own juicy orange creamsicle lip balm:
- 2 tablespoons beeswax pellets: This natural wax acts as a thickener and provides a protective layer for your lips.
- 2 tablespoons coconut oil: A fantastic moisturizer that adds creaminess to the balm.
- 1 tablespoon sweet almond oil: This oil is gentle and nourishing, making it great for sensitive lips.
- 1 teaspoon orange essential oil: For that zesty, refreshing scent reminiscent of a creamsicle.
- 1 teaspoon vanilla extract: This adds a sweet finish and complements the orange beautifully.
- Optional: A few drops of natural colorant if you want a pop of color.
Equipment
Gather these tools for an efficient lip balm-making experience:
- Double boiler: If you don’t have one, a glass bowl over a pot of simmering water works just fine.
- Measuring spoons: For accurate measurements of your ingredients.
- Stirring stick or spoon: A wooden stick or silicone spatula works well.
- Lip balm containers: You can use small tins or lip balm tubes.
- Dropper: Optional, for adding essential oils.
Step-by-Step Instructions
Here’s how to make your orange creamsicle lip balm:
Set Up Your Double Boiler
Fill the bottom pot with water and bring it to a gentle simmer. Place the top pot or glass bowl on top, ensuring it doesn’t touch the water.Melt the Base Ingredients
Add the beeswax, coconut oil, and sweet almond oil into the top pot or bowl. Stir occasionally until everything is melted and smoothly combined (about 5-10 minutes).Add Flavoring
Once the mixture is melted, remove it from heat. Quickly stir in the orange essential oil and vanilla extract.Add Color (Optional)
If you’re using a natural colorant, add a few drops now and mix thoroughly.Pour into Containers
Using the dropper or a spoon, carefully pour the mixture into your lip balm containers. Fill them to the top, leaving a tiny bit of space to avoid overflow.Let It Set
Allow the lip balm to cool and solidify at room temperature for about 1-2 hours.Cap and Label
Once solid, cap your containers, and you might want to label them for fun.
Tips for Success
- Temperature Control: Make sure the mixture doesn’t get too hot to prevent burning the oils; stick to a gentle heat.
- Mix Thoroughly: Stir well to ensure all ingredients are combined uniformly for consistent flavor and texture.
- Use High-Quality Oils: The quality of essential oils and flavorings will significantly affect the taste and scent.
Common Mistakes to Avoid
- Not Measuring Accurately: Always measure your ingredients to get the right consistency.
- Skipping the Essential Oils: Omitting these will leave your balm without its signature taste and aroma.
- Pouring Too Soon: Let your mixture cool a bit before pouring to prevent spills.
Variations and Customization Ideas
- Flavor Alternatives: Swap out orange for lemon or lime essential oil for a citrus twist or choose mint for a refreshing kick.
- Additives: Consider including natural ingredients like vitamin E for added nourishment.
- Texture Tweaks: If you prefer a softer balm, increase the amount of carrier oils slightly.
Storage and Shelf Life
Store your lip balm in a cool, dry place away from direct sunlight. It will stay fresh for about 6-12 months due to the natural preservatives in the beeswax and oils. Always check for any changes in color or smell before using.
Safety Tips
- Avoid Allergens: Make sure you and anyone using the lip balm are not allergic to any of the ingredients.
- Essential Oil Caution: When using essential oils, be sure to use only those suitable for topical use and follow recommended dilution guidelines.
Frequently Asked Questions
1. Can I make this lip balm vegan?
Yes! Substitute beeswax with carnauba wax or candelilla wax, which are plant-based alternatives.
2. How do I know if my lip balm is too hard or too soft?
If it’s too hard, you can remelt it and add more oil. If it’s too soft, add more beeswax.
3. Can I customize the scent further?
Absolutely! Feel free to mix different essential oils to create your custom scent.
4. How long until I can use my lip balm?
Once fully set, your lip balm is ready to use. Generally, this takes about 1-2 hours.
5. Is it safe to use on children?
While the ingredients are generally safe, always check for allergies first. You may want to avoid strong essential oils for very young children.
6. Can I use a microwave to melt my ingredients?
While it’s possible, a double boiler allows more control and reduces the risk of overheating the oils.
Conclusion
Making your own juicy orange creamsicle lip balm is a fun and rewarding DIY project that anyone can do. With just a few simple ingredients and tools, you can create a deliciously fragranced balm that keeps your lips soft and moisturized. Whether you’re treating yourself or crafting a thoughtful homemade gift, this recipe is sure to be a hit. I encourage you to give it a try and explore the endless possibilities of DIY lip care. Happy crafting!