
Sweetly Masculine Lime and Cedarwood Soap Recipe – Garden Therapy
Creating your own soap at home can be a rewarding and fun experience. Not only do you get to customize scents and ingredients to your liking, but you also have the opportunity to make unique handmade gifts for friends and family. In this article, I will guide you through a fantastic DIY soap recipe featuring the earthy aroma of cedarwood and the fresh zest of lime. This sweetly masculine lime and cedarwood soap is a perfect addition to your daily grooming routine or a thoughtful gift for the men in your life.
Why You Will Love This Recipe
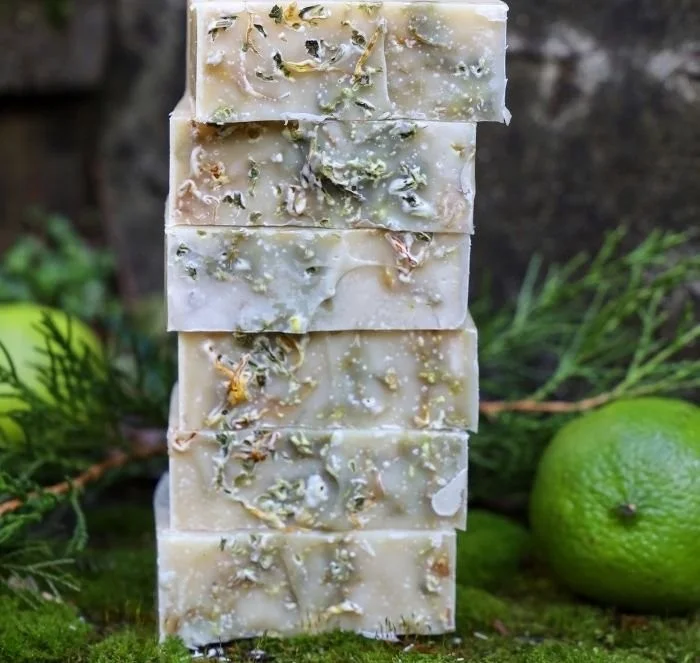
The combination of lime and cedarwood brings a refreshing yet grounded scent to your soap. Cedarwood essential oil is known for its soothing properties, while lime essential oil adds a cheerful burst of citrus. This soap is not only made from natural ingredients, but the final product looks beautiful, with a subtle color contrast that will brighten up any bathroom. Plus, the soap-making process is satisfying and can become a delightful hobby.
Ingredients
To craft your lime and cedarwood soap, you will need the following ingredients:
Oils and Butters
- 12 oz Olive Oil
- 8 oz Coconut Oil
- 5 oz Palm Oil
- 5 oz Shea Butter
Lye Solution
- 4.5 oz Sodium Hydroxide (lye)
- 11 oz Distilled Water
Essential Oils
- 1 oz Cedarwood Essential Oil
- 1 oz Lime Essential Oil
Colorant (optional)
- 1 tsp Natural Yellow Clay or a few drops of green soap colorant
Equipment
Gather the following equipment before you start:
- Digital kitchen scale
- Heat-safe container for mixing lye
- Stainless steel or heat-safe bowl for mixing oils
- Stirring utensil (preferably stainless steel or silicone)
- Hand blender or stick blender
- Soap mold (silicone molds work well)
- Thermometer
- Safety goggles and gloves
- Measuring spoons
- Parchment paper (if needed for lining the mold)
- Labels for finished soap bars
Step-by-Step Instructions
Preparation Time: 30 minutes
Making Time: 1 hour
Yield: Approximately 10 bars of soap
Step 1: Safety First
Put on your safety goggles and gloves before handling sodium hydroxide. Make sure your workspace is well-ventilated, as lye can produce harmful fumes when mixed with water.
Step 2: Prepare the Lye Solution
In a heat-safe container, slowly add the sodium hydroxide to the distilled water while stirring gently. Never add water to lye. This will trigger a chemical reaction that could be dangerous. Stir until fully dissolved, then place the lye solution aside to cool.
Step 3: Melt the Oils
In a separate bowl, combine your Olive Oil, Coconut Oil, Palm Oil, and Shea Butter. Heat gently using a double boiler method or in short bursts in the microwave until everything is melted and combined. Allow it to cool to 100-110°F.
Step 4: Combine Lye and Oils
Once both the lye solution and oils are within the same temperature range (around 100°F), slowly pour the lye solution into the oils. Blend using your stick blender for about 30 seconds or until you reach a light trace (the mixture should be slightly thickened).
Step 5: Add Essential Oils
When you achieve a light trace, add the cedarwood and lime essential oils, as well as any colorant, if desired. Blend again until fully incorporated.
Step 6: Pour into Mold
Pour the soap mixture into your mold, smoothing the top as needed. Tap the mold gently on a flat surface to release any air bubbles.
Step 7: Insulate the Mold
Cover the mold with a towel to insulate it and let it sit undisturbed for 24-48 hours as the soap hardens.
Step 8: Unmold and Cure
After 48 hours, carefully remove the soap from the mold. Cut into bars and place them on a drying rack. Let the bars cure for 4-6 weeks in a cool, dry place before using.
Tips for Success
- Use a Soap Calculator: If you’re new to soap-making, invest some time in learning how to use a soap calculator. This allows you to customize your oils and lye measurements based on what you have on hand.
- Keep Measurements Precise: Accurate measurements are crucial for soap-making, as too much or too little lye can ruin the batch or create unsafe soap.
Common Mistakes to Avoid
- Skipping Safety Gear: Always wear gloves and goggles when working with lye. Safety first!
- Mixing Temperatures: Ensure that both lye solution and oils are close in temperature before mixing. If they are too far apart, it can affect the saponification process.
- Being Impatient: Allowing the soap to cure for the full six weeks is crucial. Patience ensures a gentler soap.
Variations and Customization Ideas
- Additives: Consider adding exfoliants like poppy seeds or oatmeal for texture.
- Essential Oil Blends: Experiment with other essential oils like patchouli or peppermint to adjust the scent.
- Colorants: Use natural colorants derived from plants or herbs, such as spirulina for green tones or indigo powder for blue.
Storage and Shelf Life
Store your finished soap bars in a cool, dry place away from direct sunlight. Properly cured, these soaps can last for 1-2 years. Always label your soaps with the date they were made to keep track of their freshness.
Safety Tips
- Handle Lye with Care: Be sure to follow manufacturer guidelines for handling lye safely.
- Ventilation is Key: Always work in a well-ventilated area to avoid inhaling fumes from the lye solution.
Frequently Asked Questions
1. Can I use different oils in this recipe?
Yes! You can substitute oils, but make sure to use a reliable soap calculator to adjust the lye amounts accordingly.
2. Why is my soap sweating?
If you notice beads of moisture on the surface, it could be due to humidity. Allow them to dry, and it’s completely normal.
3. Can I use fragrance oils instead of essential oils?
Absolutely! Just be sure to check the recommended usage amount on your fragrance oil bottle.
4. How can I tell if my soap has cured properly?
The soap should feel firm, have a uniform texture, and not have any residual lye smell.
5. What should I do if my soap is too soft?
If your soap isn’t hardening as expected, it may need more curing time. Make sure it’s stored in a well-ventilated area.
6. How do I know if my soap is safe to use?
After the full curing period, the soap should no longer smell of lye, and it should feel solid. Always perform a pH test if unsure.
Conclusion
Crafting your own lime and cedarwood soap at home is not only fulfilling, but it also offers a beautiful way to express your creativity. This sweetly masculine soap makes for an excellent gift or an upgrade to your own daily routine. Don’t hesitate to experiment with various essential oils and additives for a personalized touch. Enjoy your soap-making journey, and remember that practice will only make you better. Happy crafting!