
Looking for a Fun New Craft Project? Check Out These 20 Beautiful DIY Candles You Can Easily Make Yourself
If you’re hunting for a new craft that’s not only fun but also rewarding, look no further than DIY candles! Making your own candles gives you the chance to create unique designs, choose your favorite scents, and even infuse them with colors that match your style. Plus, they make for wonderful homemade gifts! In this guide, you’ll discover 20 beautiful DIY candle projects that are easy to make, even for beginners.
Why You Will Love This Recipe
Crafting candles is an enjoyable and therapeutic way to spend your time. Whether you’re looking for a relaxing afternoon project or a fun activity with friends, pouring your own candles combines creativity with sensory enjoyment. They can fill your space with delightful fragrances, enhance your home décor, or serve as thoughtful handmade gifts. Plus, there’s something special about lighting a candle you made yourself.
Ingredients
For our DIY candles, you’ll need the following basic ingredients. Depending on the specific project, some materials may vary:
- Wax: Soy wax, paraffin, or beeswax (2 lbs for each candle)
- Wicks: Pre-waxed cotton or wooden wicks (size depends on your container)
- Fragrance oil: 1 oz for every 1 lb of wax
- Color dye (optional): Special candle dye or crayon shavings
Equipment
Here’s the equipment you’ll need:
- Double boiler or microwave-safe container
- Candle thermometer
- Pouring pitcher
- Stirring spoon
- Wick holder (or chopsticks)
- Scale (for precise measurements)
- Heat-resistant containers: Mason jars, glass votives, or silicone molds
Step-by-Step Instructions
Basic Candle Making Process
Prepare Your Workspace: Cover your surface with newspaper or paper towels to catch drips and spills.
Measure Your Ingredients: Using the scale, weigh out the wax you will use for your candles.
Melt the Wax: Place the wax in a double boiler or a microwave-safe container. If using a microwave, heat in 30-second increments, stirring in between until fully melted. Aim for a temperature of around 170°F (76°C).
Add Color and Fragrance: Once melted, add dye if desired and mix thoroughly. Then, add the fragrance oil, stirring well to ensure even distribution.
Attach the Wick: While your wax cools slightly to around 160°F (71°C), secure your wick to the bottom of your container using a bit of melted wax or a wick sticker. Use a wick holder to keep it centered.
Pour the Wax: Carefully pour the melted wax into your container, filling it to your desired level. Leave some space at the top (about 1/2 inch).
Cool and Trim the Wick: Allow the candle to cool completely. Once solid, trim the wick to 1/4 inch above the surface.
Cure: For optimal scent throw, allow your candles to cure for at least 48 hours before burning.
Tips for Success
- Use Quality Ingredients: The quality of your wax and fragrance can significantly affect the final results.
- Test Your Wicks: Not all wicks will burn the same way in every container and wax type. If possible, do a small test burn for wick sizes and types.
- Add Extras: Consider adding dried flowers, herbs, or glitter to your candle for a decorative touch.
Common Mistakes to Avoid
- Overheating Wax: Be cautious not to exceed 190°F (88°C) when melting wax as it can caramelize and alter the fragrance.
- Not Measuring Ingredients: Precision matters in candle making. Use a scale for the best results.
- Ignoring Safety: Always work in a well-ventilated area and keep a fire extinguisher handy.
Variations and Customization Ideas
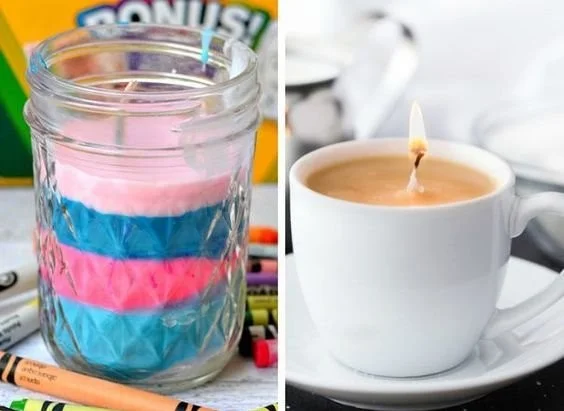
- Layered Candles: Pour different colored wax layers, allowing each layer to solidify before adding the next.
- Scent Combinations: Experiment with blending different fragrance oils for a unique scent profile.
- Molds vs. Containers: Use silicone molds to make decorative pillar candles instead of pouring into containers.
Storage and Shelf Life
Store your candles in a cool, dry place away from direct sunlight to prolong their life. Properly made candles have a shelf life of about 1-2 years when stored correctly.
Safety Tips
- Avoid using too many fragrance oils as it can make the candle burn unevenly.
- Monitor your candles while burning and do not leave them unattended.
- Keep candles away from drafty areas or flammable materials.
Frequently Asked Questions
Can I use essential oils instead of fragrance oils?
- Yes, essential oils can be used, but make sure they are suitable for candle making. The scent may not be as strong or last as long.
What type of containers are best for candles?
- Heat-resistant glass or metal containers are ideal. Avoid plastic as it can warp or melt.
How can I fix a sinkhole in my candle?
- If a sinkhole forms as your candle cools, simply remelt a small amount of wax and pour it over the affected area.
What’s the best way to prevent soot?
- Trim your wick to 1/4 inch and avoid burning your candle in drafty areas to minimize soot.
Can I reuse old candles?
- Yes! You can melt down leftover wax and pour it into new containers, just remember to clean the wick and container thoroughly.
Conclusion
Now that you have the steps and guidelines for making your own beautiful DIY candles, it’s time to get crafting! With just a few supplies, you can create custom candles perfect for any occasion. Whether you choose to enhance your home or surprise a loved one with a handmade gift, the joy of candle-making awaits. Don’t hesitate to experiment with colors, scents, and styles to truly make each candle uniquely yours! Happy crafting!