
Discover Simple Steps to Craft Beautiful Homemade Candles
Candles are not just a source of light; they’re a fantastic way to add warmth and ambiance to any space. Whether you are making them for Christmas gifts or to enhance your everyday decor, crafting your own homemade candles can be rewarding and enjoyable. In this guide, I’ll take you through the simple steps to create beautiful, personalized soy candles that will fill your home with delightful scents.
Why You Will Love This Recipe
Making your own candles allows you to unleash your creativity while controlling the ingredients, scents, and colors. Homemade candles make perfect gifts for friends and family, and they can be tailored to fit any occasion. Plus, the soothing activity of candle-making can serve as a delightful form of self-care. Let’s get started on this fun and rewarding DIY project!
Ingredients
To make approximately 4 standard-sized candles, you will need:
- Soy wax flakes: 2 pounds (making around four 8-ounce candles)
- Fragrance oil: 1-2 ounces (adjust depending on scent strength; choose your favorite scent)
- Color dye (optional): A few drops (select a dye appropriate for candle making)
- Wicks: 4 pre-wicked candle wicks (ensure the wick size is suitable for your container)
- Candle containers: 4 heat-resistant glass jars or tins (8-ounce size recommended)
- Wick holders or chopsticks: To keep the wicks centered
Equipment
Here’s what you’ll need for this candle-making project:
- Double boiler: For melting the wax safely
- Digital thermometer: To monitor the wax temperature
- Candle pour pitcher: Helpful for pouring melted wax into containers
- Stirring utensil: A wooden or stainless-steel stick for mixing
- Scale: To measure wax and fragrance accurately
- Protective gloves: For handling hot materials
Step-by-Step Instructions
1. Prepare Your Workspace
Choose a well-ventilated area and cover your work surface with newspaper or a disposable tablecloth to catch any spills.
2. Measure the Wax
Using a scale, measure out 2 pounds of soy wax flakes. This will allow you to create approximately four 8-ounce candles.
3. Melt the Wax
Fill your double boiler with water and heat on medium until it simmers. Pour the soy wax flakes into the top part of the double boiler, stirring occasionally. Monitor the temperature with your thermometer; aim for about 180°F (82°C) for optimal results.
4. Add Fragrance and Dye
Once the wax is fully melted, add your chosen fragrance oil. The general rule is to use 1 ounce of fragrance per pound of wax, but feel free to adjust if you prefer a stronger scent. If you want to add color, add dye drops now and stir until fully combined.
5. Prepare the Containers
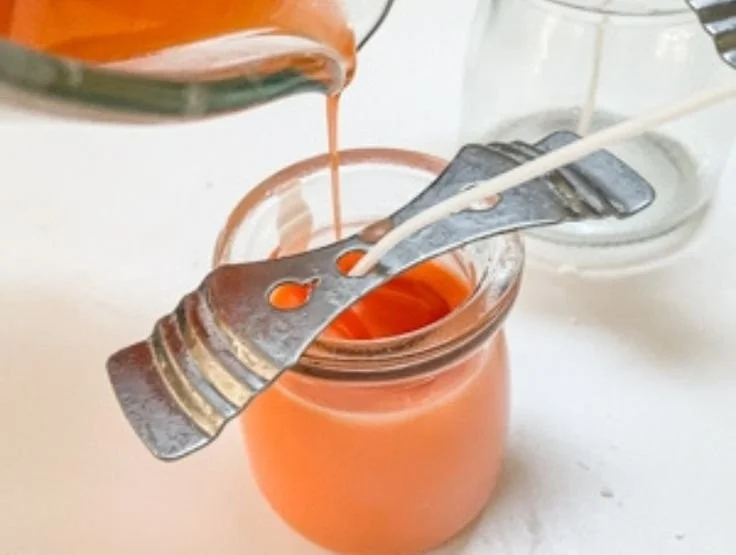
While waiting for the wax to cool slightly, secure your wicks in the center of each container using a bit of melted wax or a wick sticker. Use wick holders or chopsticks to keep the wick upright.
6. Pour the Wax
Allow the wax to cool to around 140-150°F (60-65°C) before pouring. Carefully pour the melted wax into each container, leaving about 1/4 inch from the top.
7. Secure the Wicks
Ensure that the wicks remain centered as the wax starts to cool. Adjust as needed.
8. Let the Candles Cure
Allow your candles to cool completely at room temperature; this usually takes a few hours. For the best scent throw, let your candles cure for about 48 hours before burning.
Tips for Success
- Choose the right container: Ensure it’s heat-resistant and suitable for candles to avoid cracking.
- Be mindful of temperature: Pouring the wax at the right temperature can help reduce issues like shrinkage or cracking.
- Use quality fragrance oils: Not all fragrance oils are created equal. Choose ones specifically meant for candles for the best outcome.
Common Mistakes to Avoid
- Not measuring correctly: Weigh your ingredients accurately for consistent results.
- Overheating the wax: Always melt wax slowly to prevent it from burning.
- Pouring too hot: Pouring wax that’s too hot can cause cracking as it cools.
Variations and Customization Ideas
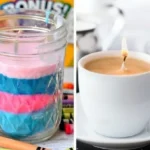
- Layered Candles: Pour different colors of wax one layer at a time for a beautiful layered effect.
- Essential Oils: Scale back fragrance oils and use essential oils for a natural alternative.
- Scent Combos: Mix scents like vanilla and lavender for a unique aromatic experience.
Storage and Shelf Life
Store your finished candles in a cool, dry place away from direct sunlight. Homemade candles can last up to 1 year if stored properly. Make sure to keep them in their containers to preserve scent and prevent dust accumulation.
Safety Tips
- Always melt wax using a double boiler rather than directly on an open flame to prevent accidents.
- Never leave melting wax unattended.
- Keep flammable materials away from your workspace.
Frequently Asked Questions
Q1: Can I use paraffin wax instead of soy wax?
Yes, although soy wax is preferred for its eco-friendliness. Paraffin wax is more traditional but not as sustainable.
Q2: How do I know what wick size to use?
Wick size depends on the container size and wax type. Candle-making supply websites often have wick size charts that can help.
Q3: Can I use food coloring in my candles?
It’s best to use candle-safe dyes, as food coloring may not blend well and could affect the candle’s burn quality.
Q4: How can I make my candles last longer?
Keep your candle wicks trimmed to 1/4 inch before lighting and avoid burning for more than 4 hours at a time.
Conclusion
Crafting your own homemade candles is a fulfilling and creative process that can brighten any corner of your home. With just a few simple materials and steps, you can create beautiful, personalized candles perfect for every occasion. So roll up your sleeves, gather your supplies, and let your imagination light the way! Happy candle-making!