
Unleash Your Creativity with This Easy DIY Scented Candle Recipe
Creating stunning scented candles at home is a delightful way to fill your space with aroma, warm your heart, and maybe even create handmade gifts for loved ones. This easy-to-follow DIY candle making recipe will walk you through everything you need—ingredients, equipment, and step-by-step instructions—so you can unleash your inner creative spirit.
Why You Will Love This Recipe
Making your own scented candles allows you to control the ingredients, fragrances, and aesthetic elements like color and container choice. You can create a cozy ambience for yourself or craft a meaningful gift for someone special. Plus, there’s nothing quite like illuminating your home with a candle that you’ve lovingly created yourself.
Ingredients
- Wax: 2 pounds of soy wax flakes (a popular eco-friendly option)
- Fragrance oil: 1–2 ounces (depending on how strong you’d like the scent)
- Dye (optional): Candle dye or crayon shavings for color
- Wicks: Pre-tabbed wicks suitable for your container size (length may vary)
- Container: Heat-safe glass jars or metal tins
Equipment
- Double boiler or microwave-safe container
- Thermometer (optional but helpful)
- Stirring utensil (wooden or silicone)
- Wick holder (can be a pencil or chopstick)
- Pouring pitcher (for easy transfer)
- Scale (for accurate measuring)
- Safety gloves and eyewear (for handling hot wax)
Step-by-Step Instructions
Prepare Your Workspace: Ensure your area is clean, and cover surfaces if necessary. Gather all your materials to have them within reach.
Measure Wax: Weigh out 2 pounds of soy wax flakes.
Melt Wax: Using a double boiler, melt the wax over medium heat. If you’re using a microwave, heat in short bursts (30 seconds at a time), stirring in between until melted.
Check Temperature: The wax should reach about 180°F (82°C) for optimal scent throw.
Add Fragrance: Remove the melted wax from heat and add fragrance oil. Stir well to combine; this is a great time to add color if desired.
Prepare Wicks: Secure the wick to the bottom of your container with a small amount of wax or with wick stickers.
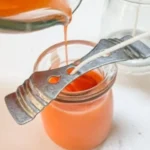
Pour Wax: Allow the wax to cool to about 150°F (65°C) before carefully pouring it into your container. Ensure the wick remains centered.
Secure Wick: Use a wick holder to keep the wick upright as the candle cools.
Cool Completely: Let the candle cool for several hours at room temperature.
Trim Wick: Once set, trim the wick to about 1/4 inch above the wax.
Cure: For optimal scent throw, let your candles sit for at least 48 hours before burning.
Tips for Success
- Testing Fragrance: Always test a small batch before a larger one to see how the fragrance develops.
- Environment: Keep the work area free from drafts, which can cause uneven cooling.
- Wick Sizing: Use a wick testing guide or burn test small samples to find the right size for your jar.
Common Mistakes to Avoid
- Overheating Wax: Avoid exceeding temperatures above 200°F (93°C) as it can degrade the wax and scent.
- Not Stirring Enough: Make sure to completely stir in the fragrance to avoid uneven scent distribution.
- Using the Wrong Type of Wick: Ensure the wick is suitable for the size of your container to prevent tunneling or excessive soot.
Variations and Customization Ideas
- Fragrance Combinations: Mix and match different fragrance oils like vanilla and cinnamon for a comforting aroma or citrus and eucalyptus for a refreshing scent.
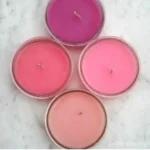
- Color Options: Use natural dyes for a more organic touch or experiment with different shades to match your decorations.
- Container Choices: Get creative with containers! You could use teacups, mason jars, or decorative tins.
Storage and Shelf Life
Store your candles in a cool, dry place away from direct sunlight. If kept properly, homemade candles can last up to 1-2 years.
Safety Tips
- Always work in a well-ventilated area while melting wax.
- Wear safety gloves and eyewear if desired to protect against splashes.
- Never leave melting wax unattended and keep it away from flammable materials.
Frequently Asked Questions
1. Can I use essential oils instead of fragrance oils?
Yes! However, keep in mind that essential oils may not throw scent as well as synthetic fragrance oils. Adjust the amount accordingly.
2. How do I know if my candle wick is the right size?
Perform a burn test—light the candle for 1-2 hours. If the flame is too high or too low, you may need to change the wick size.
3. Can I reuse old candles?
Yes! Melt down the wax remnants and create new candles. Just ensure the old wick and fragrances are compatible.
4. What should I do if my candle cracks?
Cracks can occur if the candle cools too quickly. To fix this, re-melt the top and pour a thin layer of wax over it to smooth out.
5. Can I add herbs or flowers to my candles?
Yes! Just make sure they are dried and safe for burning. Certain materials can alter the wick’s performance.
Conclusion
Creating your own stunning scented candles is not only enjoyable but also allows for personalization and creativity. With this easy DIY recipe, you can transform simple ingredients into beautiful, aromatic treasures that brighten your home or serve as thoughtful gifts. So gather your materials, unleash your creativity, and enjoy the warm, inviting glow of your homemade candles! Happy crafting!