
Making Scented Beeswax Candles with Essential Oils
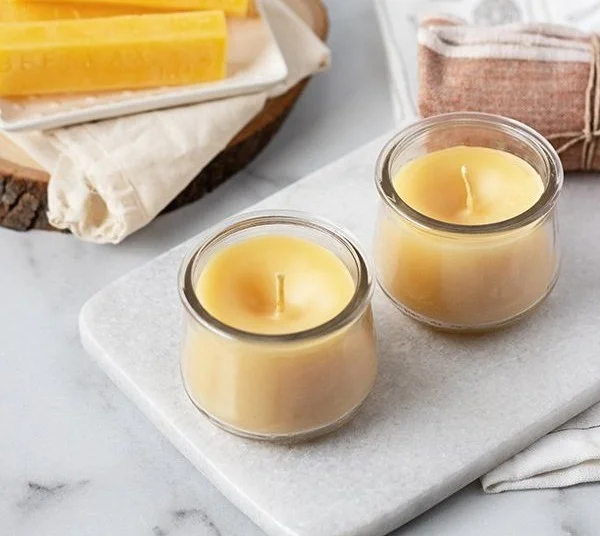
Creating your own scented beeswax candles is not only a rewarding DIY project, but it allows you to customize aromas and have complete control over the ingredients in your candles. These natural candles can fill your home with lovely scents and can be made using just a few simple ingredients. In this article, I will guide you step-by-step on how to make scented beeswax candles with essential oils, along with tips to ensure your success.
Why You Will Love This Recipe
Scented beeswax candles are known for their natural properties and pleasant aromas. Unlike paraffin candles, beeswax burns cleaner and emits negative ions, which can purify the air. Here are a few more reasons you’ll love making these candles:
- Natural Fragrances: Choosing your own essential oils means you can avoid synthetic fragrances.
- Customization: You can mix and match scents for a personalized aroma.
- Eco-Friendly: Beeswax is a renewable resource and biodegradable.
Ingredients
For this candle-making project, you will need the following:
- Beeswax: 1 pound (approximately 454 grams)
- Essential Oils: 1 ounce (about 30 milliliters) of your favorite oils (lavender, eucalyptus, or citrus blends are great choices)
- Wicks: Cotton or wooden wicks (choose a size suitable for your container)
- Containers: Glass jars, tin cans, or silicone molds
Equipment
To make your candles, gather these items:
- Double boiler or a heat-safe bowl and pot
- Thermometer (optional, but useful)
- Stirring spoon (preferably wooden or silicone)
- Pouring pitcher or a ladle
- Scale (for measuring wax and oils)
- Wick holder or chopsticks (to secure wicks in place)
Step-by-Step Instructions
Step 1: Prepare Your Work Area
Make sure your workspace is clean and organized. Cover surfaces with newspaper or a disposable tablecloth to catch any wax spills.
Step 2: Measure the Ingredients
- Weigh out 1 pound of beeswax.
- Measure out 1 ounce of essential oils (you can adjust this based on your fragrance preference).
Step 3: Melt the Beeswax
- Set up your double boiler by filling the bottom pot with water and bringing it to a gentle simmer.
- Place the beeswax in the top bowl and allow it to melt slowly, stirring occasionally until fully liquefied. This usually takes about 15-20 minutes.
Step 4: Add Essential Oils
- Once the beeswax is melted, remove it from heat.
- Allow the wax to cool slightly, around 140°F (60°C).
- Stir in your essential oils thoroughly to ensure an even distribution of fragrance.
Step 5: Prepare Wicks
- While the wax is cooling, secure the wicks in your containers. You can attach them temporarily using a bit of melted wax at the bottom, or use wick holders.
- Make sure the wick is centered for even burning.
Step 6: Pour the Wax
- Carefully pour the melted wax into your prepared containers, leaving about half an inch at the top.
- Ensure that the wick remains centered as you pour.
Step 7: Let the Candles Cool
- Allow the candles to cool completely at room temperature, which typically takes about 2-3 hours.
- Trim the wicks to about ¼ inch above the wax once fully cooled.
Tips for Success
- Temperature Matters: Be mindful of the temperature when adding essential oils; too hot can affect the oils’ fragrant qualities.
- Experiment with Scents: Don’t be afraid to mix different essential oils to create unique fragrances.
- Control Your Pouring: A steady hand will help you avoid air bubbles and an uneven surface.
Common Mistakes to Avoid
- Too Much Fragrance: Adding more than the recommended amount of essential oil can prevent the candle from burning properly.
- Ignoring Wick Size: Using a wick that is too small or large for your container can cause uneven burning.
- Not Securing the Wick: Ensure the wick is secured to prevent it from leaning or falling over during the pouring process.
Variations and Customization Ideas
- Layered Colors: You can create beautiful layered candles by pouring different colors of wax (again, beeswax can be dyed using natural colorants).
- Additives: Consider adding dried herbs or flowers to your candles for a decorative touch, but be sure they are safe to burn.
- Container Alternatives: Experiment with different sized containers for varying burn times and styles.
Storage and Shelf Life
Store your finished candles in a cool, dry place away from direct sunlight. Properly stored, beeswax candles can last for years. Keep in mind that the scent can diminish over time, so it’s best to use them within a year for optimal fragrance.
Safety Tips
- Always work in a well-ventilated area, especially when melting wax and adding essential oils.
- Avoid leaving melting wax unattended.
- Never allow wax to exceed 200°F (93°C), as it can become a fire hazard.
- If using a stove, keep a fire extinguisher nearby.
Frequently Asked Questions
1. Can I use other wax types?
Yes, but remember that different waxes have different burning qualities and scent throw properties.
2. How do I clean up wax spills?
Use warm soapy water or a bit of rubbing alcohol on a cloth for sticky residue.
3. Why is my candle not burning evenly?
This could be due to a wick that is too small or misaligned. Ensure proper wick sizing and centering before pouring.
4. Are there any allergens in essential oils I should be aware of?
Yes, some essential oils can cause allergic reactions. Always check the oil’s details and perform a patch test if needed.
Conclusion
Making scented beeswax candles with essential oils is a fun and fulfilling project that allows you to express your creativity while enjoying the warm glow and delightful scents that fill your home. With these detailed instructions and helpful tips, you are well-equipped to create beautiful candles that can even be thoughtful, handmade gifts for loved ones. Enjoy your candle-making experience, and let the aromas transform your space!