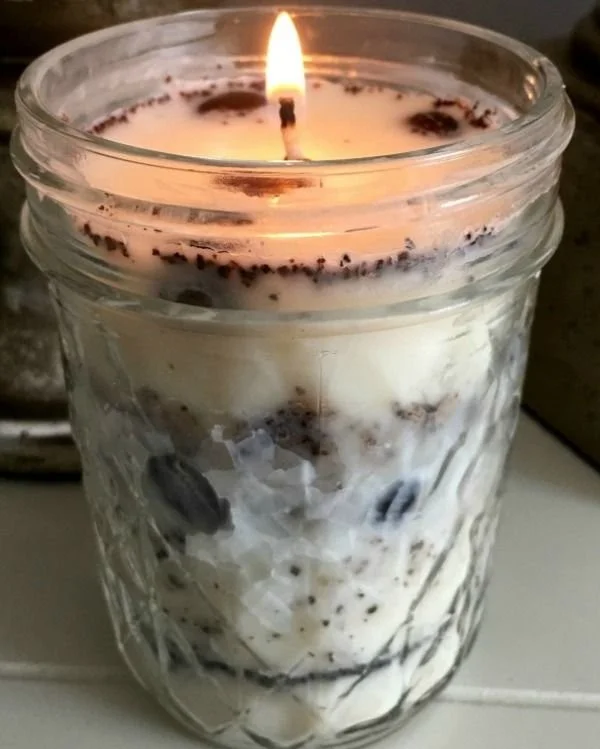

Homemade Coffee Bean Soy Candle
Creating your own candles can be a rewarding and enjoyable experience, especially when you tailor them to match your personal preferences and aromatic desires. One delightful variation is the homemade coffee bean soy candle. These candles not only smell fantastic, but they also add a warm ambiance to any space. In this guide, I’ll walk you through the process of making your own coffee bean soy candle from scratch, providing helpful tips along the way.
Why You Will Love This Recipe
- Unique Aroma: The rich, warm scent of coffee can uplift your mood and create a cozy atmosphere.
- Eco-Friendly Ingredients: Using soy wax makes this candle a more sustainable choice compared to paraffin.
- Customizable: You can adjust the scent and look of your candle to fit any occasion or preference.
- Perfect Gift: Handmade candles make thoughtful and personalized gifts for friends and family.
Ingredients
- Soy Wax: 1 pound (about 454 grams)
- Coffee Beans: 1/2 cup (finely crushed for a stronger fragrance)
- Fragrance Oil: 1 ounce (coffee-scented or your preferred scent)
- Dye (optional): Candle dye in brown or caramel color, according to your preference
- Wicks: 1 or 2 cotton or wood wicks, appropriate for the size of your container
- Container: Heat-resistant glass jars or metal tins, 8-ounce size recommended
Equipment
- Double boiler or a microwave-safe container
- Thermometer
- Stirring spoon
- Wick holder (you can use a chopstick or pencil)
- Scale (for measuring ingredients)
- Pouring pitcher (optional, for easy pouring)
Step-by-Step Instructions
Preparation Time: 15 minutes
Making Time: 2 hours (including cooling)
Approximate Yield: 2 candles (8 ounces each)
Melt the Wax:
- If using a double boiler, fill the bottom pot with water and place it on the stove over medium heat. Add soy wax to the top pot and allow it to melt, stirring occasionally.
- If using a microwave, place the soy wax in a microwave-safe container and heat in 30-second intervals until completely melted.
Add Coffee Beans:
- Once the wax is melted, carefully add the finely crushed coffee beans. This will infuse your candle with a delightful coffee scent. Stir gently to combine.
Incorporate Fragrance:
- Remove the melted mixture from heat and let it cool to about 185°F (85°C). Then add the coffee fragrance oil and optional dye. Mix thoroughly.
Prepare the Wick:
- Secure the wick at the bottom of your container using a bit of melted wax or a wick sticker. Ensure it stands upright by using a wick holder or centering stick.
Pour the Candle:
- Gently pour the wax mixture into your prepared containers, filling them about 1 inch from the top. Be careful not to disturb the wick as you pour.
Set and Cool:
- Allow the candles to cool at room temperature for several hours or until completely hardened.
Trim the Wick:
- Once cooled, trim the wick to about 1/4 inch from the surface of the candle.
Cure Your Candles:
- For the best scent throw, allow your candles to cure for at least 48 hours before burning.
Tips for Success
- Temperature Monitoring: Always use a thermometer to ensure the wax is at the correct temperature for adding fragrance and pouring to prevent issues with scent throw.
- Quality Fragrance: Invest in quality fragrance oils specifically made for candles to enhance your results.
- Pre-Test Wicks: Different wicks can produce varying results; consider testing a few to determine which works best for your candle size and wax type.
Common Mistakes to Avoid
- Not Monitoring Temperatures: Adding fragrance oil at the wrong temperature can lead to a loss of scent.
- Overcrowding with Coffee Beans: Too many coffee beans can disrupt the burning process; stick to the recommended amount.
- Improper Wick Size: Using a wick that is too small will result in poor melt pools, while too large will cause soot and uneven burns.
Variations and Customization Ideas
- Add Essential Oils: Instead of synthetic fragrance oils, you can use essential oils for a natural twist.
- Mix Different Scents: Combine coffee with vanilla or chocolate scents for a unique blend.
- Color Variations: Experiment with different dyes for visually appealing candles.
Storage and Shelf Life
Store your finished candles in a cool, dry place, away from direct sunlight. Properly stored, soy candles can last up to 12 months.
If you notice any cracks or imperfections after cooling, don’t worry; they are cosmetic and won’t affect burn quality.
Safety Tips
- Always work in a well-ventilated area when melting wax and adding fragrance oils.
- Use heat-resistant containers to avoid breakage.
- Never leave candles unattended while burning.
- Keep candles away from flammable materials and out of reach of children and pets.
Frequently Asked Questions
Can I use other wax types?
Yes, while soy wax is preferred for its easy melting and burning properties, you can experiment with beeswax or paraffin, keeping in mind they may require slightly different handling.What if my candle doesn’t burn evenly?
This could be due to incorrect wick size or placement. Testing various wick types may help correct this issue.How can I strengthen the aroma of my candle?
Use higher-quality fragrance oils and increase the amount slightly, while ensuring you do not exceed recommended guidelines.Can I reuse candle containers?
Absolutely! Just make sure to clean out any remaining wax thoroughly before pouring another candle.What should I do if my candle has sinkholes?
You can patch sinkholes with a bit of melted wax or remelt and pour in a second layer if needed.Is it necessary to let candles cure?
Curing improves scent throw and burn quality, yet it’s not strictly necessary. However, allowing them to sit for a few days is highly recommended.
Conclusion
Making a homemade coffee bean soy candle is a delightful DIY project that can brighten up your home or serve as a meaningful gift. Not only do you get to enjoy the wonderful scent of coffee, but you also have the satisfaction of creating something special. With various customization options and an eco-friendly approach, you can tailor your candles to fit your perfect aesthetic. Gather your ingredients, follow the steps, and soon you will have beautiful candles that brighten any room! Enjoy the process and happy candle making!