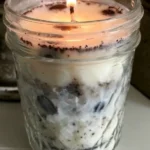

Make Your Own Coffee Bean Candles: A Step-by-Step Guide
Creating homemade candles is a fun and satisfying way to add a personal touch to your living space. When you make coffee bean candles, not only do you get a beautiful artisanal piece, but you also enjoy the aromatic essence of coffee every time you light one. Whether you’re seeking a cozy atmosphere or a thoughtful handmade gift, this guide will take you through the process step-by-step.
Why You Will Love This Recipe
Coffee bean candles are a fantastic project for DIY enthusiasts and beginners alike. The warm, inviting scent of coffee can help you unwind after a long day, evoke memories of cozy café visits, and even brighten up your home décor. Plus, making your own candles allows you to tailor them to your personal style and fragrance preferences.
Ingredients
To create your coffee bean candles, you’ll need the following:
- Wax Type: 2 pounds of soy wax (preferred for its clean burn)
- Coffee Beans: 1 cup of whole coffee beans
- Fragrance Oil: 1 ounce of coffee-scented fragrance oil (optional, for a stronger aroma)
- Dye (optional): Candle-safe dye for coloring the wax (suggested: brown or cream shades)
Equipment
Gather these essential tools for your candle-making session:
- Double boiler or a microwave-safe container
- Heat-resistant container (such as glass jars or metal tins) for your candles
- Candle wicks with a suitable wick holder (pre-waxed wicks work best)
- Thermometer
- Stirring utensil (a wooden stick or spoon)
- Pouring pitcher or a ladle
- Scale (to measure wax precisely)
- Wick centering device (or tape to hold wicks in place)
Step-by-Step Instructions
Preparation Time: 10 minutes
Making Time: 1 hour
Yield: Approximately 4 candles (depending on container size)
Prepare Your Work Space: Choose a well-ventilated area for candle making. Lay down newspaper or a disposable covering to protect your surfaces.
Measure the Wax: Weigh out 2 pounds of soy wax using your scale. This amount will fill about 4 standard candle containers (8 oz each).
Melt the Wax: Using a double boiler, melt the wax until it reaches a temperature of 170–180°F (77–82°C). Stir occasionally with your stirring utensil. If using a microwave, heat in 30-second bursts, stirring in between until fully melted.
Add Fragrance (optional): Once melted, add your coffee-scented fragrance oil and stir thoroughly to ensure it’s evenly distributed.
Prepare the Containers: Place your wick in each candle container using a wick holder or securing method. You can attach the wick to the bottom with a small adhesive dot or tape.
Incorporate Coffee Beans: Once the wax is at the right temperature (below 180°F or 82°C), carefully pour a small amount of wax into each container to create a base. Allow it to set for a few minutes until it begins to harden. Then, add a layer of whole coffee beans to each container, pressing them gently into the wax.
Fill the Containers: Pour the remaining melted wax over the coffee beans, ensuring they are covered. Leave about half an inch of space at the top.
Cool and Set: Let your candles cool completely at room temperature, which may take about one to two hours. Once they are set, trim the wick to about 1/4 inch above the wax.
Tips for Success
- Wick Size Matters: Ensure you use the appropriate wick size for your container. Too small a wick will produce weak flames, while a too-large wick will burn too hot, leading to soot or excessive dripping.
- Temperature Control: Monitor the temperature closely when adding fragrance and pouring the wax to retain scent and color integrity.
- Spacing Coffee Beans: If you prefer a stronger coffee aroma, you can fill the container more densely with coffee beans; just ensure the wick remains unobstructed.
Common Mistakes to Avoid
- Skipping Wick Testing: Each candle may require a different wick size or type. Always test to ensure even burning.
- Overheating Wax: Heat wax gradually, as excessive heat can degrade the fragrance oil and lead to a poorer scent throw.
- Pouring Too Quickly: Pouring too quickly can create bubbles. Always pour gently to ensure a smooth finish.
Variations and Customization Ideas
- Coffee Bean Blend: Mix in different whole beans like espresso or flavored beans (vanilla, hazelnut) for unique aromas.
- Color: Use candle dye to change the wax color. A rich brown or cream can complement the coffee theme nicely.
Storage and Shelf Life
Store your finished candles in a cool, dry place away from direct sunlight. When stored correctly, coffee bean candles can last for up to 1 year, allowing you to enjoy them or give them as gifts throughout the seasons.
Safety Tips
- Always monitor your melted wax to avoid overheating.
- Never leave burning candles unattended.
- Keep candles away from flammable materials and out of reach of pets and children.
Frequently Asked Questions
Q1: Can I use other types of wax besides soy?
A1: Yes, you can use paraffin, beeswax, or palm wax, but ensure they are suitable for candle making.
Q2: What should I do if my wick keeps sinking into the wax?
A2: This is often due to the wick being too thin. You can try using a thicker wick next time and ensure it’s secured well at the bottom.
Q3: How strong is the scent of coffee in the candle?
A3: The scent can vary based on the amount of fragrance oil added and the quality of the coffee beans.
Q4: Can I reuse candle containers?
A4: Absolutely! Just clean them thoroughly after use, removing any residual wax.
Q5: Is it safe to inhale the fragrance oil?
A5: Fragrance oils are generally safe when burned as candles, but always ensure that the area is well-ventilated.
Conclusion
Making coffee bean candles combines creativity with functionality, resulting in a delightful home scent and a cozy atmosphere. With just a few simple ingredients and the right equipment, you can craft your own candles that are perfect for personal use or as gifts. Don’t hesitate to experiment with different coffee beans and fragrance combinations to find your perfect blend. Happy candle making!