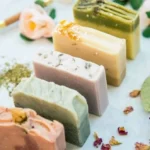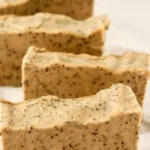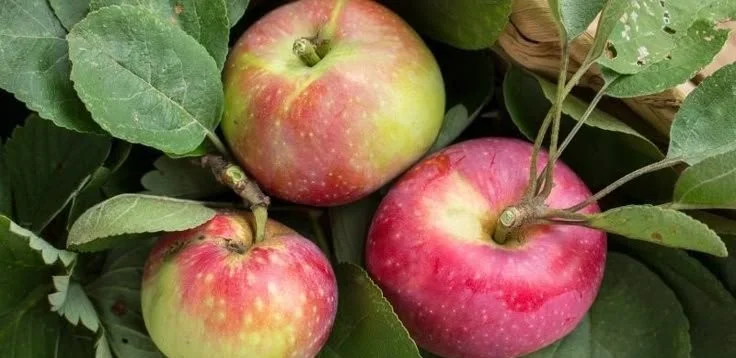

Natural Palm-Free Soap Recipe with Fresh Apple Cider and Spicy Essential Oils
Are you looking to create a delightful homemade soap that not only cleanses but also brings a warm, inviting aroma to your home? This natural palm-free soap recipe features fresh apple cider combined with a cozy blend of spicy essential oils, making it perfect for your seasonal soap-making adventures. In this guide, you’ll learn everything you need to know to create your very own bar of soap, from the ingredients to the step-by-step process.
Why You Will Love This Recipe
The beauty of homemade soap lies in its ability to provide you with a unique product that perfectly suits your preferences. Here’s why you’ll adore this natural palm-free soap recipe:
- Natural Ingredients: Using fresh apple cider adds a lovely apple fragrance and antioxidants, while spicy essential oils offer a warm, comforting scent.
- Palm-Free: This recipe avoids palm oil, making it a more sustainable choice for environmentally-conscious crafters.
- Customizable: You can tailor it to suit your own scent preferences or skin type!
Ingredients
For this soap recipe, you’ll need the following ingredients:
- Distilled Water: 6 oz (170 g)
- Sodium Hydroxide (Lye): 2.5 oz (71 g)
- Olive Oil: 10 oz (283 g)
- Coconut Oil: 6 oz (170 g)
- Castor Oil: 2 oz (57 g)
- Fresh Apple Cider: 4 oz (113 g) (make sure it is unfiltered and free from preservatives)
- Essential Oils:
- Cinnamon Essential Oil: 1 tsp
- Clove Essential Oil: ½ tsp
- Sweet Orange Essential Oil: 1 tsp
- Optional Colorant: Natural colorants like paprika or turmeric
Equipment
To make your soap, gather the following equipment:
- Digital scale
- Safety goggles and gloves
- Heat-resistant mixing bowls (glass or stainless steel)
- Stick blender
- Soap mold (silicone or lined with parchment paper)
- Thermometer
- Spatula
- Measuring spoons
- Stick blender
- Safety equipment (ventilation mask if sensitive to fumes)
Step-by-Step Instructions
Preparation Time
- Prep Time: 15 minutes
- Cure Time: 4-6 weeks
- Yield: Approximately 10-12 bars of soap
Steps to Make Your Soap
Prepare Your Workspace: Ensure your area is clean and well-ventilated. Gather all your ingredients and equipment, and put on your gloves and goggles.
Lye Solution: Weigh out the distilled water in a heat-resistant bowl. Slowly add the sodium hydroxide to the water (never the other way around) and stir until it’s fully dissolved. Be cautious, as this solution will get hot and produce fumes.
Mixed Oils: In a separate bowl, weigh and combine the olive oil, coconut oil, and castor oil. Heat gently until melted and combined, then allow to cool to around 100°F (38°C).
Cider Addition: Once the lye solution and oil mixture are both around 100°F, slowly add the fresh apple cider to the oils and mix well.
Combine Lye and Oils: Carefully pour the lye solution into the oils while blending with a stick blender. Blend until you reach a thin trace (when the mixture leaves a trail on the surface).
Add Essential Oils: Mix in your essential oils until well incorporated. If you are using colorants, mix them in at this stage.
Mold the Soap: Pour the mixture into your soap mold. Tap the mold lightly on the counter to remove air bubbles.
Insulate: Cover the mold with a towel and let it sit for 24-48 hours to complete the saponification process.
Unmold and Cut: Once the soap is firm, carefully remove it from the mold and cut it into bars.
Curing: Place the cut bars on a drying rack in a cool, dry area for about 4-6 weeks to cure.
Tips for Success
- Temperature: Pay attention to the temperatures of your lye solution and oils; they should be similar for a smoother emulsion.
- Stick Blender: Avoid blending for too long, as it can lead to a thicker trace that makes pouring difficult.
Common Mistakes to Avoid
- Adding Lye Incorrectly: Always add lye to water, not the other way around; this prevents dangerous reactions.
- Skipping Safety Gear: Never skip on safety goggles and gloves when handling sodium hydroxide.
Variations and Customization Ideas
This recipe can easily be customized. Consider the following options:
- Different Essential Oils: Experiment with essential oils like nutmeg or ginger for a different spicy scent.
- Additives: You can include dried herbs (like cinnamon bark powder) or natural exfoliants (like oatmeal) for texture.
Storage and Shelf Life
Properly cured soap should be stored in a cool, dry place away from direct sunlight. Ideally, keep the bars in a well-ventilated area, and use them within one year for optimal freshness.
Safety Tips
- Always handle sodium hydroxide with care, as it can cause burns. Ensure good ventilation in your workspace.
- Wear protective gear, including gloves and goggles, during the entire soap-making process.
- Keep lye and soap products out of reach of children and pets.
Frequently Asked Questions
Q1: Can I use store-bought apple cider instead of fresh?
Yes, store-bought apple cider works fine, just ensure it is free from preservatives for best results.
Q2: What can I do if my soap trace becomes too thick?
If the trace becomes too thick, immediately pour it into the mold; you can also remedy it by adding a little bit of warmth while blending.
Q3: How do I know when my soap is fully cured?
Cured soap should be hard to the touch and free from any excess moisture or stickiness.
Q4: Can I use other oils instead of olive and coconut?
Absolutely! Just make sure to recalculate your lye based on the new oil amounts using a reliable soap calculator.
Q5: How can I create a decorative effect on my soap?
You can swirl in some color or use a spoon to create patterns before it sets in the mold.
Conclusion
Making your own palm-free soap with fresh apple cider and a cozy blend of essential oils is a rewarding project that brings both personal satisfaction and a lovely handmade product. Whether you choose to keep your soap bars or gift them to friends, this recipe offers a delightful way to embrace the art of soap-making. So gather your ingredients and equipment, and embark on your DIY soap adventure today! Happy crafting!