
Homemade Coffee Soap Recipe: The Perfect Exfoliating Bar for Coffee Lovers
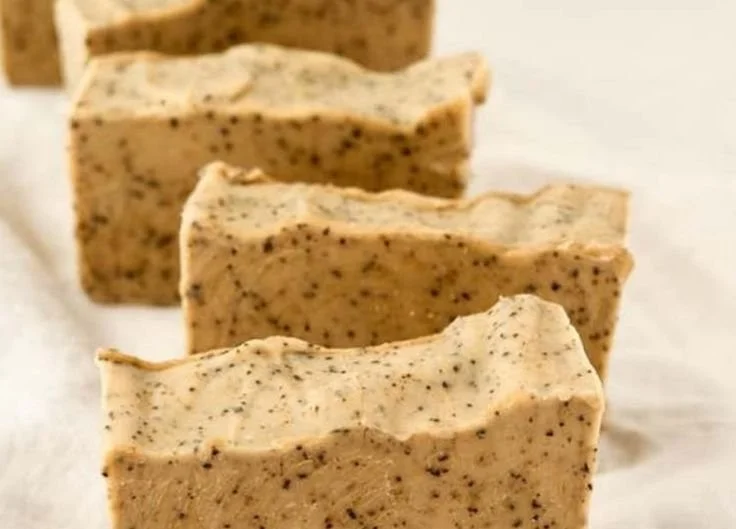
Are you a coffee enthusiast looking for an innovative way to incorporate your love for coffee into your daily routine? This DIY coffee soap recipe is the perfect blend of exfoliation and moisturization, utilizing coffee grounds and brewed coffee to create a stunning bar of soap. Whether you’re new to soap making or an experienced DIY maker, this guide will walk you through every step of the process, ensuring that your handmade soap turns out beautifully.
Why You Will Love This Recipe
Exfoliating Properties: Coffee grounds are nature’s little exfoliators. They help to remove dead skin cells, revealing fresh, glowing skin underneath.
Natural Color and Aroma: Using brewed coffee not only imparts a lovely brown hue to the soap but also adds a delightful coffee scent that can energize your shower routine.
Moisturizing Boost: A well-balanced blend of oils in this recipe ensures a moisturizing outcome, perfect for dry skin.
Easy to Customize: This basic recipe provides a great jumping-off point for various additions. You can play around with scents, colors, and even extra exfoliants to suit your preferences.
Ingredients
For this coffee soap, you will need:
- 2 cups of melt-and-pour soap base (clear or opaque)
- 1/4 cup brewed coffee (cooled to room temperature)
- 2 tablespoons coffee grounds (used or fresh)
- 1 tablespoon coconut oil (for added moisture)
- 1 teaspoon vanilla essential oil (optional, for fragrance)
- Soap colorant (optional, depending on your color preference)
Equipment
Ensure you have the following tools before starting your soap-making journey:
- A microwave-safe bowl or double boiler
- A spatula or stirring stick
- Soap molds (silicone molds work great for easy release)
- A thermometer
- A scale (for accurate measurements, if not using cups)
- Safety goggles and gloves (recommended for personal safety)
Step-by-Step Instructions
Making homemade coffee soap is a straightforward process. Let’s dive into the details:
Prepare Your Workspace: Start by cleaning and sterilizing your workspace. Gather all necessary ingredients and tools.
Melt the Soap Base: Cut the melt-and-pour soap base into small chunks. Place the pieces in a microwave-safe bowl or double boiler. If using a microwave, heat in 30-second intervals, stirring in between until fully melted. If you’re using a double boiler, bring water to a gentle simmer, then place the soap base in the top pan, stirring until melted.
Mix in Coffee: Once your soap base has melted completely, remove it from the heat. Let it cool slightly (to about 120°F or 49°C) before adding the brewed coffee, coffee grounds, coconut oil, and any optional fragrance or colorant. Stir well to combine.
Pour into Molds: Carefully pour the mixture into your soap molds. Leave a little space at the top, as the soap might expand slightly when cooling.
Cool and Set: Allow the soap to cool at room temperature for several hours or in the refrigerator for about 30 minutes to speed up the process.
Unmold Your Soap: Once fully set, gently pop the soap out of the molds.
Tips for Success
Quality Ingredients: Use high-quality brewed coffee for the best results. The flavor and scent will make a significant difference in your final product.
Avoid Overheating: Overheating the soap base can result in a burnt smell or texture. Keep an eye on it as it melts.
Don’t Rush Cooling: Let the soap set completely before unmolding to avoid any deformation.
Common Mistakes to Avoid
Skipping the Coffee Grounds: These are what give your soap exfoliating properties. Skipping them means losing out on the unique benefits they offer.
Incorrect Measurements: Always measure accurately to ensure consistency in your soap-making process.
Overdoing Fragrance or Colorant: A little goes a long way. Too much can affect the soap’s texture and may result in an unfavorable scent or color.
Variations and Customization Ideas
Add Essential Oils: Incorporate other essential oils like peppermint, eucalyptus, or cinnamon for added fragrance and benefits.
Include Other Exfoliants: Try incorporating oats, sugar, or even dried citrus zest to diversify the texture.
Create Layers: Pour different colored soap mixtures one at a time to create aesthetically pleasing layers in your soap.
Storage and Shelf Life
Once your soap is ready, store it in a cool, dry place away from direct sunlight. Properly wrapped, your bars should last up to 6 months. Avoid keeping them in a humid environment, as this can cause soap to sweat and deteriorate.
Safety Tips
General Precautions: Always make soap in a well-ventilated area. If you’re using lye in a different recipe, remember that sodium hydroxide is hazardous. Wear gloves and safety goggles, and keep lye away from skin and eyes.
Cooling Soap Properly: Do not rush the cooling process; sudden temperature changes can cause cracking.
Frequently Asked Questions
1. Can I use instant coffee instead of brewed coffee?
Yes, you can, but brewed coffee provides a richer scent and color. Instant coffee might result in a grainy texture.
2. How can I enhance the coffee scent?
If you want a stronger coffee scent, consider using coffee essential oil or more brewed coffee, but be cautious not to change the consistency dramatically.
3. What do I do if my soap doesn’t unmold easily?
If soap sticks to the mold, place it in the freezer for 10-15 minutes, and then try again.
4. Can I use other oils instead of coconut oil?
Absolutely! Olive oil, almond oil, or even shea butter can replace coconut oil but may alter the moisturizing effects slightly.
5. How do I know when my soap is fully cured and ready to use?
Melt-and-pour soap is ready to use immediately after unmolding, while cold process soap typically takes 4-6 weeks to cure.
6. Will the coffee grounds affect the shelf life?
The coffee grounds can potentially introduce moisture, but as long as the soap is stored properly, it should not greatly affect its shelf life.
Conclusion
Making your own homemade coffee soap is not only a fun and fulfilling DIY project but also allows you to indulge in your love for coffee every time you wash your hands. With simple ingredients and straightforward instructions, you can create an exfoliating, aromatic bar of soap that makes for a perfect gift or a delightful treat for yourself. So gather your supplies and dive into this rewarding crafting adventure—you won’t regret it! Enjoy the process and, most importantly, have fun!