
Candle Making Basics: Your Guide to Selling Homemade Candles
Candle making is a delightful and fulfilling activity that can transform your home into a fragrant sanctuary. Whether you’re interested in producing stunning handmade gifts for friends and family or looking to turn your passion into a small business, learning how to make candles is a fantastic skill to have. In this guide, we’ll cover the essentials of candle making, including simple recipes, essential tools, and tips for success.
Why You Will Love This Recipe
Making candles at home allows you to unleash your creativity while enjoying the therapeutic process of crafting. You can customize scents, colors, and shapes, making it truly a personal endeavor. Plus, candles are popular handmade gifts that can easily be sold at local markets, online platforms, or even at craft fairs.
Ingredients
To start your candle-making journey, you’ll need the following ingredients:
- Wax: A popular choice is soy wax (at least 1 pound for every 2-3 candles). Soy wax is a natural, renewable resource and is known for its clean burn.
- Fragrance oils: Approximately 1 ounce (or 2 tablespoons) per pound of wax. Choose essential or fragrance oils that you love—lavender, vanilla, and eucalyptus are popular options.
- Dye (optional): Candle dye chips or liquid dye can be used for coloring your candles. Use sparingly, usually a few chips or drops for volume.
- Wicks: The size depends on your container size. A good starting point is a medium cotton wick for an 8-ounce container.
Equipment
You’ll also need some specific tools and equipment to make the process smooth:
- Double boiler: This can be a dedicated tool or a makeshift one using a pot and heat-resistant bowl.
- Thermometer: To measure wax temperature accurately.
- Stirring utensil: A wooden skewer or spoon, for blending wax and fragrance.
- Containers: Glass or metal candle containers to hold your finished candles.
- Wick holder: This helps keep the wick centered while the wax sets.
Step-by-Step Instructions
Preparation Time: 15 minutes
Making Time: 1 to 2 hours
Yield: Approximately 2 to 3 medium candles (8 ounces each)
Prepare Your Work Area: Clear your workspace and gather all your materials. Ensure you are in a well-ventilated area.
Measure Your Wax: Use a kitchen scale to measure out the soy wax into your double boiler (about 1 pound for 2-3 candles).
Melt the Wax: Fill the bottom part of the double boiler with water, and bring to a gentle simmer. Place the wax in the top pot and stir occasionally until melted, usually about 10-15 minutes.
Add Dye (If Desired): If you want to color your candles, add a few dye chips to the melted wax and mix thoroughly until dissolved.
Check the Temperature: Use your thermometer to monitor the wax temperature. For fragrance addition, the optimal temperature is usually between 185°F and 200°F (85°C to 93°C).
Incorporate Fragrance: Remove the wax from heat and add your chosen fragrance oil (about 1 ounce per pound of wax). Stir well for about 2 minutes to ensure even distribution.
Attach the Wick: Before pouring the wax, secure the wick in the center of each container using a wick sticker or a drop of melted wax. Use a wick holder to keep it upright.
Pour the Wax: Slowly and carefully pour the melted wax into the prepared containers. Leave a small gap at the top (approximately ¼ inch).
Allow to Cool: Let the candles cool undisturbed for several hours until they are fully set.
Trim the Wick: Once set, trim the wick to about ¼ inch above the wax surface.
Tips for Success
Wick Testing: For consistent burning, test different wick sizes to find the best fit for your wax and container size. A wick that is too small can produce a weak flame and insufficient scent throw, while one that is too large can lead to soot and uneven burns.
Cool Gradually: Allow candles to cool at room temperature. Rapid cooling can cause cracks.
Common Mistakes to Avoid
Overheating Wax: Always melt wax slowly and never exceed the recommended temperatures, as it can affect the quality.
Not Calculating Fragrance Load: Using too little fragrance can lead to weak-scented candles, while too much may cause issues with soot or pooling on the surface.
Variations and Customization Ideas
Scent Combinations: Experiment with mixing different fragrance oils. A combination of lavender and vanilla can create a soothing aroma, while lemon and eucalyptus can invigorate your space.
Container Choices: Try different materials like mason jars, tea cups, or even ceramic bowls to create unique candle presentations.
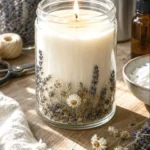
Decorative Elements: Consider adding dried flowers, herbs, or spices inside your candles for visual appeal and subtle fragrance.
Storage and Shelf Life
Store your finished candles in a cool, dry place. If kept out of direct sunlight and extreme temperatures, homemade candles can last for up to a year without losing scent or quality.
Safety Tips
Fire Safety: Never leave burning candles unattended. Place them on stable surfaces away from flammable materials.
Ventilation: Work in a well-ventilated area when melting wax and adding fragrance oils to avoid inhaling fumes.
Frequently Asked Questions
1. What type of wax is best for beginners?
Soy wax is an excellent choice for beginners due to its easy handling and clean burn. It also holds fragrance well and is eco-friendly.
2. How can I tell if my candle is burning correctly?
A properly burning candle will have a steady flame and minimal soot. If the flame is flickering or too large, it may indicate a wick issue.
3. Can I use essential oils instead of fragrance oils?
Yes, but be mindful that essential oils can be pricey and may require a special wick or formulation for optimal scent throw.
4. What should I do if my candles have cracks?
Cracked candles can be caused by cooling too quickly. If encountered, simply remelt the surface and re-pour a small amount of melted wax to fill the cracks.
5. How do I get rid of wick soot?
Trimming the wick before lighting (to about ¼ inch) helps reduce soot. A properly sized wick will also minimize this issue.
Conclusion
Candle making is an enjoyable and rewarding hobby that can easily be turned into a profitable endeavor. By following the basics outlined in this guide, you are well on your way to creating beautiful, fragrant candles that bring joy to your home or can be shared as thoughtful gifts. Remember, practice makes perfect, and feel free to get creative with your blends and containers. So, gather your supplies, channel your inner DIY maker, and start crafting your very own homemade candles today!