
Learn How to Make Cherry Blossom Soap!
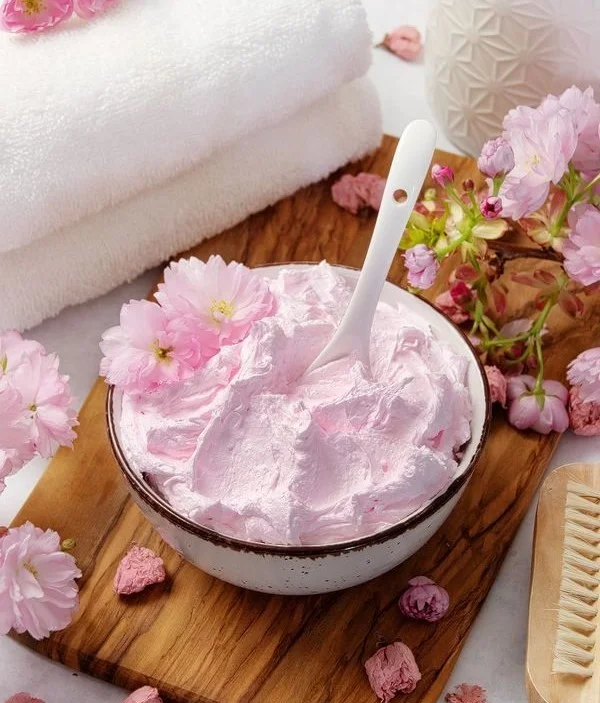
If you’re looking for a delightful DIY project that resonates with the soothing essence of spring, making cherry blossom soap is a fantastic choice. This recipe harnesses the beauty of cherry blossom-infused oil and essential oils, resulting in a whipped soap that is both moisturizing and fragrant. Not only is this soap a treat for your skin, but it also serves as an elegant gift for friends and family!
Why You Will Love This Recipe
Cherry blossom soap is perfect for those who appreciate the delicate floral aroma and soft texture. Here’s why this recipe stands out:
- Moisturizing Benefits: The cherry blossom-infused oil enhances your skin’s hydration and is perfect for various skin types.
- Quick to Make: This recipe takes only about 20 minutes from start to finish, making it an ideal beginner DIY project.
- Versatile Use: Use it as a gentle cleanser or a mild body wash cream.
- Gift-Worthy: Its charming scent and beautiful appearance make it a thoughtful handmade gift.
Ingredients
To create your own cherry blossom soap, you will need the following ingredients:
- 1 cup whipped soap base (available at craft stores or online)
- 1/4 cup cherry blossom-infused oil (can be homemade or store-bought)
- 1 tablespoon cherry blossom fragrance oil (for extra scent)
- 1 teaspoon vitamin E oil (optional, for added moisture)
- Soap colorant (optional, to enhance color)
Equipment
Gather the following tools to aid your soap-making process:
- Electric mixer (handheld or stand mixer)
- Mixing bowls
- Measuring cups and spoons
- Spatula
- Soap molds or containers (silicone molds work great)
- Spoon or pipette (for adding colorant if used)
Step-by-Step Instructions
Prepare Your Workspace:
Set up your workspace and ensure it is clean. Gather all your ingredients and tools before you start.Mix the Base:
In a mixing bowl, add 1 cup of the whipped soap base. Using your electric mixer, whip it on medium speed for about 2-3 minutes until it is fluffy and smooth.Incorporate Oils:
Gradually add the cherry blossom-infused oil and vitamin E oil (if using) into the whipped soap. Mix thoroughly until well combined.Add Fragrance:
Pour in 1 tablespoon of cherry blossom fragrance oil. Continue mixing until the scent is evenly distributed throughout the soap.Add Color:
If you’re using soap colorant, add a few drops now and mix until you achieve your desired shade. Be cautious not to overmix as it may deflate the texture.Mold the Soap:
Using a spatula, transfer the whipped soap mixture into your molds or containers. Smooth the top if desired.Let It Set:
Allow the soap to sit at room temperature for about 30 minutes, or until firm. For quicker setting, you can place them in the refrigerator for about 10-15 minutes.Unmold and Store:
Once firm, carefully remove the soap from the molds. Store in an airtight container, and keep it in a cool, dry place.
Tips for Success
- Use an Electric Mixer: An electric mixer is essential for achieving that airy whipped texture, so avoid mixing by hand if possible.
- Room Temperature Ingredients: Ensure all your ingredients are at room temperature for easy blending.
- Avoid Overmixing: Whipping too long can cause the soap to lose its fluffy texture.
Common Mistakes to Avoid
- Skipping Essential Oils: Don’t skip the fragrance oil unless you prefer unscented soap. The scent is key to the aromatherapy experience.
- Inadequate Mixing: Not mixing thoroughly may lead to uneven scent distribution and texture.
- Using Hot Ingredients: Always ensure that your soap base has cooled adequately before mixing in any oils, as the heat can affect their properties.
Variations and Customization Ideas
You can easily customize this recipe to suit your preferences:
- Different Scents: Substitute cherry blossom with other floral or fruity fragrances such as rose, lavender, or citrus.
- Add Exfoliants: Incorporate gentle exfoliants like oatmeal or dried herbs for a soothing scrub effect.
- Color Customization: Use natural colorants for a more organic approach, such as beet powder for pinks or spirulina for greens.
Storage and Shelf Life
Store your cherry blossom soap in a cool, dry place in an airtight container. It should maintain its quality for about 6-12 months if properly stored. Avoid direct sunlight and high temperatures, as they can degrade the soap’s quality.
Safety Tips
- Protect Your Workspace: Cover surfaces with newspaper or plastic to avoid messes.
- Ventilation: Ensure your workspace is well-ventilated, especially if using an essential oil that may irritate.
- Avoid Eye Contact: Keep all ingredients out of reach of children and protect your eyes when mixing.
Frequently Asked Questions
1. Can I use different oils in the recipe?
Yes! You can substitute the cherry blossom-infused oil with any other lightweight carrier oil like jojoba, sweet almond, or avocado oil.
2. Is it safe to make soap during pregnancy?
While making soap with ready bases is generally safe during pregnancy, consult a healthcare provider regarding specific fragrance oils and essential oils.
3. How do I know if my soap has set properly?
The soap will feel firm to the touch and should retain its shape when removed from the mold.
4. Can I create a layered soap?
Yes! You can create layers by pouring different colors or scents over one another, allowing each layer to set before adding the next.
5. What if my whipped soap looks lumpy?
This can happen if the base was overmixed or temperatures were too high. If this happens, try re-whipping at low speed and adding a few drops of additional oil for moisture.
6. Why is my soap too hard?
If overmixed, the water content can evaporate, making the soap feel harder. Rehydating with a tiny bit of oil can improve texture.
Conclusion
Now that you’ve learned how to make cherry blossom soap, it’s time to get creative! This beautiful, fragrant soap not only nurtures your skin but also showcases your DIY skills. Whether you keep it for yourself or gift it to someone special, it’s sure to bring joy. Gather your ingredients and start whipping up this delightful soap today—happy crafting!