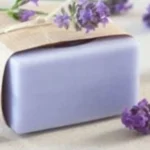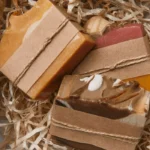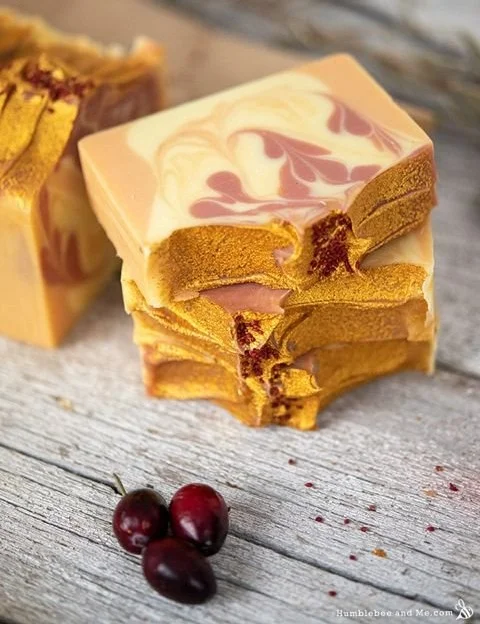

Making your own homemade soap or candles is a wonderfully fulfilling craft that allows you to create beautiful, personalized products right in your own kitchen. Whether you’re drawn to the idea of crafting your own natural soap or you’re keen to make scented candles, both are accessible projects that can be tailored to suit your taste. In this guide, we’re going to explore two popular DIY recipes: a melt and pour soap and a basic soy candle.
Why You Will Love This Recipe
Not only does creating your own soap and candles offer a unique way to express your creativity, but it also provides a fantastic opportunity for gifting. These homemade products can be tailored with different scents, colors, and shapes, making them perfect for birthdays, holidays, or just a thoughtful gesture. Plus, you’ll enjoy the satisfaction of creating something with your own hands.
Homemade Soap: Melt and Pour Method
Ingredients
- Melt and pour soap base (1 lb; You can choose glycerin, shea butter, or goat milk)
- Fragrance oil (1-2 oz; adjust based on scent strength preference)
- Soap colorant (optional; follow the manufacturer’s instructions for the amount)
- Add-ins (like dried herbs, oats, or essential oils)
Equipment
- Microwave-safe bowl or double boiler
- Soap mold (silicone molds work great)
- Stirring spoon or stick
- Dropper (for adding color and fragrance)
- Measuring cups
Step-by-Step Instructions
Prepare Your Workspace: Clear a space in your kitchen, ensuring you have all your ingredients and equipment ready. Make sure to work in a well-ventilated area.
Cut the Soap Base: Using a knife, cut your melt and pour soap base into small cubes. This will help it melt evenly.
Melt the Soap Base: Place the soap cubes in the microwave-safe bowl. Microwave on high for 30 seconds at a time, stirring after each interval until fully melted. Alternatively, use a double boiler over simmering water.
Add Color and Fragrance: Once melted, add your chosen fragrance oil and stir. If you’re using a colorant, add it gradually until you achieve your desired shade.
Incorporate Add-Ins: If you want to add in dried herbs or oats, now’s the time to mix them in!
Pour into Molds: Carefully pour the soap mixture into your molds.
Let it Set: Allow your soap to cool and harden for at least an hour. If you’re in a hurry, placing the molds in the refrigerator can speed up the process.
Demold Your Soap: Once solid, gently pop the soap out of the molds.
Cure: Let your soap cure for a few days, which helps to harden it further and allows any leftover moisture to evaporate.
Tips for Success
- Start with a clear base if you’re new to soap-making, as it’s easier to work with.
- Mix colors and fragrances in small quantities before adding to ensure you like the combination.
Common Mistakes to Avoid
- Overheating the Soap: If you heat the soap too much, it can lose its lathering properties, resulting in a poor-quality end product.
- Skipping the Testing Phase: Always test your scent and color before pouring to avoid any surprises!
Variations and Customization Ideas
- Add Essential Oils: To make the soap more natural, substitute fragrance oils with essential oils like lavender or eucalyptus.
- Use Decorative Molds: Try different shaped molds such as flowers or hearts for special occasions.
Storage and Shelf Life
Store your homemade soaps in a cool, dry place away from direct sunlight. Properly stored, they can last for up to a year.
Safety Tips
Always handle melted soap with care to avoid burns. Use gloves if you have sensitive skin, and ensure your workspace is safe and clean.
Homemade Candle: Basic Soy Candle Recipe
Ingredients
- Soy wax (1 lb; ideal for beginners and eco-friendly)
- Fragrance oil (1 oz; choose a scent that you love)
- Candle wick (appropriate size for 1 lb of wax)
- Candle dye (optional; follow manufacturer guidelines)
Equipment
- Double boiler or wax melter
- Glass measuring cup
- Stirring utensil
- Thermometer
- Candle mold or container (like glass jars)
Step-by-Step Instructions
Prepare Your Workspace: Ensure your workspace is clean and clear of any items you don’t want to risk getting wax on.
Measure the Wax: Weigh out 1 lb of soy wax. Use a kitchen scale for accuracy.
Melt the Wax: Use a double boiler to melt the wax. Heat gently, monitoring the temperature with your thermometer. Aim for about 170°F.
Add Fragrance and Color: Once melted, remove from heat and let it cool to about 160°F. Add your fragrance oil and, if desired, stir in dye for color.
Wick Preparation: Attach the wick to the bottom of your container using glue dots or a bit of melted wax. Ensure the wick stands straight.
Pour the Wax: Carefully pour the wax into your container, leaving a little space at the top.
Let it Cool: Allow the candle to set at room temperature until it’s solid (at least a few hours).
Trim the Wick: Once solid, trim the wick to about ¼ inch above the wax.
Optional: If you’d like to decorate your candle, consider adding candle embellishments before it fully sets.
Tips for Success
- Always ensure that your wick is the right size for your container to avoid poor burning.
- Stir well when adding fragrance oil to evenly distribute the scent throughout the wax.
Common Mistakes to Avoid
- Not Warming Your Containers: If your containers are cold, the wax may crack upon cooling.
- Pouring at Too High a Temperature: Let your wax cool before pouring it into the container. This helps prevent sinkholes.
Variations and Customization Ideas
- Scent combinations: Mix different fragrance oils for unique scents.
- Decorative Elements: Consider adding dried flowers or herbs on top for a beautiful aesthetic!
Storage and Shelf Life
Store your candles in a cool, dry place away from direct sunlight. Correctly stored, they can last up to 1-2 years.
Safety Tips
When burning candles, always supervise them and keep them out of reach of children and pets. Make sure to cut the wick to the recommended height to avoid excessive flickering or smoking.
Frequently Asked Questions
1. Can I use essential oils instead of fragrance oils in my soap?
Absolutely! However, essential oils can be more subtle in fragrance. Always use a soap-specific essential oil for the best results.
2. What type of containers are best for pouring candles?
Glass jars or metal tins specifically designed for candle making are great choices, as they can handle the heat and are aesthetically pleasing.
3. How do I know if the wick size is correct for my candle?
Wick sizing can be tricky; a good rule of thumb is to consult a candle-making supplier for wick sizing charts relative to the type of wax and container size.
4. Is it safe to make soap or candles at home?
Yes, as long as you follow safety precautions, especially when using lye for soap making. Always wear gloves and goggles when handling soap ingredients.
5. Can I use food coloring in my soap?
While it’s technically possible, food coloring can lead to unpredictable results in soap. It’s best to use colorants specifically designed for soaps.
6. How do I fix misformed candles or soaps?
If your candles have cracks, you can gently reheat the tops to smooth them over. For soaps, you might consider re-melting and pouring again if the shape isn’t right.
Conclusion
Creating your own homemade soap and candles can be a rewarding and enjoyable process. Not only are you engaging in a creative activity, but you’re also producing beautiful items that you can use or share with loved ones. Remember to follow the step-by-step instructions closely and take your time to enjoy the journey. Before you know it, you’ll be a DIY expert in no time! So gather your ingredients, follow these recipes, and let your creativity shine. Happy crafting!