
8 Simple DIY Fall Candle Recipes to Fill Your Home with the Fragrances of Autumn
As the leaves begin to turn and the air turns crisp, it’s the perfect time to fill your home with the warm and inviting scents of fall. There’s something magical about creating your own candles, especially when you can customize them to reflect the essence of autumn. In this guide, I’ll show you how to make eight simple DIY fall candle recipes using natural soy, beeswax, and paraffin. Let’s get started on this delightful DIY project!
Why You Will Love These Recipes
Making your own candles can be incredibly rewarding. Not only do you get to enjoy beautiful, aromatic creations, but you can also personalize the scents and designs to match your home decor and mood. Whether it’s a pumpkin spice latte, warm cinnamon buns, or a cozy fireplace, these candle recipes will evoke the warmth and comfort of the fall season.
Ingredients
For all candle recipes:
- Wax Type: Choose either soy wax, beeswax, or paraffin wax based on your preference.
- Fragrance Oils: Use scent blends that capture the essence of fall (see individual recipes below for suggestions).
- Dyes (optional): Candle dye in your desired color.
- Wick: Cotton or wood wicks. The size will depend on your container.
Equipment
- Double boiler or a microwave-safe container
- Stirring spoon or stick
- Thermometer
- Pouring pitcher or heat-resistant cup
- Scale for measuring wax
- Candle containers (glass jars, metal tins, etc.)
- Wick holder (can be a clothespin or wick centering device)
- Safety gloves and goggles (for safety)
Step-by-Step Instructions
General Melting Instructions
- Measure Wax: Weigh the amount of wax you will need based on your container size. A standard guideline is 1 pound of wax for about 20 ounces of candle volume.
- Melt Wax: Use a double boiler or microwave to melt your wax. Heat until completely liquid.
- Add Color (if desired): Stir in dye according to the package instructions.
- Add Fragrance: Once the wax reaches about 185°F (85°C), add your fragrance oil (generally, 1 ounce of fragrance per pound of wax). Stir well.
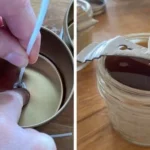
- Wick Preparation: Secure the wick to the bottom of the container using a bit of melted wax or glue. Center it using a wick holder.
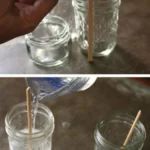
- Pour Wax: Let the wax cool to about 130°F (54°C) before carefully pouring it into your container.
- Let it Set: Allow the candle to cool completely, ideally for 4-6 hours, before trimming the wick and burning.
Fall Candle Recipes
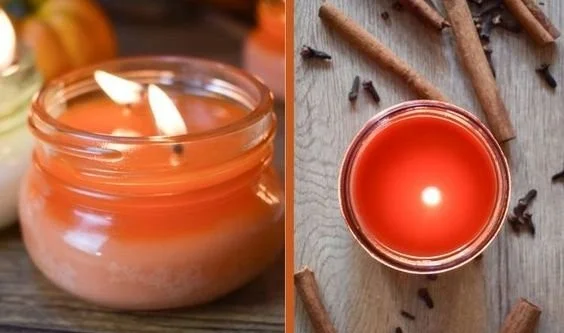
1. Pumpkin Spice Candle (Soy)
- Wax Type: Soy Wax
- Fragrance: 1 oz pumpkin pie spice fragrance oil
- Dye: Orange or yellow
2. Cinnamon Apple Pie Candle (Beeswax)
- Wax Type: Beeswax
- Fragrance: 1 oz cinnamon and apple fragrance oil
- Dye: Optional light brown dye
3. Harvest Spice Candle (Paraffin)
- Wax Type: Paraffin
- Fragrance: 1 oz harvest spice fragrance oil
- Dye: Dark red or brown
4. Maple Leaf Candle (Soy)
- Wax Type: Soy Wax
- Fragrance: 1 oz maple syrup fragrance oil
- Dye: Yellow or amber
5. Woodland Forest Candle (Beeswax)
- Wax Type: Beeswax
- Fragrance: 1 oz evergreen fragrance oil
- Dye: Green (optional)
6. Toasted Marshmallow Candle (Paraffin)
- Wax Type: Paraffin
- Fragrance: 1 oz toasted marshmallow fragrance oil
- Dye: Light beige
7. Bonfire Nights Candle (Soy)
- Wax Type: Soy Wax
- Fragrance: 1 oz campfire fragrance oil
- Dye: Dark brown or black
8. Sweet Potato Pie Candle (Beeswax)
- Wax Type: Beeswax
- Fragrance: 1 oz sweet potato pie fragrance oil
- Dye: Light orange (optional)
Tips for Success
- Measurement Matters: Be precise with your measurements for optimal results.
- Temperature Control: Use a thermometer to ensure you add fragrance at the correct temperature for maximum scent throw.
- Testing Wicks: Experiment with different wick types and sizes to find the best burn for your candle.
Common Mistakes to Avoid
- Overheating Wax: Always melt wax slowly and avoid overheating; this can affect the scent and the burn.
- Skipping Fragrance Testing: Test a small batch of your fragrance blend before committing to the entire candle.
- Wrong Wick Size: Choosing the wrong wick can lead to poor burning, either too fast or too slow.
Variations and Customization Ideas
Feel free to mix and match fragrance oils to create a signature scent that reflects your style. You can also layer different colors of wax for visual appeal.
Storage and Shelf Life
Store your candles in a cool, dark place to maintain their scent and appearance. If stored properly, homemade candles can last for about 6-12 months.
Safety Tips
- Always supervise candle making, especially if children or pets are present.
- Use heat-resistant gloves and goggles to avoid burns from hot wax.
- Follow safe candle-burning practices once your candle is complete, including trimming the wick to about 1/4 inch before burning and never leaving burning candles unattended.
Frequently Asked Questions
Q: Can I use essential oils instead of fragrance oils?
A: Yes, but essential oils may have a weaker scent throw compared to synthetic fragrance oils.
Q: How do I know what size wick to use?
A: The size of your wick depends on the container size and the type of wax used. Check guides or wick manufacturers for recommendations.
Q: What should I do if my candle won’t burn evenly?
A: Ensure your wick size is appropriate, and avoid placing candles in drafts.
Q: Can I use old candles to make new ones?
A: Yes, you can melt down old candles, but ensure they are compatible in scent and wax type.
Q: How can I clean up wax spills?
A: Heat the wax gently to re-melt it, then wipe it away with paper towels. For hard wax, you can freeze it to chip it off.
Conclusion
Making your own fall candles is a satisfying and enjoyable project that can fill your home with the cozy fragrances of autumn. Whether you’re creating lovely gifts for friends and family or simply indulging in your own fragrant delights, these fall candle recipes are easy to follow and fully customizable. So gather your materials, choose your favorite scents, and enjoy the creative process. Here’s to a fragrant fall season!