
Unleashing Your Creativity: DIY Candle Making for Beginners
Are you a DIY lover? You’re in for a treat! Today we’re diving into the world of candle making, a fantastic and fulfilling project that allows you to create personalized gifts as well as cozy ambiance for your home. Whether you’re aiming to make simple tealights or luxurious scented candles, this article has got you covered. Let’s roll up our sleeves and get started!
Why You Will Love This Recipe
Candle making is not only a rewarding experience, but it’s also a pathway to unleash your creativity. You get to customize the scents, colors, and designs, creating something truly unique. Homemade candles also make excellent gifts and can brighten your home with inviting aromas and soft lighting. Plus, engaging in this hands-on craft can be a great stress reliever.
Ingredients
To get started, you’ll need the following ingredients:
- Wax: 1 pound (choose from soy wax, paraffin wax, or beeswax)
- Fragrance oil: 1 ounce (optional, based on your preference)
- Dyes: As desired (if you want colored candles)
- Wicks: 1 (specific to the diameter of your container)
Equipment
You’ll also need some essential equipment to help you along the way:
- Double boiler or microwave-safe container
- Stirring spoon or spatula
- Thermometer
- Candle containers (glass jars, tins, or molds)
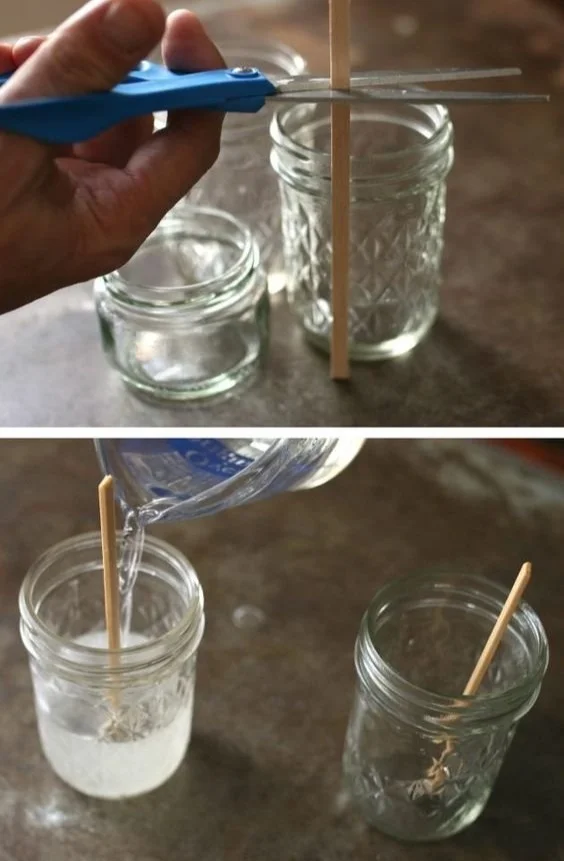
- Wick holder or tool (to keep the wick centered)
- Food scale (for accurate measurements)
- Safety gloves and goggles
Step-by-Step Instructions
Preparation Time: 15 minutes
Making Time: 1 hour
Approximate Yield: About 4 standard candles
Measure Your Wax: Using the food scale, weigh out 1 pound of wax. This amount will typically fill about 4 standard candle jars.
Melt the Wax: Place the wax in a double boiler over medium heat until completely melted, stirring occasionally. If you’re using a microwave, heat in 30-second intervals until fully melted.
Monitor the Temperature: Using a thermometer, check the wax temperature. It should reach approximately 180°F (82°C) for optimal fragrance blending.
Add Fragrance and Dye: If you’re using fragrance oil and dye, add them once the wax reaches 180°F. Stir well to ensure an even distribution. For a moderately scented candle, use about 1 ounce of fragrance for the 1 pound of wax.
Prepare Your Wick: While the wax cools to about 150°F (65°C), prep your wick. Attach the wick to the bottom of your container using a wick sticker or a dab of melted wax. Use the wick holder to keep it centered.
Pour the Wax: Once the wax has cooled to 150°F, pour the wax into the container carefully, ensuring the wick stays centered. Fill to your desired level, leaving some space at the top.
Let It Set: Allow your candle to cool completely at room temperature, which may take about 1-2 hours. Avoid moving them while cooling to prevent uneven tops.
Trim the Wick: Once fully set, trim the wick to about 1/4 inch above the surface of the candle.
Cure: For the best scent throw, allow your candles to cure for at least 48 hours before burning.
Tips for Success
- Ensure your containers are clean and dry before pouring wax.
- Use a thermometer to monitor temperatures accurately for the best results.
- Consider adding a second pour if there are any sinkholes or imperfections on the top as the candle cools.
- Mix in your fragrance oil and color thoroughly to maintain a consistent appearance and scent.
Common Mistakes to Avoid
- Pouring Temperature: Don’t pour the wax too hot or too cold. Follow the specified temperature for adding fragrances and pouring.
- Ignoring Wick Size: The size of your wick matters! A wick that’s too small will lead to poor burning, while one that’s too large may create soot.
- Using Non-Candle Containers: Be cautious about using containers that can’t withstand heat, which may crack or shatter.
Variations and Customization Ideas
- Scent Combinations: Experiment with different fragrance oils. Try blending lavender and vanilla or eucalyptus and mint for unique scents.
- Color Choices: Use natural dyes for a more eco-friendly approach or mix multiple colors for a marbled effect.
- Decorative Touches: Add herbs, flowers, or glitter to the wax for an added decorative element.
Storage and Shelf Life
Store your homemade candles in a cool, dry place away from direct sunlight. Properly made candles can last anywhere from 6 months to 1 year. For the best scent throw, however, it’s recommended to use them within three months.
Safety Tips
- Always work in a well-ventilated area when using fragrance oils.
- Wear protective gloves and goggles to avoid skin and eye contact with hot wax.
- Never leave melting wax unattended, and keep it away from children and pets.
- When burning your candles, never leave them unattended and keep them away from flammable materials.
Frequently Asked Questions
Q1: Can I use essential oils instead of fragrance oils?
A1: Yes, you can use essential oils, but be aware that they may not have the same scent throw as fragrance oils.
Q2: What type of wick should I use for soy wax?
A2: A cotton or wooden wick typically works best for soy wax, but always select a wick size that corresponds to your container diameter.
Q3: What should I avoid adding to my candles?
A3: Avoid using food items like spices or dried fruits as they can lead to spoilage and create a fire hazard.
Q4: How do I troubleshoot candles that won’t burn or have a weak scent?
A4: Ensure that you’re using the correct wick size and that the fragrance oil is mixed thoroughly into the wax.
Q5: Can I reuse old candle jars?
A5: Yes! Be sure to clean them thoroughly and remove any leftover wax before reusing.
Q6: How can I make my candles more natural?
A6: Choose soy wax or beeswax and use essential oils for scent to create more natural candles.
Conclusion
Making homemade candles is an enjoyable and rewarding experience, whether you’re creating them for yourself or as thoughtful gifts. By following these steps and tips, you can craft beautiful, aromatic candles that will light up your space. So gather your materials, unleash your creativity, and enjoy the process of DIY candle making! Happy crafting!