
Coffee Melt and Pour Soap: A Beginner’s Delight
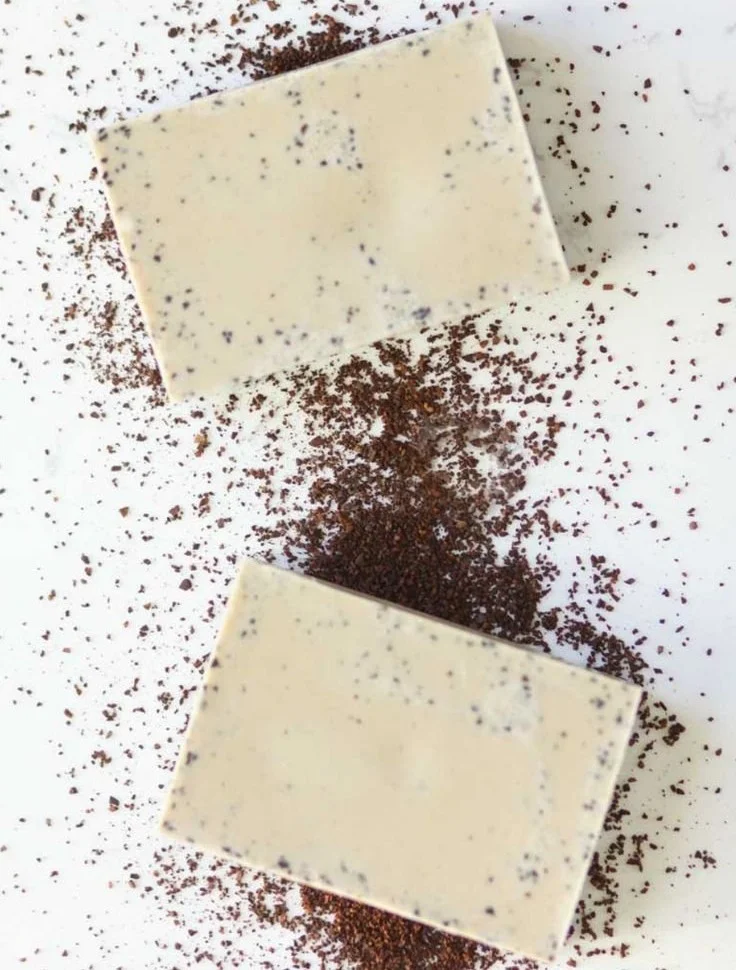
Making your own soap at home can be a fun and rewarding experience. The art of soap-making has been cherished for centuries, and with the right ingredients and techniques, you can create beautiful bars of natural soap that are not only aesthetically pleasing but also great for your skin. One of the simplest methods to get started is through the melt and pour technique. In this article, we will explore how to make coffee melt and pour soap, a delightful recipe that’s perfect for beginners.
Why You Will Love This Recipe
There are several reasons why coffee melt and pour soap is an excellent choice for newbie soap-makers:
- Easy to Follow: The melt and pour method is straightforward and requires no complicated equipment or advanced techniques.
- Natural Ingredients: You have control over the ingredients, allowing you to create a soap that is free from harmful chemicals.
- Moisturizing Properties: Coffee grounds and oils included in this recipe will moisturize your skin and provide gentle exfoliation.
- Unique and Customizable: You can easily personalize your soap with scents, colors, and additives to make it truly your own.
Now, let’s dive into making your coffee melt and pour soap!
Ingredients
To make approximately 6-8 bars of coffee melt and pour soap, you will need:
- 1 lb (16 oz) of melt and pour soap base (shea butter or glycerin)
- 2 tablespoons of coffee grounds (coarse to medium grind)
- 1 tablespoon of coffee essential oil or fragrance oil (optional, for a stronger coffee scent)
- 1 teaspoon of natural colorant or cosmetic-grade colorant (optional, depending on preference)
- Mold (silicone molds work best for easy removal)
Equipment
Here’s a list of equipment you’ll need for this project:
- Microwave-safe bowl or measuring cup
- Stirring utensil (like a wooden stick or silicone spatula)
- Soap mold (silicone or plastic, ideally in bar shapes)
- Scale or measuring spoons for accuracy
- Isopropyl alcohol in a spray bottle (to eliminate bubbles, optional)
Step-by-Step Instructions
Follow these easy steps to create your own coffee melt and pour soap.
Step 1: Prepare Your Workspace
- Clear a clean, flat surface where you can work safely.
- Gather all your equipment and ingredients to make the process smoother.
Step 2: Cut the Soap Base
- Cut the melt and pour soap base into small chunks (approximately 1-inch cubes) to allow for easier melting.
Step 3: Melt the Soap Base
- Place the soap chunks into a microwave-safe bowl or measuring cup.
- Microwave in 30-second intervals, stirring after each interval until fully melted. (This generally takes about 1-3 minutes.)
- Do not overheat; the soap should be liquid but not boiling.
Step 4: Mix in Coffee and Other Additives
- Once melted, stir in the coffee grounds thoroughly.
- If using, add coffee essential oil and colorant at this point, continuing to stir to ensure even distribution.
Step 5: Pour into Molds
- Carefully pour the mixture into your soap molds, filling them to the top.
- If you see bubbles forming on the surface, lightly spritz with isopropyl alcohol to eliminate them.
Step 6: Allow to Cool
- Let the soap sit at room temperature for 3-4 hours, or until completely solid.
- If you’re in a hurry, you can place the molds in the refrigerator for about 30 minutes.
Step 7: Remove the Soap
- Once the soap is solidified, gently pop the bars out of the molds.
- If necessary, use a sharp knife to trim any edges for a clean finish.
Tips for Success
- Choose a Quality Soap Base: The quality of your soap base will affect your final product. A good-quality melt and pour base will contribute to a nicer texture and moisturizing properties.
- Experiment with Additives: Don’t hesitate to explore different natural colorants or essential oils to enhance your soap.
- Be Patient: Allow the soap to cure fully before using. This will improve the texture and extend its shelf life.
Common Mistakes to Avoid
- Overheating the Soap: Be attentive during the melting process; overheating can cause the soap base to lose its properties.
- Using Too Fine Coffee Grounds: A fine grind may cause the soap to become gritty. Coarse to medium grind works best for exfoliation without clogging pores.
- Skipping the Alcohol Spray: Neglecting to spritz the top with alcohol can result in an uneven surface due to bubbles.
Variations and Customization Ideas
- Scent Alterations: Explore different fragrance oils such as vanilla or chocolate to complement the coffee scent.
- Add Herbs or Oils: Add dry herbs like lavender or a few drops of essential oils like peppermint for a refreshing twist.
- Layering Techniques: Create layered soaps by allowing the first layer to set slightly before pouring the next one.
Storage and Shelf Life
Store your homemade coffee soap bars in a cool, dry place away from direct sunlight. When properly stored, your soap can last for 6 months or more. Consider wrapping them in biodegradable paper or placing them in airtight containers to extend their shelf life.
Safety Tips
- Avoid Burns: Always be cautious when handling melted soap base. It can be hot, so use protective gloves if necessary.
- Ventilation: Work in a well-ventilated area when using any fragrance oils to mitigate inhalation of vapors.
- Sensitive Skin: If you or someone using the soap has sensitive skin, perform a patch test before full use.
Frequently Asked Questions
Can I use any melt and pour soap base?
Yes, but shea butter and glycerin bases are popular options due to their moisturizing properties. Each offers different benefits, so you can choose based on your skin needs.
Why does my soap have bubbles on the surface?
Bubbles can form when air is trapped in the mixture. Spritzing with isopropyl alcohol can quickly eliminate surface bubbles for a smoother finish.
How do I make my soap smell stronger?
Increase the amount of fragrance oil but be mindful not to exceed recommended usage rates to avoid skin irritation. Consult the supplier’s guidelines for specific measurements.
Can I add color to the soap?
Absolutely! Using cosmetic-grade colorants or natural colorants like turmeric can enhance the visual appeal of your soap.
Is coffee soap safe for everyone?
While most can use coffee soap, it may not be suitable for everyone, especially those with very sensitive skin. Always perform a patch test before use.
Conclusion
Congratulations! You’ve made your first batch of coffee melt and pour soap. With just a few ingredients and simple steps, you’ve created a beautiful and functional handmade product. As you continue your soap-making journey, remember that the possibilities are endless when it comes to customization and experimentation. Whether you keep these bars for yourself or gift them to friends and family, you can take pride in your homemade creation. Enjoy the delightful aroma and moisturizing benefits of your coffee soap, and happy crafting!