
Create Your Own Rosehip Cold Process Soap
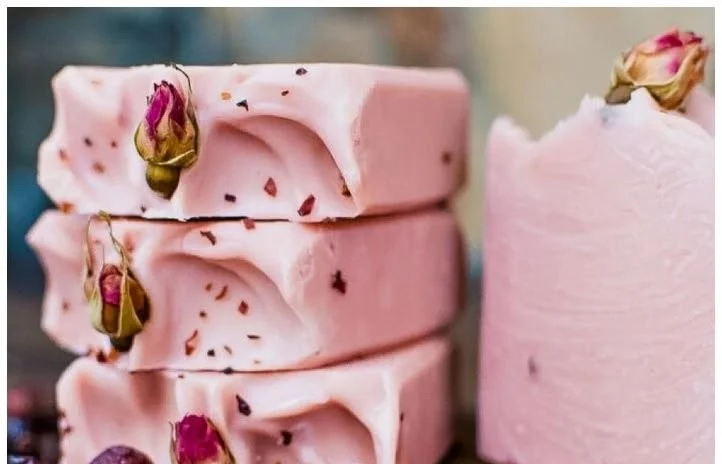
Interested in cold process soap making? You’re in for a treat with this rosehip cold process soap recipe! This DIY soap is not only delightful to make but also great for nurturing delicate skin, promoting a vibrant and youthful glow. With the benefits of rose hips, you’ll be incorporating natural goodness into your skincare routine. Let’s dive in!
Why You Will Love This Recipe
Cold process soap making is a fulfilling hobby that allows you to create natural, handcrafted soap tailored to your skin’s needs. Rosehips, known for their high vitamin C content and antioxidant properties, make a fantastic addition to any skincare regimen. This soap is perfect for all skin types, especially those with sensitive or aging skin. By making your own soap, you can avoid the harsh chemicals found in commercial products while enjoying the wonderful scents and textures that come from natural ingredients.
Ingredients
For this rosehip cold process soap, you will need:
- 16 oz Olive Oil (ideal for moisturizing)
- 16 oz Coconut Oil (helps produce a bubbly lather)
- 16 oz Palm Oil (provides hardness to the bar)
- 6.8 oz Sodium Hydroxide (Lye) (needed for saponification)
- 16 oz Distilled Water (to dissolve the lye)
- 2 oz Rosehip Oil (rich in vitamins and good for the skin)
- Essential Oils (optional) (like lavender or rose for fragrance)
This recipe yields about 4 to 6 bars of soap, depending on how you cut them.
Equipment
Gather the following equipment to ensure a smooth soap-making process:
- Digital Scale (for precise measurements)
- Stainless Steel or Heat-Resistant Glass Mixing Bowl (for mixing oils)
- Plastic or Glass Measuring Cup (for liquids)
- Stick Blender (to mix the soap)
- Thermometer (to check temperatures)
- Soap Mold (silicone molds work best)
- Safety Goggles and Gloves (for protection when handling lye)
- Pipette or Dropper (if using essential oils)
- Spatula (for scraping)
- Stick Blender Container (if using a stick blender)
Step-by-Step Instructions
Step 1: Prepare Your Workspace
- Work in a well-ventilated area.
- Wear safety goggles and gloves to protect against lye splashes.
Step 2: Measure Your Ingredients
- Weigh 16 oz of each oil (olive, coconut, palm) on the digital scale.
- Measure 6.8 oz of lye and 16 oz of water.
Step 3: Dissolve the Lye
- Carefully add the lye to the water (never the other way around!) while stirring slowly. This generates heat, so do it in a glass or stainless-steel bowl.
- Allow the lye solution to cool to about 100°F.
Step 4: Heat the Oils
- Combine the measured oils in a separate mixing bowl.
- Heat the oils gently, ensuring they are fully melted and mixed, then allow them to cool to about 100°F.
Step 5: Combine Lye and Oils
- Once the lye solution and oils are both around 100°F, slowly add the lye solution to the oils.
- Use a stick blender to mix until you reach "trace," which is when the mixture thickens to a pudding-like consistency.
Step 6: Add Rosehip Oil and Essential Oils
- At trace, add 2 oz of rosehip oil and any desired essential oils.
- Blend briefly to incorporate.
Step 7: Pour into Molds
- Gently pour the soap mixture into your mold, tapping to remove air bubbles.
- Cover the mold with a towel to insulate and keep in a warm area for 24 to 48 hours.
Step 8: Unmold and Cure
- Remove the soap from the mold after 24 to 48 hours.
- Cut into bars and allow them to cure in a cool, dry place for 4 to 6 weeks to fully saponify and harden.
Tips for Success
- Keep your workspace organized to minimize mess and confusion.
- Always wear protective gear when handling lye.
- Use a reliable soap calculator to double-check lye and oil calculations specific to your recipe.
- Practice patience; quality soap takes time to cure!
Common Mistakes to Avoid
- Not Measuring Accurately: Soap-making is a science, and precise measurements are crucial. Make sure your digital scale is calibrated.
- Skipping Safety Gear: Always wear protective gloves and goggles to avoid lye burns.
- Inducing Fragrance Too Early: Essential oils should be added at trace, not before, to preserve their benefits.
Variations and Customization Ideas
Feel free to customize this rosehip soap recipe:
- Color: Add natural colorants, such as spirulina or turmeric, for aesthetic appeal.
- Add-Ins: Incorporate dried rose petals or oatmeal for added texture and benefits.
- Essential Oils: Experiment with other essential oils like chamomile or geranium to suit your preferences.
Storage and Shelf Life
Store your finished soap bars in a cool, dry place, away from direct sunlight. When properly cured and stored, they should last for up to a year. Soap can also be wrapped in wax paper or covered in a box to enhance its longevity.
Safety Tips
- Always measure lye outdoors or in a well-ventilated area.
- Avoid inhaling fumes; ensure good airflow in your workspace.
- Make sure children and pets stay clear during the soap-making process.
Frequently Asked Questions
1. Can I use a different type of oil in this recipe?
Absolutely! Just ensure any substitutions are calculated correctly using a soap calculator to maintain proper lye balance.
2. What do I do if my soap overheats?
If you notice the soap mixture is getting too hot, remove it from the heat and allow it to cool slightly before continuing.
3. How do I know when my soap is ready for use?
Ensure your soap has cured for at least 4 weeks, allowing the lye to fully saponify. You’ll know it’s ready when the pH is neutral and no lye is detectable.
4. Can I make this soap without lye?
No, lye is essential for the saponification process in cold process soap. If you’re looking for lye-free options, consider melt and pour soap.
5. What should I do if I have leftover soap?
You can save leftover bits of soap and use them to create new batches. Just ensure they are of the same base type and melt them accordingly.
6. Can I add additional exfoliating agents, like salt or sugar?
Yes, you can add up to 1-2 tablespoons of natural exfoliants to your soap. Just ensure they’re suitable for skin contact.
Conclusion
Now that you have a comprehensive guide on how to create your very own rosehip cold process soap, I hope you’re inspired to embark on this rewarding DIY journey. Not only will you be crafting beautiful handmade soap, but you’ll also be nurturing your skin with natural ingredients. Remember to respect safety guidelines, measure accurately, and have fun experimenting with variations!
Try out this recipe and enjoy the benefits of homemade soap in your everyday routine. Happy soap making!