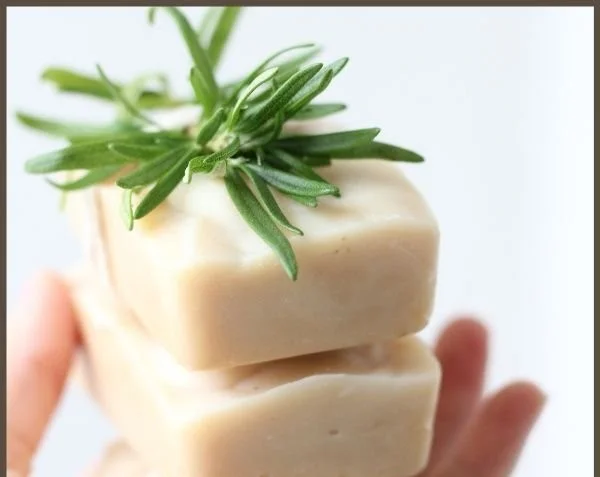

Homemade Rosemary-Mint Goat Milk Soap
Making your own soap at home can be an incredibly rewarding experience. Not only do you get to craft a product that’s gentle on your skin and customizable to your preferences, but you also have the satisfaction of knowing exactly what goes into it. Today, I’ll guide you through making homemade rosemary-mint goat milk soap using a simple and effective cold process method.
Why You Will Love This Recipe
This rosemary-mint goat milk soap recipe is a delightful blend of soothing rosemary and refreshing mint. Goat milk is known for its moisturizing properties, making it perfect for those with sensitive skin. Additionally, the vibrant aroma from the essential oils can uplift your mood while providing a fresh, cleansing experience during each wash.
By the end of this article, you’ll not only learn how to create your own soap but also discover tips, tricks, and customization ideas to make this project uniquely yours.
Ingredients
For this recipe, you will need the following ingredients:
- Lye/Sodium Hydroxide: 4 oz (113 g)
- Water: 10 oz (283 g)
- Goat Milk: 12 oz (340 g) (canned)
- Coconut Oil: 6 oz (170 g)
- Olive Oil: 6 oz (170 g)
- Palm Oil: 6 oz (170 g)
- Essential Oils:
- Rosemary Essential Oil: 1 oz (28 g)
- Peppermint Essential Oil: 0.5 oz (14 g)
- Colorant (Optional): Natural colorants like spirulina or clay (as desired)
Equipment
Before you start, gather the following equipment:
- Safety Gear: Goggles and gloves
- Digital Scale: For accurate measurements
- Heat-resistant Containers: For mixing lye and oils
- Stick Blender: For mixing the soap batter
- Thermometer: To check temperatures
- Soap Mold: Silicone or wooden molds work well
- Spatula: For scraping soap into molds
- Measuring Spoons/Cups: For measuring essential oils
- Plastic or Stainless Steel Whisk: For manual mixing
Step-by-Step Instructions
Step 1: Prepare Your Workspace
Make sure your workspace is clean and free of clutter. Wear your safety goggles and gloves to protect yourself from lye. Ensure that your area is well-ventilated.
Step 2: Measure Your Ingredients
Lye and Water Mixture: Carefully measure 4 oz of sodium hydroxide and set it aside. In a heat-resistant container, measure 10 oz of water. Slowly add the lye to the water while stirring gently. Never pour water into lye! Always add lye to water to prevent a violent reaction. The mixture will heat up; allow it to cool to around 100°F (38°C).
Goat Milk: In a separate container, measure out 12 oz of canned goat milk and set aside to soften. You can partially freeze it to help with temperature control.
Oils: Weigh out and combine the coconut oil, olive oil, and palm oil in a heat-safe container and gently heat until melted.
Step 3: Combine Lye and Oils
Once the lye solution has cooled to about 100°F (38°C) and your oils are also close to that temperature, slowly pour the lye solution into the oils while stirring gently with a spatula.
Use the stick blender to blend the mixture. Blend until you reach “trace,” which is the point where the mixture thickens enough to leave a trail when dripped over the surface.
Step 4: Add Essential Oils and Colorants
- Once you achieve trace, add the rosemary and peppermint essential oils, along with any natural colorant if desired. Blend again briefly until incorporated.
Step 5: Pour into the Mold
Immediately pour the soap batter into your mold. Use a spatula to smooth the top if desired.
Cure the Soap: Cover the mold with a towel or plastic wrap to help it retain heat and insulate. Let it sit for 24 to 48 hours until it hardens.
Step 6: Unmold and Cure
Once solidified, gently remove the soap from the mold and cut it into bars.
Place the bars in a cool, dry area for curing. Allow them to cure for 4 to 6 weeks before use for optimal results. This helps the soap fully saponify and become milder.
Tips for Success
- Temperature Management: Make sure your lye and oils are around the same temperature to avoid separating.
- Stick Blender Use: Avoid over-blending the soap batter to prevent it from becoming too thick before you add essential oils.
- Colorants: Test colorants in small batches to see how they react in the soap.
Common Mistakes to Avoid
- Incorrect Lye Mixing: Always remember to add lye to water, not vice versa.
- Skip the Cure Time: Rushing to use soap that hasn’t cured properly can result in irritation or a less effective product.
- Skipping Safety Gear: Never skip wearing protective gear, even for beginner projects.
Variations and Customization Ideas
- Essential Oil Blends: Experiment with other essential oils such as lavender or tea tree for different scents and benefits.
- Additives: Consider adding oatmeal for exfoliation or honey for additional moisturizing properties.
- Mold Shapes: Use different molds for exciting shapes and sizes.
Storage and Shelf Life
Store your finished soap in a cool, dry place. Properly cured soap can last for up to 1-2 years if kept away from moisture. Wrap bars in wax paper or store in an airtight container to extend their shelf life.
Safety Tips
Always handle lye with care, wearing gloves and goggles, and work in a well-ventilated area. Keep lye away from children and pets. Follow all safety precautions outlined in this guide to ensure a safe soap-making experience.
Frequently Asked Questions
1. Can I use fresh goat milk instead of canned?
Yes, you can use fresh goat milk. Ensure it is freeze-formed to help manage temperatures during the saponification process.
2. What if my soap doesn’t reach trace?
If it doesn’t reach trace after a few minutes of blending, keep blending. If it remains thin, check your lye and oil measurements, as incorrect ratios can lead to issues.
3. Can I use other oils besides the ones listed?
Absolutely! Just remember to calculate the lye amount using a reliable soap calculator to ensure safety and proper saponification.
4. How do I know when my soap is fully cured?
Fully cured soap will feel hard and dry to the touch. It should not have a soda-like smell and should have no signs of moisture.
5. What should I do if my soap turns out too soft?
If the soap is too soft after curing, it might need to cure longer or may have had incorrect ratios. Soft soap can still be used but will wear down faster.
6. Can I use synthetic fragrance oils instead of essential oils?
Yes, you can use synthetic fragrance oils. Just be sure to check that they are skin-safe and at the correct usage rate.
Conclusion
Creating your own homemade rosemary-mint goat milk soap is a charming and fulfilling activity that can enhance your bathing experience or make for thoughtful, handmade gifts. With simple ingredients and straightforward instructions, this DIY project is perfect for beginners and seasoned creators alike. Embrace your creativity, enjoy the process, and watch as your home fills with the delightful aroma of rosemary and mint. Don’t hesitate to try this recipe! Happy soap making!