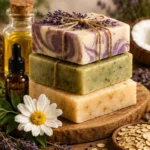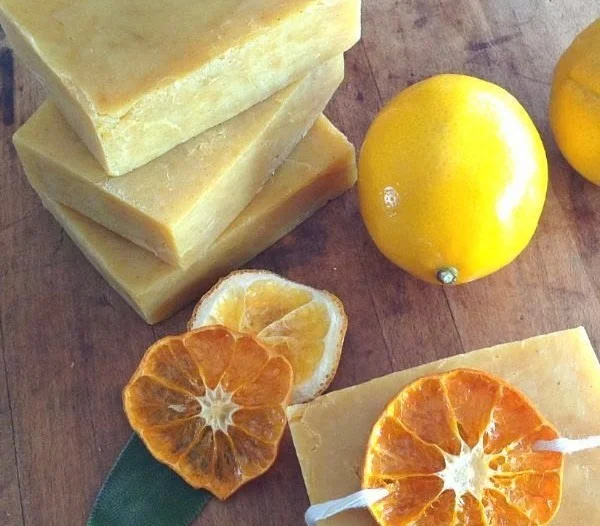

Embrace Self-Care with DIY Soap Making
Imagine this: It’s the end of a long week, and you finally carve out some much-needed ‘me time.’ You settle in with your favorite drink, ready to indulge in a little self-care routine. What if I told you that you could elevate that experience with something as simple as DIY soap? Yes, you heard me right! Making your own soap isn’t just a relaxing activity; it’s a chance to customize your skincare routine, deepening your connection with self-care while indulging in your creativity.
So, if you’ve ever looked at the ingredients of commercial soaps and thought, "What exactly am I putting on my skin?" you’re not alone. We’ve all been there, wondering why it feels like the products we buy might not be as pure and nourishing as they claim. With DIY soap making, we can take control of what goes on our skin, ensuring it’s filled with love and wholesome ingredients instead of harsh chemicals.
Let’s dive into the wonderful world of DIY soap, shall we?
The Joy of Making Your Own Soap
There’s something magical about creating something from scratch. When you craft your own soap, you’re not just pouring ingredients into a mold; you’re engaging in a ritual that can uplift your spirit and nourish your skin. And here’s the best part: you have complete control over what goes into each bar.
Picture the satisfaction of picking your own scents, colors, and textures. You can tailor each recipe to suit your skin type, whether you’re dealing with dryness, oiliness, or irritation.
Common Benefits of DIY Soap
- Customizable Ingredients: Choose oils and additives that suit your skin type and preferences.
- Natural Fragrance: Customize scents using essential oils for a heavenly aroma.
- Cost-Effective: Save money in the long run by making your own luxurious soaps.
- Sustainable: Reduce waste by using eco-friendly materials and packaging.
- Creative Outlet: Express your artistic side through various shapes, colors, and textures.
Getting Started with DIY Soap
You might be wondering, what do I need to begin this creative adventure? Let’s unpack the essentials and get your soap-making process ready to roll!
Essential Ingredients
- Base Oils: Common choices include olive oil, coconut oil, and palm oil.
- Lye: This is crucial for cold process soap making, but don’t fret—lye is safe when handled properly.
- Distilled Water: Used to dissolve lye for the chemical process.
- Essential Oils: For fragrance—think lavender for relaxation or eucalyptus for an invigorating scent.
- Colorants: Natural options like turmeric or activated charcoal can add charm.
Tools You’ll Need
- A digital scale (precision is key!)
- A heat-safe container for mixing lye
- Measuring spoons
- Stick blender
- Soap molds
- Safety goggles and gloves (safety first!)
Step-by-Step Guide to Making Your First Soap
Are you excited yet? Let’s get into the nitty-gritty of making your first batch of homemade soap.
Step 1: Safety First
Before you begin, always remember to wear gloves and goggles. Lye can be caustic, so prioritize safety.
Step 2: Measure Ingredients
Using a digital scale, measure your lye and water. (Seek out specific recipes for exact measurements based on your desired batch size.)
Step 3: Mix Lye and Water
In a well-ventilated area, slowly add the lye to the water (not the other way around!) and stir until fully dissolved. Set aside to cool.
Step 4: Melt the Base Oils
Melt your chosen oils in a separate heat-safe container until they reach around 100°F.
Step 5: Combine Mixtures
Once both the lye mixture and the oils are at approximately the same temperature, slowly pour the lye into the oils while using your stick blender to mix until you reach a ‘trace’ (this means the mixture thickens and holds a trail when drizzled on the surface).
Step 6: Add Extras
Now’s the fun part! If you’re adding essential oils, colorants, or botanicals, mix them in gently after reaching trace.
Step 7: Pour into Molds
Pour your soap mixture into molds, smoothing the top and making sure no air bubbles are trapped.
Step 8: Curing Process
Cover the molds with a towel and let them sit for 24-48 hours. After that, pop them out and slice into bars! Then, let them cure for about 4-6 weeks.
Step 9: Enjoy Your Creation
After the curing period, your soap is ready to enjoy! The texture should be smooth, and you’ll get to experience the lovely scent you chose.
Quick Beauty Tips for Using Your Homemade Soap
- Store Properly: To maintain your soap’s integrity, store it in a cool, dry area away from direct sunlight.
- Experiment: Don’t hesitate to try new combinations of ingredients. Each batch can be an opportunity for creativity.
- Gift to Loved Ones: Wrap up a few bars and share the joy of homemade self-care with friends and family—it’s a heartwarming gift.
Common Mistakes to Avoid
Making soap can seem daunting, but it’s all part of the learning process. Here are some common pitfalls to dodge:
- Skipping Safety Gear: Always protect yourself with gloves and goggles.
- Not Measuring Correctly: Precision is key to ensure the proper chemical reactions occur.
- Ignoring Trace: Not mixing enough to reach trace means the soap might not set properly.
- Overheating Ingredients: This can alter your oils and affect the outcome, so keep temperatures balanced.
FAQs about DIY Soap Making
Can I use regular kitchen utensils?
While you can use some utensils, it’s best to designate tools specifically for soap making to avoid cross-contamination.
What type of essential oils should I use?
Opt for pure essential oils that are skin-safe. Lavender, eucalyptus, and tea tree oils are popular choices.
Is it safe for sensitive skin?
Homemade soap can be gentle on the skin, especially when you choose calming oils and avoid synthetic fragrances.
Can I color my soap naturally?
Absolutely! Natural colorants like turmeric, beetroot powder, and spirulina can add vibrant hues without the chemicals.
Bonus Self-Care Ideas
Once you’ve mastered DIY soap, why not explore other creative self-care activities? Here are a few wonderful ideas:
- Make Bath Bombs: Effervescent fun for a relaxing soak.
- Create Sugar Scrubs: Exfoliate while enjoying scents and soft skin.
- Try Candle Making: Fill your space with lovely aromas and a cozy glow.
Embracing Your DIY Journey
As we wrap up, let’s take a moment to reflect on the journey of making our own soap. It’s not just about crafting a bar to get clean; it’s about investing in yourself. With every batch you create, you’re nurturing your skin, your mind, and your spirit.
You might start with soap, but before you know it, you can broaden your self-care regimen into a lifestyle filled with beautiful, homemade treasures. It’s the little things, like a luxurious lather of your very own soap, that turn a mundane routine into a delightful experience.
It’s time to embrace your creativity, indulge in self-care, and relish in the goodness you’ve created. So grab those ingredients and molds—your DIY soap adventure awaits!