
Start Your Journey into Soap Making
Imagine this: it’s a rainy afternoon, and you’re looking for a cozy indoor activity that not only feeds your creativity but also results in something beautiful and practical. Sound familiar? That’s how I found myself on the thrilling path of cold-process soap making. Making natural soap from scratch isn’t just about having pretty bars in your bathroom; it’s a satisfying blend of creativity and self-care, echoing the beauty of nurturing ourselves and our loved ones.
I remember my first attempt at making soap—it started with a few basic ingredients and a desire to create something special for my family. The joy of crafting those beautiful bars with scents and colors I chose was unparalleled. If you’re curious about diving into this fantastic DIY, let’s roll up our sleeves and explore the wonderful world of cold-process soap making together.
Understanding Soap Making Ingredients
Before we get down to the nitty-gritty, let’s talk about what you’ll need to make your own soap. This isn’t just about mixing some stuff in a bowl; it’s a delightful blend of chemistry, artistry, and self-expression. Here’s a basic rundown of the essential ingredients and their roles:
Oils and Butters: These are the base of your soap. Common choices include:
- Olive oil: Provides moisture.
- Coconut oil: Creates lather and hardness.
- Shea butter: Adds emollient properties.
Lye (Sodium Hydroxide): This is where the magic happens. Lye is responsible for the saponification process, turning the oils into soap. Note: Always handle lye with care (more on this later).
Distilled Water: Lye needs water to dissolve and react; distilled water is the best choice for purity.
Essential Oils or Fragrance Oils: These add enchanting aromas to your soap. Choose wisely, as some oils have specific skin benefits.
Colorants: Optional but fun! Natural colorants like clay or certain spices can add a beautiful touch.
Additives: Consider adding things like oats, honey, or dried flowers for texture and benefits.
Equipment You Will Need
Now, before you rush off to the kitchen, you’ll need to gather some equipment. Here’s what you should have on hand:
- Stainless steel or glass mixing bowls
- A stick blender for mixing
- A scale for weighing ingredients (important for measurement accuracy)
- A thermometer (digital is easiest)
- A lye-safe container (like a glass jar)
- Soap molds (silicone molds work wonderfully)
- Safety gear: gloves, goggles, and a long-sleeved shirt to protect against lye splashes
Safety First in Soap Making
Let’s be clear—safety is paramount here. Working with lye can be dangerous if not handled correctly. Here are a few essential safety tips:
Work in a well-ventilated area: Lye can emit fumes, so make sure there’s adequate airflow.
Use proper safety gear: Gloves and goggles should be your best friends during this process. You’ll feel like a science wizard, and trust me, it’s worth it.
Store lye safely: Keep it away from children and pets, and make sure to label it clearly.
Always add lye to water, never the other way around: This ensures that the lye dissolves safely and avoids dangerous reactions.
Basic Cold-Process Soap Recipe
Ready to get your hands dirty? Here’s a simple recipe for a basic cold-process soap. This recipe makes about 2 pounds of soap, perfect for beginners.
Ingredients
- 10 oz. olive oil
- 12 oz. coconut oil
- 8 oz. shea butter
- 12 oz. distilled water
- 4.5 oz. lye
- 1-2 oz. essential oils (like lavender or tea tree for a calming effect)
Instructions
Preparation: Make sure you’re wearing your safety gear. Measure out your lye and water in separate containers. It’s always best to use a scale for accuracy.
Mix Lye and Water: Slowly add the lye to the distilled water (never the other way around). Stir gently until dissolved. You’ll see the mixture heat up—this is normal!
Melt Your Oils: In a separate bowl, combine your olive oil, coconut oil, and shea butter. Melt them together in the microwave or over a double boiler until everything is liquid.
Cool Down: Allow both your lye solution and your oils to cool to around 100-110°F.
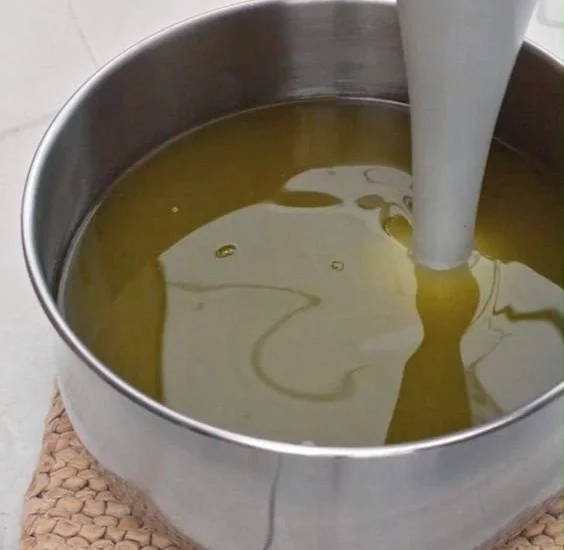
Combine: Slowly pour the lye solution into the oils, stirring gently. Use your stick blender to mix until it reaches a light trace (think of a thin pudding texture).
Add Essential Oils: Once you have that trace, add your essential oils and blend again until well incorporated.
Pour into Molds: Now’s the fun part! Pour the soap mixture into your molds, tapping lightly to remove air bubbles.
Cure: Cover the molds with a towel and leave them undisturbed for 24-48 hours.
Unmold and Cut: After they’ve set, pop them out of the molds and cut them into bars. Remember, fresh soap needs to cure for 4-6 weeks before it’s safe to use.
Common Mistakes to Avoid
As with any new endeavor, there are a few bumps along the way. Here are some mistakes I’ve made and learned from:
Not measuring accurately: Soap making is a science; being off by even a small amount can affect the outcome.
Skipping the curing process: I get it; you’re excited, but fresh soap needs to cure to ensure it’s safe for your skin.
Ignoring safety precautions: Safety first, always.
Quick Beauty Tips for Soap Making Success
Experiment with scents: Don’t be afraid to try blending essential oils to find your signature aroma.
Use natural colorants: They’re a fun way to add personality to your bars without synthetic dyes.
Add exfoliants: Things like ground coffee, oats, or poppy seeds can elevate your bars, making them not only lovely but beneficial for your skin.
Bonus Self-Care Ideas
Making soap can be therapeutic but remember that self-care doesn’t stop there! Consider pairing your soap-making session with these lovely ideas:
Set the mood: Light a relaxing candle, play your favorite tunes, and embrace the creative vibe.
Invite friends over: Host a soap-making party! Sharing the joy makes it even sweeter.
Create gift sets: Your handmade soaps can make fabulous gifts. Pair them with a little loofah or some dried flowers.
FAQs About Cold-Process Soap Making
What if my soap didn’t firm up?
If your soap still feels soft after 48 hours, it may not have gone through saponification properly. This can happen if the lye wasn’t mixed correctly. Don’t fret; you can often re-batch it into new soap.
Can I use kitchen utensils for soap making?
Ideally, you should use designated equipment for soap making, especially when using lye. It’s for your safety and the quality of your soap.
How do I know if my soap is safe to use?
After the curing period, a pH test can show you if your soap is safe. Generally, properly made soap should feel mild and not irritate the skin.
Embrace Your Soap Making Journey
Soap making is as much about the process as it is about the final product. You’ll find that with each batch you create, you’re crafting little pieces of art that care for your skin and offer a hint of your personality to those you share them with.
So, what will you create? The world of cold-process soap is a canvas for your creativity, and I can’t wait for you to experience all the fragrant joy that comes with it. You’ve got this, and remember—it’s about enjoying the journey, learning, and embracing the beauty of your craft. Happy soap making!