
A Beginner’s Guide to Making Homemade Soap and Candles
Creating homemade soap and candles is a delightful and rewarding DIY project that anyone can enjoy. Whether you’re looking to make natural soap for personal use or create beautifully scented candles as gifts, this step-by-step guide will walk you through everything you need to know. Let’s light up your crafting journey!
Why You Will Love This Recipe
Making your own soap and candles not only allows you to develop a creative hobby, but it also lets you customize your products according to your preferences. You can control the ingredients, scent, and design, ensuring they fit your personal style or that of the recipient. Plus, there’s something incredibly satisfying about using products crafted with your own hands.
Ingredients for Homemade Soap
For the sake of this article, we will focus on the cold process soap method, a popular choice among DIY enthusiasts.
Soap Ingredients:
- 16 oz Olive Oil: A wonderful moisturizer with a gentle touch.
- 16 oz Coconut Oil: Provides great lather and hardness.
- 16 oz Palm Oil: Gives the soap its structure.
- 12 oz distilled water: Used to mix with lye.
- 7.3 oz sodium hydroxide (lye): Essential for the saponification process (handle with care!).
- Essential oils (optional): 1-2 oz based on your scent preference (lavender, eucalyptus, etc.).
Equipment for Soap Making
- Safety goggles
- Gloves
- Digital scale
- Heat-resistant container (for mixing lye and water)
- Stick blender
- Soap mold or silicone mold
- Thermometer
- Mixing spoons
- Measuring spoons
Step-by-Step Instructions for Cold Process Soap
Preparation Time: 20 minutes
Making Time: 4-6 weeks (including curing)
Approximate Yield: 4-6 bars of soap
Safety First: Put on safety goggles and gloves. Work in a well-ventilated area.
Prepare the Lye Solution: Measure the distilled water in a heat-resistant container. Slowly add the sodium hydroxide to the water (never the other way around!) while stirring until fully dissolved. This will produce heat and fumes, so be cautious. Allow it to cool.
Melt Oils: In a separate container, combine the olive oil, coconut oil, and palm oil. Heat gently until melted and combined, then let it cool to around 100°F.
Combine Lye and Oils: Once both the lye solution and the oils have cooled (ideally to around the same temperature), slowly pour the lye solution into the oils while stirring gently. Use a stick blender to mix until "trace" is reached (when the mixture thickens slightly).
Add Fragrance: If desired, stir in your chosen essential oils for fragrance.
Pour into Mold: Carefully pour the soap mixture into your mold. Tap gently to remove air bubbles.
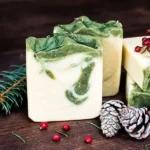
Cure Your Soap: Cover the mold with a towel and let it sit for 24-48 hours until it hardens. Then, carefully remove it from the mold and cut into bars.
Curing Time: Place the bars in a cool, dry place to cure for 4-6 weeks before using.
Tips for Success
- Always measure your ingredients accurately; soap making is a precise science!
- Stick with the recommended lye and water ratios to avoid any mishaps.
- Ensure your oils and lye solution are within a similar temperature range (around 100°F) for the best results.
Common Mistakes to Avoid
- Skipping safety gear: Always wear gloves and goggles to protect yourself from lye.
- Using inaccurate measurements: Invest in a good digital scale for precise measurements.
- Insufficient curing time: Don’t rush this step; it’s crucial for your soap’s quality.
Variations and Customization Ideas
- Color: Use natural colorants, like turmeric or spirulina.
- Additives: Incorporate exfoliants like oatmeal or coffee grounds.
- Scent combinations: Experiment with mixing different essential oils.
Storage and Shelf Life
Store your bars of soap in a cool, dry place away from direct sunlight. When cured properly, homemade soap can last up to 1 year.
Safety Tips
- Always handle sodium hydroxide (lye) with care; it can be dangerous if mishandled.
- Make lye solutions in a well-ventilated area to avoid inhaling fumes.
Frequently Asked Questions
Is it safe to make soap at home?
Yes, as long as you follow safety guidelines and handle lye carefully.
How do I know when my soap is ready to use?
Your soap should be fully cured (about 4-6 weeks) before use to avoid skin irritation.
Can I use any oils in my soap?
While many oils can be used, it’s crucial to research their properties and ensure they are safe and effective for soap making.
What should I do if my soap doesn’t harden?
If your soap remains soft, it may have high water content or an incorrect lye ratio. Adjust your recipe accordingly for your next batch.
Conclusion
Making homemade soap is a fun and fulfilling endeavor that allows for endless creativity and personalization. By following these simple steps and tips, you’ll be on your way to creating beautiful, natural soap that you can enjoy yourself or give as heartfelt gifts.
Now it’s your turn! Gather your ingredients and equipment, and embark on this exciting DIY project. Happy crafting!