
Learn How to Make Natural Winter Spice Pine Soap
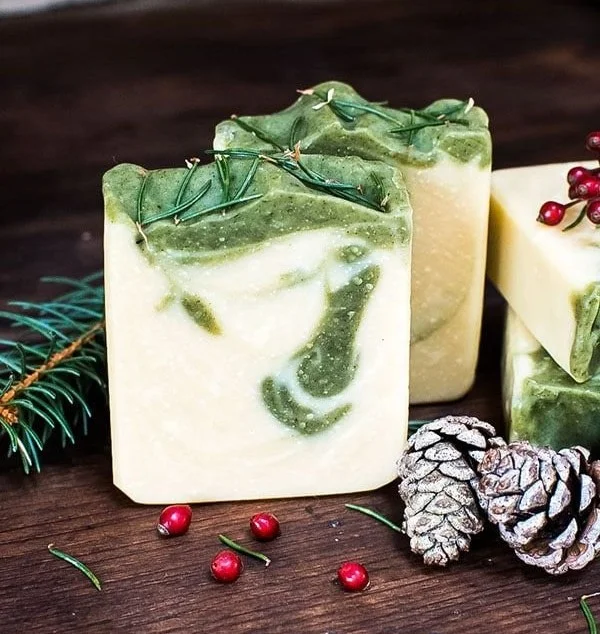
As winter approaches and the air turns crisp, our skin often feels the effects of the dry atmosphere. One wonderful way to combat winter dryness while enjoying the cozy scents of the season is by making your own natural Winter Spice Pine Soap. This homemade soap not only moisturizes your skin but fills your space with a delightful sweet-spicy evergreen scent that’s perfect for the holidays. If you’re a DIY enthusiast or a beginner looking to create something special, let’s dive into this soothing soap recipe!
Why You Will Love This Recipe
Making your own soap allows you to control the ingredients, ensuring they are natural and free from harsh chemicals. This Winter Spice Pine Soap recipe is perfect for holiday gifting or personal use. Here are some reasons you’ll love it:
- Moisturizes Dry Skin: Crafted with skin-loving oils, this soap helps nourish and hydrate.
- Earthy Aroma: The lovely blend of pine, cinnamon, and sweet spices creates a warm and inviting scent.
- Easy to Customize: You can tweak the recipe to suit your scent preferences or skin needs.
Ingredients
For Winter Spice Pine Soap
- 8 oz (227 g) Olive Oil: A great moisturizing oil that helps to nourish the skin.
- 8 oz (227 g) Coconut Oil: Adds a bubbly lather and hardness to the soap.
- 8 oz (227 g) Palm Oil: Helps create a stable bar and contributes to moisturizing properties.
- 8 oz (227 g) Distilled Water
- 3.3 oz (94 g) Sodium Hydroxide (Lye): A key ingredient in the cold process of soap making, must be handled with care.
- 1 oz Pine Essential Oil (or Fragrance Oil): Provides the signature pine scent.
- 0.5 oz Cinnamon Essential Oil: Adds warmth and spice.
- 0.5 oz Clove Essential Oil: Complements the cinnamon with its deep, rich fragrance.
- 1 oz Natural Colorant (optional): You may use green clay or another natural colorant.
Optional Add-ins
- Dried Pine Needles: For an extra touch of nature.
- Oatmeal or Honey: For added exfoliation and moisture.
Equipment
- Safety Gear: Gloves, goggles, and a mask to protect from lye fumes.
- Digital Scale: To accurately measure ingredients.
- Heatproof Containers: For mixing lye and oils.
- Stick Blender: For blending oils and lye solution.
- Pouring Pitcher: For transferring the soap mixture.
- Soap Mold: Silicone molds work well for easy removal.
- Thermometer: To check the temperature of oils and lye.
- Spoon or Spatula: For mixing.
Step-by-Step Instructions
Preparation Time
- Preparation: 20 minutes
- Making Time: 60 minutes
- Curing Time: 4-6 weeks
- Yield: Approximately 10 bars of soap
Steps
Preparation: Wear your safety gear! Ensure you are in a well-ventilated area. Measure out your ingredients accurately using a digital scale.
Mix the Lye Solution:
- Carefully add the lye to the distilled water (never the other way around) in a heatproof container. Stir gently until dissolved. Set aside to cool.
Melt the Oils:
- In a separate heatproof container, combine the olive oil, coconut oil, and palm oil. Heat gently until melted and combined.
Combine Oils and Lye:
- Wait until both the lye solution and oils are around 100°F (38°C). Slowly pour the lye solution into the oils. Use the stick blender to mix until you reach “trace,” a light pudding-like consistency.
Add Fragrance and Color:
- Once at trace, add your pine, cinnamon, and clove essential oils along with any natural colorant. Mix thoroughly to incorporate.
Add Optional Ingredients:
- If using, stir in dried pine needles, oatmeal, or honey at this stage.
Pour into Molds:
- Carefully pour the soap mixture into prepared molds. Smooth the top with a spatula if needed.
Insulate and Cure:
- Cover the molds with a towel to insulate them for 24 hours. This helps the soap saponify thoroughly.
Unmold and Cut:
- After 24 hours, carefully remove the soap from the molds and cut into bars. Allow them to cure on a rack for 4-6 weeks before using.
Tips for Success
- Temperature Matters: Make sure both your lye solution and oils are at similar temperatures for better emulsification.
- Blend Wisely: Don’t over-blend after adding fragrances; this can cause the soap to seize.
Common Mistakes to Avoid
- Incorrect Lye Measurement: Always use a reliable soap calculator to determine the correct lye amount based on your oil weights.
- Skipping Safety Gear: Lye can cause burns; never skip gloves or goggles.
- Not Curing Long Enough: Proper curing time is essential for soap safety and longevity.
Variations and Customization Ideas
- Scent Variations: Experiment with different essential oils like cedarwood or eucalyptus for a unique aroma.
- Color Changes: Use natural colorants like turmeric or beetroot powder for a fun twist.
- Add Texture: Incorporate exfoliants such as poppy seeds or crushed nuts for added texture.
Storage and Shelf Life
Store your completed soap in a cool, dry place away from direct sunlight. Properly cured, this soap can last for 1-2 years. It is best to wrap each bar in paper or store it in a porous container to allow it to breathe.
Safety Tips
- Always wear gloves, goggles, and a mask when handling lye.
- Work in a well-ventilated area to avoid inhaling lye fumes.
- Store lye and soap materials out of reach of children and pets.
Frequently Asked Questions
1. What if my soap turns out too soft?
This can happen due to incorrect lye calculations or insufficient curing time. Allow the soap more time to cure or use a soap calculator to ensure accuracy.
2. Can I use other oils in this recipe?
Yes, you can substitute some oils, but maintain the total weight to ensure the lye calculates correctly.
3. Is it safe to use essential oils on my skin?
Most essential oils are safe for topical use, but always perform a patch test to check for sensitivities.
4. How do I know when my soap is ready to use?
After curing for 4-6 weeks, your soap should be hard and the scent should have matured.
5. Can I add color to my soap?
Absolutely! Natural colorants can be added, but avoid using water-based colorants as they can affect the chemical reaction.
6. How can I ensure my soap doesn’t seize?
Stick to recipes with essential oils that have a known track record for stability and follow the temperature guidelines closely.
Conclusion
Making your own natural Winter Spice Pine Soap is not only a fun, rewarding project but also a perfect way to pamper your skin during those chilly winter months. With its delightful scent and skin benefits, it can make a fantastic homemade gift for friends and family. Give this DIY soap project a try, and embrace the art of creating beautiful, fragrant bars that capture the essence of winter!
Happy soap making!