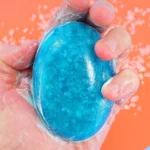

This Winter Forest Soap Recipe is a Refreshing Addition to Your Self-Care Routine
Imagine stepping into your morning shower and being enveloped in the crisp, invigorating scent of a winter forest. The aroma of essential oils from cedar and pine transports you to a serene, snowy landscape, awakening your senses and refreshing your spirit. Here’s the truth: self-care is not just about comforting bath products; it’s about creating an atmosphere that adds joy and rejuvenation to your daily routine.
One way to enhance your self-care ritual is by making your own winter forest soap. Not only does this project allow you to immerse yourself in the soothing fragrances of nature, but it also gives you the opportunity to craft something beautiful and beneficial for your skin. If you’re new to soap making, don’t worry! With the right guidance, you can create a luxurious product right at home without needing a ton of experience. You might even find enjoyment in experimenting with different scents and ingredients.
Let’s dive into the delightful process of crafting your own winter forest soap, plus some tips on how to personalize your creations.
Understanding the Benefits of Natural Ingredients
Before we get into the step-by-step process, let’s take a moment to appreciate the wonders of using natural ingredients in your skincare. Essential oils from forest trees, such as cedarwood and pine, not only add a delightful aroma but also carry many skin benefits. Cedarwood essential oil is known for its antiseptic and anti-inflammatory properties, which can help clear blemishes and soothe irritated skin. Pine oil, on the other hand, is rich in antioxidants, making it great for keeping skin healthy and free from environmental stressors.
When you make soap from scratch, you have control over what goes into it. This aspect is vital for anyone conscious about their skincare routine. In fact, if you’re interested in expanding your aromatic experience at home, consider checking out easy homemade candle recipes that complement your soap and create a serene ambiance.
Gather Your Ingredients and Tools
For this winter forest soap recipe, you’ll need the following supplies:
Ingredients:
- 1 lb of melt-and-pour soap base (goat’s milk or shea butter work well)
- 1 tablespoon of cedarwood essential oil
- 1 tablespoon of pine essential oil
- Optional: Green mica powder for coloring
- Optional: Natural exfoliants like ground oats or crushed almonds
Tools:
- Soap mold (silicone molds work best)
- Glass measuring cup
- Stirring spoon
- Rubbing alcohol in a spray bottle
It’s best to gather everything before you start. Not only will this make the process smoother, but it’ll also keep the creative energy flowing.
Step-by-Step Soap Making Process
Step 1: Melt the Soap
Begin by cutting your soap base into small chunks. This helps it melt evenly. Place the pieces in a glass measuring cup and microwave in short intervals, around 30 seconds at a time, stirring in between until fully melted.
Pro tip: Be careful not to overheat the soap; it should be just melted without boiling.
Step 2: Add Scent and Color
Once the soap base melts, it’s time to add your essential oils. Stir in the cedarwood and pine essential oils thoroughly. If you’d like a pop of color, gently mix in the green mica powder. If you prefer a more natural look, you can skip coloring altogether, giving your soap a rustic charm.
As you mix, you might want to think about different scents that pair well with winter vibes. For more ideas and guidance, consider checking out a beginner’s guide to candle making to introduce more aromas into your self-care routine.
Step 3: Incorporate Exfoliants
If you decide to use exfoliants like ground oats or crushed almonds, now’s the time to add them. This will provide a gentle scrub that can be fantastic for sloughing off dead skin. Stir gently to distribute them evenly throughout the mixture.
Step 4: Pour into Molds
Carefully pour your mixture into the soap molds. You might want to tap the molds gently on the counter to eliminate any air bubbles. Now, check the surface for any imperfections; if you see bubbles forming, lightly spray with rubbing alcohol to smooth everything out.
Step 5: Let Curd and Cure
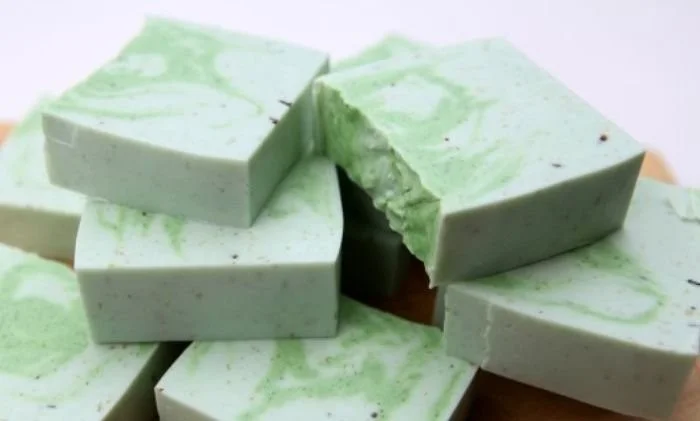
Allow your soap to cool and harden. This usually takes about one to two hours. Once they’re solid, gently pop them out of the molds. If you’re feeling adventurous, cut them into bars for more versatility.
Storing and Using Your Winter Forest Soap
Once your gorgeous bars are ready, make sure to store them in a cool, dry place. You can wrap them in wax paper or store them in a decorative box to keep them fresh and fragrant. Each use will remind you of the tranquility of a winter forest, an experience designed for both cleansing and relaxation.
Let’s talk about how to maximize the experience when using your soap. Pairing it with a soothing body wash or a rich body lotion can enhance your overall feel-good moment. If you’re looking for more luxurious options, you can explore forest-scented candles that can lend a calming atmosphere during your shower routine.
Common Mistakes to Avoid
Like any DIY project, there are common pitfalls to be mindful of. Here are a few tips to help guide you:
1. Overheating the Soap
As mentioned, be careful with the temperature when melting your soap base. Overheating can cause the gelling of the soap, affecting texture.
2. Skipping Essential Oils
Don’t underestimate the importance of adding essential oils to your soap; they are what provide that lovely scent and therapeutic benefits.
3. Inconsistent Mixing
Make sure to mix the oils and any color thoroughly. Inconsistent mixing can lead to uneven color and scent distribution.
Conclusion
Creating your own winter forest soap is a delightful way to nurture your body and spirit during the cold months. Not only do you end up with a beautiful product, but you also give yourself a refreshing shower experience. To dive deeper into other soothing options, consider exploring the aromatic benefits of products like woodsy cedarwood soap, or for a seasonal treat, discover the Zum® Bar Frosted Fir for a fun winter scent. And if you’re feeling inspired to try your hand at other DIY projects, don’t miss the chance to make delightful gifts with the Make Wildflower Soap (Cold Process Recipe).
Elevate your self-care game this winter and relish the serenity you create with every lather!