
How to Make Exfoliating Soap the Easy Way with a Melt and Pour Exfoliating Soap Recipe
If you’ve ever dreamed of creating your own soap at home, you’re in for a treat! Making melt and pour exfoliating soap is not only a creative and enjoyable experience but also a perfect opportunity to craft personalized gifts for friends and family. In this article, I’ll guide you through the process, sharing tips, ingredients, and techniques to help you make beautiful soap bars that gently exfoliate your skin.
Why You Will Love This Recipe
This melt and pour method is ideal for beginners since it eliminates the need for handling lye, making the process safe and straightforward. Exfoliating soap can refresh your skin, and by customizing the ingredients, you can create unique scents and textures tailored to your preferences. Let’s dive in!
Ingredients
For this exfoliating soap recipe, you’ll need:
- 1 lb (16 oz) of melt and pour soap base (choose a glycerin or shea butter base for their moisturizing properties)
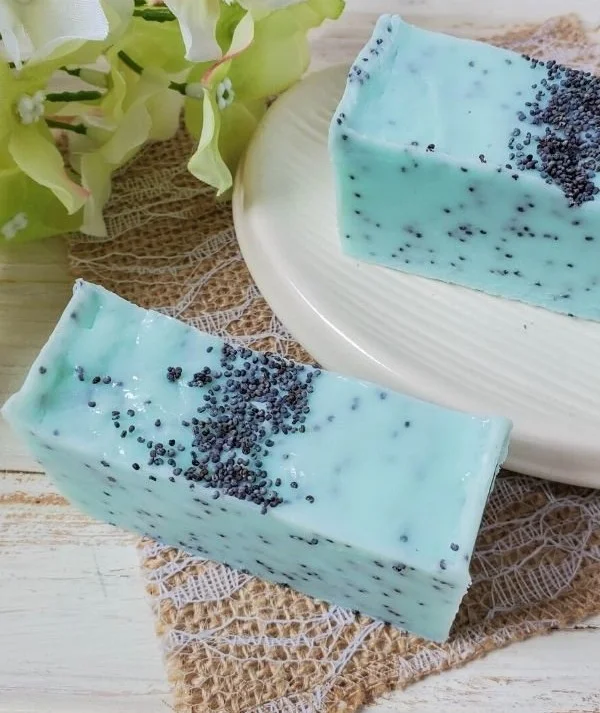
- 1/4 cup of exfoliating agent (such as ground oatmeal, coffee grounds, or sugar)
- 1–2 teaspoons of fragrance oil (optional, for a delightful scent)
- 1 tablespoon of colorant (optional, such as soap colorants or natural alternatives like turmeric or beet powder)
- Essential oils (optional, add 15-20 drops for extra scent and skin benefits)
Equipment
Gather the following supplies before starting:
- A double boiler or microwave-safe bowl
- A stirring spoon
- Soap molds (silicone molds work best)
- Measuring cups and spoons
- A thermometer (optional, for checking soap temperature)
- An apron (to keep your clothes clean)
Step-by-Step Instructions
Prepare Your Workspace: Clear a clean, flat surface. Lay down newspaper or a protective covering if desired.
Cut the Soap Base: Use a knife to cut your melt and pour soap base into small cubes (about 1-inch in size) for easier melting.
Melt the Soap Base:
- Double Boiler Method: Fill the bottom pot with water and bring it to a gentle simmer. Place the soap cubes in the top pot and stir until melted.
- Microwave Method: Place the soap cubes in a microwave-safe bowl and heat in 30-second intervals, stirring in between, until completely melted (this typically takes about 1-2 minutes).
Add Exfoliating Agents: Once the soap base is melted, remove it from the heat. Stir in your chosen exfoliating agent (e.g., ground oatmeal or coffee grounds).
Incorporate Fragrance and Color: If you’d like to add fragrance and color, now’s the time! Add your fragrance oil and colorant, stirring well to combine.
Pour into Molds: Carefully pour the melted mixture into your soap molds. Tap the molds gently on the counter to release any air bubbles.
Let it Cool: Allow the soap to cool at room temperature until solid. This typically takes about 1-2 hours. For quicker setup, you can place the molds in the refrigerator for about 30 minutes.
Unmold the Soap: Once the soap is completely cool, gently pull it out of the molds.
Cure (Optional): While melt and pour soap doesn’t require curing like cold process soaps, you can let them sit for an additional day before using or gifting.
Tips for Success
- Experiment with Scents: Try a combination of essential oils, such as lavender and chamomile, for a calming soap.
- Mix Different Exfoliants: You can mix exfoliating agents for a unique texture (e.g., sugar and ground coffee).
- Fix Bubbles: If you see little bubbles on the surface of your poured soap, you can use a spritz of rubbing alcohol to pop them.
Common Mistakes to Avoid
- Overheating the Soap Base: Avoid cooking your soap too long; it can become thick and unusable. Always stir frequently while melting.
- Adding Exfoliants Too Soon: If you add them while the soap is too hot, they may sink to the bottom. Wait for the soap to cool slightly before adding.
- Using Too Much Fragrance: A little often goes a long way. Stick to recommended measurements for balanced scents.
Variations and Customization Ideas
- Add Moisturizing Oils: Incorporate 1 tablespoon of oils like jojoba or sweet almond oil for added skin benefits.
- Use Natural Colorants: Get creative with natural colorants such as spirulina for green or paprika for red.
- Layering Colors: Pour different colors of soap one at a time to create layered effects in the molds.
Storage and Shelf Life
Store your finished soap bars in a cool, dry place away from direct sunlight. Properly stored, they can last for up to 6 months. You can wrap them in wax paper or place them in airtight containers to maintain their freshness.
Safety Tips
While making melt and pour soap is generally safe, keep the following in mind:
- Be cautious with the heat source and melted soap, as it can cause burns.
- Ensure good ventilation if using fragrance oils.
- Keep your workspace clean and organized to avoid accidents.
Frequently Asked Questions
1. Can I use regular kitchen ingredients for exfoliating agents?
Yes! Ingredients like sugar, coffee grounds, or ground oats are excellent natural exfoliants safe for skin use.
2. How do I prevent soap from being too soft?
Ensure the soap base is melted completely and mix well. Overheating can also result in a softer final product.
3. Can I add multiple colors to the soap?
Absolutely! Just pour one color at a time and allow it to set slightly before adding the next layer for a beautiful, multi-colored effect.
4. How do I know when my soap is fully cooled?
The soap will feel solid and firm to the touch. You can gently press on the top; if it springs back, it’s ready to unmold.
5. Is it necessary to use a specific type of soap base?
While a glycerin base is common, you can also find bases made from shea butter or goat’s milk; choose according to your skin’s needs or personal preferences.
Conclusion
You’ve now learned how to make exfoliating soap using a simple melt and pour method! With just a few easy steps, you can create sensational homemade soap bars that make wonderful gifts or additions to your personal skincare routine. Enjoy experimenting with different colors, scents, and exfoliants as you discover the joy of DIY soap-making. So gather your supplies, get creative, and enjoy your soap-making adventure! Happy crafting!