
Create a Beautiful Oatmeal Soap Recipe with Cherry Almond Fragrance
Making your own soap at home can be an incredibly fulfilling and creative experience. This delightful Cherry Almond Oatmeal Soap combines the soothing properties of oats with the sweet, nutty fragrance of cherry and almond, making it a perfect treat for your skin. This DIY project is an excellent starting point for beginners and is also perfect for those looking to create handmade gifts or natural bath products.
Why You Will Love This Recipe
This oatmeal soap recipe not only smells divine but also offers nourishing benefits for the skin. Oatmeal is known for its soothing properties, making it fantastic for dry or sensitive skin. When paired with the sweet cherry almond fragrance, it becomes a staple for your daily beauty routine. Additionally, the use of the melt and pour method allows you to customize your soap easily without the complications of handling lye, making it safer and more accessible for beginners.
Ingredients
To make approximately 4-6 bars of Cherry Almond Oatmeal Soap, you will need the following ingredients:
- 1 pound of melt and pour soap base (shea butter or glycerin)
- 1/4 cup of rolled oats (finely ground if desired)
- 1-2 teaspoons of cherry almond fragrance oil
- A few drops of pink or red soap colorant (optional)
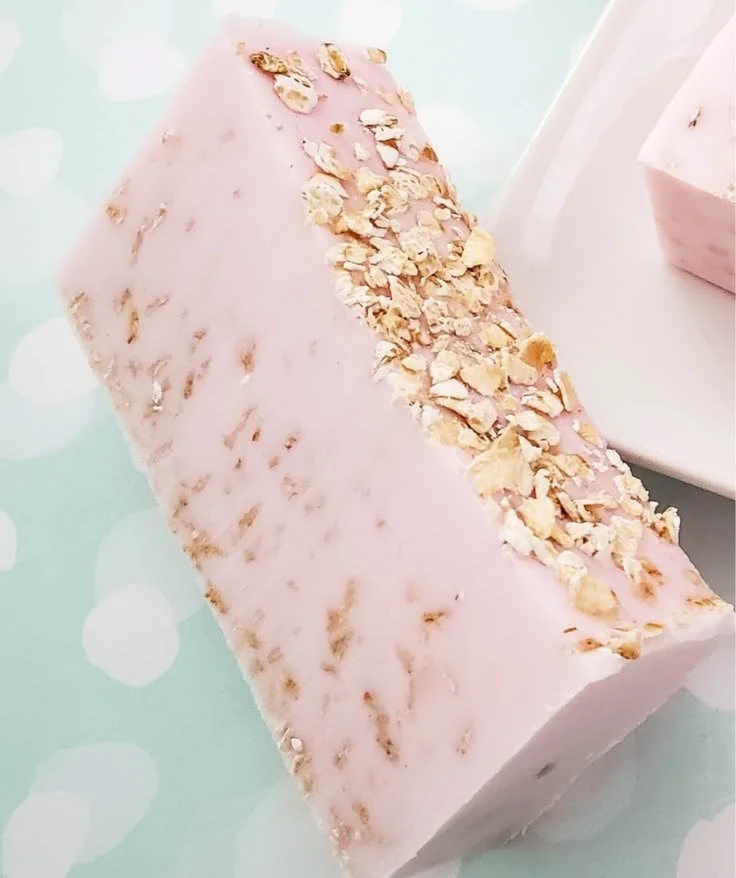
- A sprinkle of whole oats for decoration (optional)
Equipment
Before you start, gather the following equipment:
- A double boiler or a microwave-safe bowl
- A scale for measuring
- Soap mold (silicone molds work best)
- A spatula or stirring stick
- A measuring cup or spoon
- A knife for cutting the soap base
- Rubbing alcohol in a spray bottle (to eliminate air bubbles)
Step-by-Step Instructions
Making your own soap is a rewarding process. Follow these steps to create your Cherry Almond Oatmeal Soap:
1. Prepare Your Work Area
Ensure your workspace is clean and organized. Lay down newspaper or a protective covering to catch any spills.
2. Cut the Soap Base
Cut your melt and pour soap base into small cubes for easier melting.
3. Melt the Soap Base
Using a double boiler:
- Fill the bottom pot with water and bring it to a simmer.
- Place the soap cubes in the top pot, stirring occasionally until fully melted.
Alternatively, use a microwave:
- Place the soap cubes in a microwave-safe bowl and heat in 30-second intervals, stirring in between, until completely melted. Be careful not to overheat.
4. Add Oats and Fragrance
Once your soap base is melted:
- Stir in the rolled oats evenly.
- Add the cherry almond fragrance oil and mix well to ensure the scent is distributed throughout.
5. Add Color (Optional)
If you like, add a few drops of pink or red soap colorant to achieve your desired color. Mix slowly to avoid air bubbles.
6. Prepare the Mold
Pour a small amount of the soap mixture into your soap mold, filling it about 1/4 full. Allow this layer to set for about 5 minutes until it slightly hardens.
7. Finish Pouring the Soap
After the first layer sets, pour the remaining mixture into the mold. To eliminate air bubbles, lightly mist the top with rubbing alcohol.
8. Add Garnishes (Optional)
If desired, sprinkle a few whole oats on top for decoration.
9. Allow to Set
Let your soap sit at room temperature for about 1-2 hours until completely hardened. If you’re in a hurry, you can place it in the fridge for about 15-20 minutes.
10. Remove from the Mold
Once fully set, gently flex the silicone mold and pop out your beautifully crafted soap bars.
Tips for Success
- Experiment with Fragrance: Don’t hesitate to adjust the amount of fragrance oil according to your preference. Start with 1 teaspoon and increase gradually for a stronger scent.
- Avoid Bubbles: Stir slowly and gently to minimize air bubbles when mixing in the fragrance or adding color.
Common Mistakes to Avoid
- Overheating the Soap Base: Always monitor the melting process to prevent the soap from boiling over or burning.
- Not Allowing Enough Setting Time: Be patient and let your soap harden completely before removing it; this ensures a better shape and texture.
Variations and Customization Ideas
- Essential Oils: For a natural alternative, you can use essential oils instead of fragrance oils. However, ensure that they are also skin-safe.
- Additives: Consider adding other natural ingredients like honey, shea butter, or even dried flower petals for additional benefits and aesthetics.
- Different Colors and Scents: Feel free to experiment with other colors and scents to suit your style or seasonal themes.
Storage and Shelf Life
Store your finished soap bars in a cool, dry place away from direct sunlight. Properly stored, these bars can last for up to six months. Avoid wrapping them in plastic wrap to allow for proper air circulation, reducing moisture accumulation.
Safety Tips
- Use Protective Gear: Although melt and pour soap is generally safe, it’s always good to wear gloves to protect your skin from irritation.
- Ventilation: Work in a well-ventilated area, especially if using strong fragrances.
Frequently Asked Questions
1. Can I use a different type of soap base?
Yes, you can use any melt and pour soap base such as glycerin, goat milk, or coconut oil for different effects and benefits.
2. How can I make my soap more moisturizing?
Add oils like olive oil, coconut oil, or Vitamin E to your soap mixture before pouring into molds to enhance moisturizing properties.
3. Can I use other fragrances?
Absolutely! Play around with different fragrance oils or essential oils that you enjoy to create unique blends.
4. What can I do if my soap has bubbles?
If you notice bubbles on the surface, lightly mist the top with rubbing alcohol right after pouring. This will help eliminate them.
5. Is it okay to use the soap immediately after making it?
While it is technically safe to use your homemade soap immediately, allowing it to cure for at least 24 hours can enhance its performance and scent longevity.
Conclusion
Making your own Cherry Almond Oatmeal Soap is not only a fun craft project but also a fantastic way to indulge in self-care or create lovely gifts for family and friends. With this easy melt and pour recipe, you’ll enjoy a luxurious soap that nourishes your skin while filling your bathroom with an enticing aroma. Don’t hesitate to experiment and make it your own! Enjoy the process, and let your creativity shine. Happy soap making!