
Discovering the Joy of Homemade Soap
Imagine this: You’re in your cozy kitchen, surrounded by the warm scent of essential oils, as vibrant soap bars come to life right before your eyes. There’s something so satisfying about making your own soap. You might have heard that it can be complicated, but here’s the truth: using a melt-and-pour soap base makes it simpler than you think. If you’re hesitant to work with lye (which can be intimidating), this DIY soap bar tutorial is just right for you! Plus, not only is it fun, but these homemade soap bars also make a perfect gift for friends, mothers, or even to pamper yourself. You may also find Easy Homemade Eucalyptus Candle Recipes For Calm Moms useful.
Let’s dive into how you can whip up beautiful soap bars that lather well and smell divine. You might be wondering what the best way to get started is, and whether you can truly create something aesthetically pleasing. Rest assured, with the right materials and instructions, even a beginner can craft stunning soaps that stand out.
Why Melt and Pour Soap?
So, what’s the deal with melt-and-pour soap? Well, this method is perfect for beginners because it eliminates the need for complex chemical processes. You simply melt the soap base, add your favorite scents, colors, and any additives you desire, then pour it into molds. This means you can focus more on creativity without the worries that come with handling lye.
If you’re looking for more detailed steps on making your own candles — another fabulous DIY project — you can check out this DIY candle making guide that’s perfect for beginners. You’ll be impressed with how easy it is to create beautiful, customized candles just like our soap.
Getting Started: Materials You’ll Need
Before we can get into the soap-making process, you’ll need to gather some supplies. Here’s a quick list to help you out:
- Melt-and-Pour Soap Base: You can find this at most craft stores or online. There are different types, such as glycerin, shea butter, and goat milk. Choose one based on your skin type and the desired soap texture.
- Soap Molds: These come in various shapes and sizes. You can even use silicone molds that you might already have in your kitchen.
- Essential Oils: To make your soap fragrant, pick essential oils that resonate with you — like lavender, eucalyptus, or sweet orange.
- Natural Colorants: If you want colorful soap, consider using natural colorants like turmeric or spirulina, or you can opt for soap dyes available in stores.
- Additives: Think about exfoliants (like oatmeal or coffee grounds) or nourishing ingredients (like honey or shea butter) for an extra skin treat.
Step-by-Step Guide to Make Your Homemade Soap
1. Prepare the Workspace
It’s essential to clear a space on your kitchen counter. You’ll want to protect your surfaces to make cleanup easier. Lay down newspaper or parchment, and gather your materials within reach.
2. Melt the Soap Base
Cut your soap base into small chunks and place them in a microwave-safe bowl or a double boiler. Heat in short increments, stirring in between until completely melted. The soap should be smooth and pourable. Avoid overheating to prevent it from bubbling.
3. Customize Your Soap
Now, here’s where the fun begins! Once the base is melted, it’s time to incorporate your essential oils for fragrance, colorants for aesthetic flair, and any other additives you desire. Stir well to ensure everything is mixed evenly.
4. Pour into Molds
Carefully pour your mixture into the molds. Don’t fill them to the brim; leave a little space at the top. If you want to create layers of color, you can let one layer set slightly before adding the next.
5. Let It Set
Leave the soap at room temperature until it hardens, which can take a few hours. If you’re in a hurry, placing the molds in the refrigerator can speed up the process.
6. Unmold and Enjoy
Once fully set, gently pop your soap out of the molds. Admire your creations!
7. Packaging and Gifting
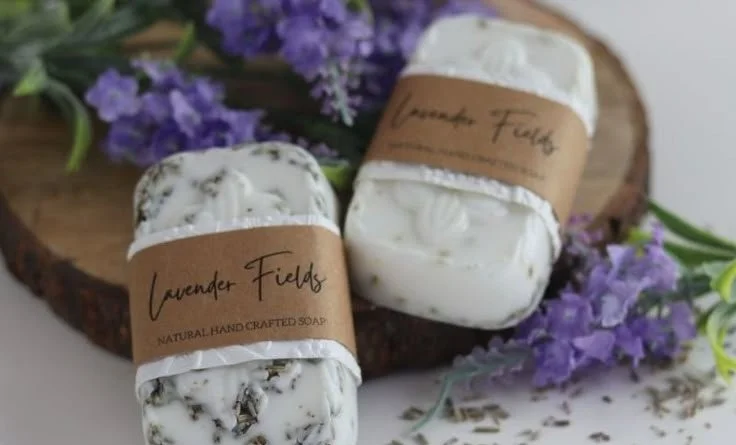
If you plan to give these bars as gifts, consider wrapping them in a stylish manner. Simple craft paper or clear cellophane tied with a pretty ribbon creates an attractive presentation.
Tips for Success
- Experiment: Feel free to try different combinations of oils and additives. You may discover a signature scent that makes your soap unique.
- Keep It Simple: If you’re feeling overwhelmed, start with fewer ingredients and build complexity as you become more comfortable.
- Store Properly: Homemade soap is best stored in a cool and dry area. It typically has a self-life of several months when properly cared for.
As you get into the groove of making your soaps, consider exploring other DIY projects as well. For instance, if you’re curious about making candles, the article on easy steps for homemade candles could inspire more of your own creations.
Common Mistakes to Avoid
Embarking on a new hobby can come with its share of hiccups. Here are a few common mistakes to keep in mind:
- Overheating the Soap Base: This can lead to bubbling or scorching, which doesn’t look good.
- Not Using Enough Fragrance: The scent can diminish during the cooling process, so don’t skimp on essential oils.
- Skipping the Cleanup: Soap can be tricky to clean once it hardens, so make sure to wash your utensils and workspace right away.
Final Thoughts on Your Homemade Soap Journey
Soap making is more than just a task; it’s a relaxing form of self-care and creativity. The more you practice, the more skilled you’ll become — and before you know it, you’ll be whipping up unique, personalized skincare bars that make your skin feel fabulous. It’s a rewarding experience that can become a regular part of your routine.
Bonus Self-Care Ideas
If you’re looking for additional self-care practices, consider incorporating activities like aromatherapy, guided meditation, or even spa nights into your routine. These can enrich your me-time and complement your newfound soap-making hobby beautifully.
Keep experimenting until you find your chosen method and flavor combinations. Soon enough, you’ll have a unique collection of blocks that are not only great for personal use but also delightful gifts.
Conclusion
Making your own soap can feel daunting, but it’s truly an enjoyable and fulfilling activity. Whether you prefer simple designs or intricate creations, the options are limitless. For those who want to explore even more DIY beauty projects, check out the insights found in easy soap recipes for beginners, discover fun ideas in making an easy, basic beginner soap, or delve into cold process soap making for beginners. Enjoy the journey into homemade beauty!