
Ready to Try Homemade Soap Making? A Beginner-Friendly Guide
Making your own soap at home can be a rewarding and enjoyable experience. Not only do you get to customize your soap with your favorite scents and colors, but you’ll also have a hand in creating something natural and gentle for your skin. In this step-by-step guide, we’ll walk you through the process of cold process soap making, from choosing your oils to the curing process, ensuring that you have all the information you need to successfully embark on your DIY soap-making journey.
Why You Will Love This Recipe
Cold process soap making allows for a wide range of customization, enabling you to create unique bars tailored to your preferences. You don’t need fancy ingredients or expensive equipment to get started; just a few basic oils, lye, and the right safety gear. Plus, making homemade soap can save you money in the long run, especially if you’ve been a loyal buyer of those expensive artisanal bars. With this guide, you’ll be on your way to crafting your very own natural soap that you can feel proud of!
Ingredients
For this beginner-friendly soap recipe, you’ll need just three main oils:
- Coconut Oil (15 oz) – for lather and cleansing properties
- Olive Oil (25 oz) – for moisture and gentle cleansing
- Palm Oil (15 oz) – for firmness and stable lather
You will also need:
- Sodium Hydroxide (Lye) (6.5 oz) – vital for the saponification process
- Distilled Water (12 oz) – to dilute the lye
- Essential Oils (optional, 1-2 oz) – for fragrance (e.g., lavender, eucalyptus)
- Colorants (optional) – such as mica or natural colorants if desired
Equipment
Before you start, gather the following equipment:
- Digital Scale – for accurate measurements
- Heat-Resistant Mixing Pitcher – for mixing lye and water
- Stainless Steel or Glass Mixing Bowls – for combining oils and mixtures
- Stick Blender – for emulsifying the soap mixture
- Thermometer – to check the temperature of oils and lye
- Soap Molds – silicone molds work well
- Safety Gear – gloves, goggles, and long sleeves for protection
- Measuring Cups and Spoons – for other ingredients and additives
Step-by-Step Instructions
Preparation Time: 30 minutes
Making Time: 1-2 hours
Yield: Approximately 10-12 bars
Step 1: Calculate the Lye
Use a reliable soap calculator to determine the exact amount of sodium hydroxide needed based on your oils’ weights. Keep in mind that lye is a caustic substance and must be handled carefully.
Step 2: Prepare Your Work Area
Ensure your working area is well-ventilated and free from clutter. Put on your safety gear: gloves and goggles.
Step 3: Mix the Lye
- Measure 12 oz of distilled water in a heat-resistant pitcher.
- Slowly add 6.5 oz of sodium hydroxide to the water while stirring gently. Never add water to lye, as this can cause a violent reaction. The solution will heat up and release fumes—make sure to do this in a well-ventilated area.
- Set the lye solution aside to cool down.
Step 4: Melt the Oils
- In a large stainless steel or glass bowl, combine 15 oz of coconut oil, 25 oz of olive oil, and 15 oz of palm oil.
- Heat gently until all oils are melted and combined. Let cool to around 100-110°F (38-43°C).
Step 5: Combine Lye and Oils
- Once both the lye solution and the oils are at a temperature of about 100-110°F (38-43°C), slowly pour the lye into the oils while stirring gently.
- Use your stick blender to mix the oils and lye until you reach "trace," which looks like a pudding-like consistency on the surface when drizzled.
Step 6: Add Fragrance and Color
- If you’re using essential oils, add 1-2 oz at this stage and blend gently.
- If adding colorants, mix thoroughly until the color is even.
Step 7: Pour the Soap into Molds
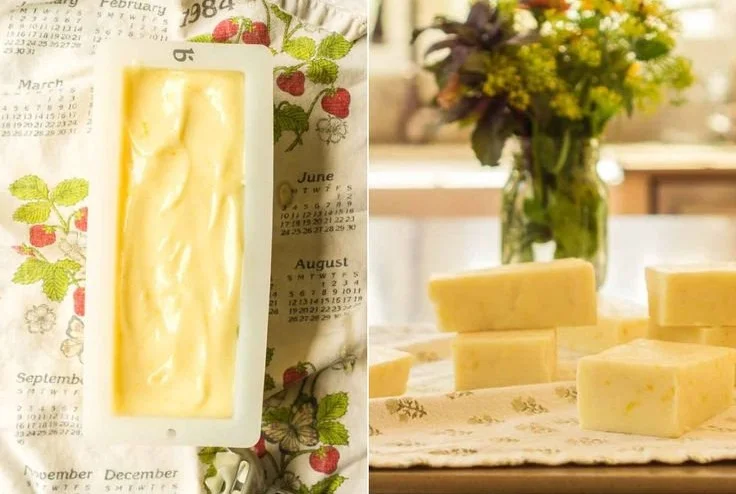
- Pour the soap mixture into your prepared molds and tap gently to remove air bubbles.
- Cover the molds with a towel or plastic wrap to insulate them.
Step 8: Cure the Soap
- Leave the soap to sit in the mold for 24-48 hours.
- After this period, remove from the mold and cut into bars.
- Place the bars on a drying rack and allow them to cure for 4-6 weeks. This will ensure the soap is gentle and safe for your skin.
Tips for Success
- Always measure ingredients accurately to ensure the best results.
- Ensure that your oils and lye are at similar temperatures when combining to achieve the best emulsification.
- Stir in fragrance and additives gently to avoid disturbing the trace.
Common Mistakes to Avoid
- Ignoring Safety Precautions: Always wear gloves and goggles when handling lye.
- Not Using a Calculator: Failing to use an accurate lye calculator can result in a lye-heavy or lye-deficient soap.
- Inadequate Curing: Cutting the soap too early can result in a soft, unusable bar.
Variations and Customization Ideas
- Swirls: You can create beautiful swirls by pouring the soap into the mold in alternating layers of different colors.
- Additives: Consider adding herbs, oatmeal, or exfoliants for added texture and benefits.
- Shapes: Try different mold shapes for unique bar aesthetics.
Storage and Shelf Life
To store your finished soap, keep it in a cool, dry place away from direct sunlight. Properly cured soap can last for 6 months to a year or more if stored correctly. Ensure the bars are wrapped to protect against moisture.
Safety Tips
- Always work in a well-ventilated area when handling lye.
- Wear protective gear including gloves and goggles at all times.
- Keep lye out of reach of children and pets.
Frequently Asked Questions
1. Can I use different oils in my soap?
Yes! You can substitute other oils, but each oil has different properties. Always calculate lye amounts based on the oils used.
2. What if my soap doesn’t reach trace?
If your soap hasn’t reached trace after blending, continue mixing. If it remains thin after a long time, it may indicate issues with the recipe.
3. How do I clean up after soap making?
Clean all utensils and bowls with vinegar to neutralize any lye residues. Rinse well afterward.
4. Can I use fragrance oils instead of essential oils?
Absolutely! Just be sure to account for the recommended usage rates.
5. How can I tell if my soap is ready to use after curing?
After the curing period, your soap should be firm and have a pleasant scent. It should also not feel slippery to the touch.
Conclusion
Making homemade soap is a rewarding DIY project that allows you to express creativity while producing a product that is beneficial for your skin and environment. By following this beginner-friendly guide, you can confidently dive into cold process soap making. Enjoy experimenting with scents, colors, and textures, and above all, have fun crafting your very own natural soap bars right at home! Now that you are equipped with knowledge and resources, it’s time to step into the wonderful world of soap making. Happy crafting!