
Discover the Joy of Making Homemade Soap in a Crockpot
Imagine yourself in a cozy corner of your kitchen, surrounded by the warm, inviting scents of essential oils and a delightful blend of nourishing ingredients. You’ve always dreamed of creating something beautiful and personal, something that can enhance your self-care routine while also adding a touch of elegance to your bathroom. Sound familiar? That’s the beauty of making homemade soap. Today, I want to introduce you to a quick and engaging method: the hot process soap-making technique using a crockpot.
Soap-making might seem intimidating at first, but trust me, once you get the hang of it, you’ll wonder why you didn’t start sooner. The hot process allows you to whip up a batch of fabulous soap in record time, allowing you to indulge in the thrill of crafting your personal skincare products without the long wait. Let’s dive in!
What is Hot Process Soap Making?
Before we get our hands dirty (well, not too dirty!), let’s talk about what hot process soap making involves. At its core, soap is made through a chemical reaction called saponification, where fats or oils combine with an alkali, such as sodium hydroxide (lye).
In the hot process method, we essentially cook the soap mixture to accelerate this reaction. This is done in a crockpot or slow cooker, which means you’ll be able to enjoy your homemade soap within just a few hours. Plus, by using a crockpot, you’ll have a more controlled environment, and let’s be honest, it makes cleanup a breeze!
The Benefits of Making Your Own Soap
You might be thinking, "Why should I bother making my own soap?" Here’s the truth: there are countless benefits to crafting your personalized bars of soap, including:
- Customization: Tailor your soap to fit your skin’s specific needs. Have dry skin? Choose nourishing oils and add hydrating ingredients!
- Natural Ingredients: Control what goes into your soap. No harsh chemicals or unwanted additives here!
- Fragrance Options: Using essential oils allows you to create delightful scents without synthetic fragrances.
- Cost-Effective: Once you have your basic supplies, making soap is often cheaper than purchasing high-end handcrafted bars.
- Creative Outlet: It’s fun and fulfilling to create something with your own two hands. What’s not to love about that?
Gathering Your Supplies
Ready to get started? Before the fun begins, let’s gather the essential tools and ingredients you’ll need to create your dreamy soap.
Soap-Making Supplies
- Crockpot: The heart of this method—ensure it’s clean and in good working order.
- Digital Scale: Accuracy is key when working with lye and oils.
- Thermometer: To monitor temperatures while making soap.
- Stick Blender: This will help to emulsify your oils and lye quickly.
- Mixing Bowls: Heat-safe bowls for combining your ingredients.
- Soap Molds: Silicone molds are great for easy removal.
- Safety Gear: Don’t forget gloves and goggles to protect yourself while handling lye.
Ingredients
- Oils/Fats: Choose a combination of oils that suit your skin. Common options include olive oil, coconut oil, and palm oil.
- Lye: Sodium hydroxide (lye) is essential for the saponification process.
- Water: Used to dissolve lye.
- Additives: These can include colorants, essential oils, oatmeal, honey, or herbs based on your preference.
Step-by-Step Guide to Making Soap in a Crockpot
Ready to let your creativity shine? Let’s walk through the hot process soap-making steps. Trust me, it’s easier than you might think.
Step 1: Prepare Your Workspace
Creating soap can get a bit messy, so make sure to lay down some newspaper or old towels. Ensure your workspace is well-ventilated and away from curious little helpers.
Step 2: Measure Your Ingredients
Using your digital scale, weigh out the oils and lye according to your soap recipe. There are many fantastic recipes available online catering to different skin types. Just make sure to double-check your measurements!
Step 3: Mix Lye with Water
In a well-ventilated area (preferably outside or near an open window), slowly add the lye to the water. Always add lye to water—not the other way around! Stir gently until it’s fully dissolved; it’ll get hot, so be careful.
Step 4: Melt Your Oils
In your crockpot, heat your oils until they’re fully melted and combined. It’s best to monitor this with your thermometer; aim for a temperature of around 100°F to 120°F.
Step 5: Combine Lye and Oils
Carefully pour the lye mixture into your melted oils, making sure to wear your gloves and goggles. Using your stick blender, blend the mixture until you reach “trace” — when it thickens enough to leave a trail on the surface.
Step 6: Cook the Soap
Put the lid on your crockpot and let the soap cook for about 1-2 hours on low. Stir occasionally. You’ll notice it changes color and texture; this is perfectly normal!
Step 7: Check for Full Saponification
After about two hours, check if the soap has reached full saponification. It should look like thick pudding. If in doubt, take a small amount and dissolve it in some warm water. If it’s clear with no oily residue, you’re good to go.
Step 8: Add Fragrance and Additives
Once saponification is complete, you can stir in your essential oils, colorants, or other additives you desire. Remember, start with small amounts—it’s easier to add than to take away.
Step 9: Pour into Molds
Spoon the mixture into your molds, pressing it down gently to eliminate air bubbles. Tap the molds on the counter to ensure a smooth surface.
Step 10: Let It Cure
Allow your soaps to cool and harden in the molds for 24 hours. Once they’re firm, carefully pop them out and cut them into bars if needed. Place your bars on a cooling rack and let them cure for about 4–6 weeks to ensure they’re safe and ready to use.
Common Mistakes to Avoid
We’ve all been there, haven’t we? Navigating this new venture may lead to a few bumps along the way. Here are some common mistakes to steer clear of:
- Not being precise: Accurate measurements make or break your soap. Don’t wing it.
- Rushing the cooling process: Patience is a virtue here. Let your soap cure properly; it’ll be worth it!
- Skipping safety gear: Safety first, my friend. Always wear gloves and goggles when working with lye.
- Ignoring the recipe: While improvisation is fun, stay true to proven recipes when starting. You can experiment later!
FAQs About Making Soap at Home
Is it safe to make soap at home?
Absolutely! As long as you follow safety protocols and use the proper equipment, making soap can be a safe and enjoyable experience.
Can I reuse my crockpot after making soap?
Yes, but make sure to thoroughly clean your crockpot afterward to prevent any residue.
What if my soap doesn’t trace?
If your soap doesn’t reach trace, it might be that the lye wasn’t fully incorporated or the mixture wasn’t blended long enough. Mix a bit longer, and ensure your oils are at the right temperature before you combine them.
Can I add herbs or flowers to my soap?
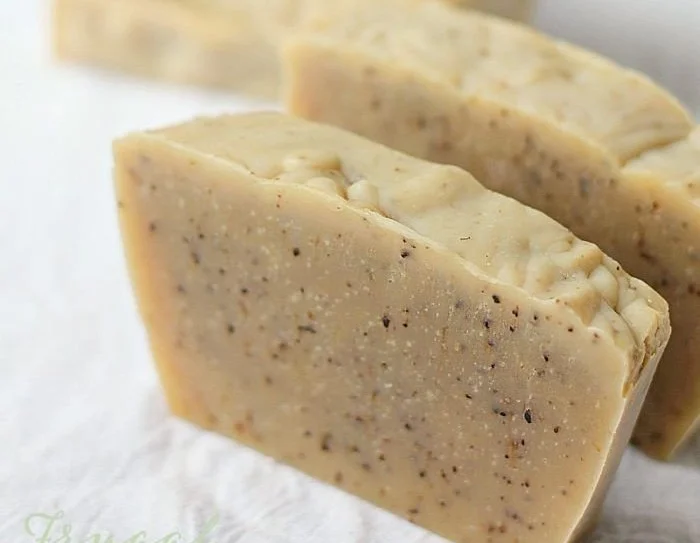
Yes! Dried herbs or flower petals can add beautiful textures and scents, just be mindful that they can affect the soap’s appearance and performance.
Bonus Self-Care Ideas
After you dive into the joy of soap making, why not keep the self-care momentum going? Here are some ideas to nurture yourself further:
- Pamper Yourself with a DIY Spa Day: Use your homemade soaps for a luxurious pampering session. Pair with a relaxing bath infused with essential oils.
- Create a Bath Salt Mix: Combine Epsom salt with a touch of essential oil for a soothing soak.
- Make Your Own Body Scrub: Mix sugar or salt with coconut oil, add some citrus, and you’ll have a refreshing skin treat.
The Final Thoughts
Soap-making is an incredibly rewarding activity that opens the door to endless creativity and self-care. Plus, it allows us to connect more deeply with the products we use on our skin every day. Have fun experimenting with scents, colors, and textures that resonate with you—there’s no right or wrong when it comes to your craft!
So gather your supplies, put on your favorite playlist, and immerse yourself in this delightful journey of soap-making. You’re not just creating soap; you’re crafting a piece of art that embodies your unique beauty philosophy. And remember, every bar of soap tells a story—let yours be a tale of care, creativity, and a splash of love. You’ve got this!