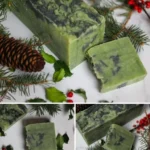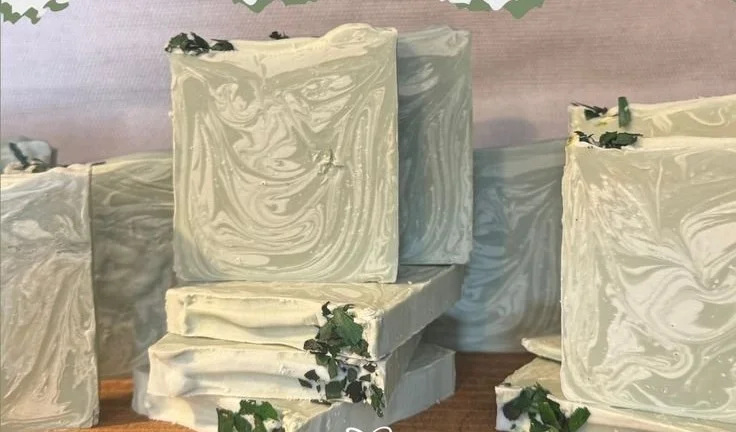

Making Your Own Natural, Cold Process Peppermint Eucalyptus Soap at Home
Creating your own natural, cold process peppermint eucalyptus soap at home is easier than you think! With just a few simple ingredients and steps, you can produce beautifully scented, skin-loving bars of soap. This homemade soap not only smells refreshing but also offers soothing and moisturizing benefits for your skin. Let’s dive into the world of DIY soap making and transform your space into a fragrant, bubbly haven!
Why You Will Love This Recipe
Homemade soap has many advantages, particularly when made with natural ingredients. Here are a few reasons you’ll adore this peppermint eucalyptus soap:
- Natural Ingredients: You know exactly what goes into your soap, meaning no harmful chemicals or artificial fragrances.
- Customization: Adjust the scent, color, or even the ingredients to suit your preferences or skin type.
- Moisturizing Benefits: Coconut oil, olive oil, and shea butter provide excellent hydration for your skin.
- Unique Gifts: Handmade soap makes for thoughtful gifts that anyone would appreciate.
Ingredients
To make your cold process peppermint eucalyptus soap, gather the following ingredients:
- Olive Oil: 15 oz (good for moisturizing)
- Coconut Oil: 10 oz (adds firmness)
- Sweet Almond Oil: 5 oz (moisturizing properties)
- Shea Butter: 5 oz (for additional hydration)
- Distilled Water: 12 oz (for mixing with lye)
- Sodium Hydroxide (Lye): 5.9 oz (ensure you check calculations using a soap calculator)
- Peppermint Essential Oil: 1 oz (uplifting scent)
- Eucalyptus Essential Oil: 1 oz (refreshing aroma)
- Optional Colorants: Natural colorants such as spirulina or mica (depending on your preference)
Equipment
Essential equipment for making cold process soap includes:
- Digital scale (for accurate measurements)
- Heat-safe container (for mixing lye)
- Plastic or stainless steel mixing spoon
- Large stainless steel pot (for melting oils)
- Stick blender (for emulsification)
- Soap mold (silicone molds are easiest for beginners)
- Safety goggles and gloves (for lye handling)
- Measuring cups and spoons
- Thermometer (to monitor oil and lye temperatures)
- Kitchen scale (to weigh all ingredients precisely)
Step-by-Step Instructions
Follow these steps to create your own peppermint eucalyptus soap:
Preparation Time: 10 minutes
Making Time: 1 hour
Cure Time: 4-6 weeks
Approximate Yield: 10-12 bars (depending on mold size)
Prepare Your Workspace:
- Ensure your workspace is clean and organized.
- Always wear gloves and goggles when handling lye, as it is caustic.
Measure the Lye:
- Using a digital scale, measure 5.9 oz of sodium hydroxide. Carefully add it to 12 oz of distilled water in a well-ventilated area. Stir gently until the lye completely dissolves. This solution will heat up, becoming very caustic, so handle with caution.
Measure Oils:
- Measure and combine your olive oil, coconut oil, sweet almond oil, and shea butter in a large pot.
Melt the Oils:
- Place the pot over low heat until the coconut oil and shea butter are melted. Stir gently to combine.
Cool the Lye and Oils:
- Remove the pot from heat. Allow the oils and the lye solution to cool to about 100°F (38°C).
Combine Lye and Oils:
- Slowly pour the lye solution into the oils while stirring continuously.
Blend to Trace:
- Use a stick blender to blend the mixture until it reaches "trace," which is when it thickens enough to leave a trail on the surface. This usually takes 5-10 minutes.
Add Fragrance:
- Once trace is achieved, add the peppermint and eucalyptus essential oils. Blend for a few seconds to fully incorporate.
Pour Into Molds:
- Carefully pour the soap mixture into your soap mold. Tap the mold gently to remove air bubbles.
Insulate and Let Set:
- Cover the mold with a towel and insulating blanket to keep the heat in. Let it sit undisturbed for 24-48 hours.
Unmold and Cut:
- Once solid, remove the soap from the mold and cut it into bars.
Cure the Soap:
- Place the bars on a cooling rack lined with parchment paper. Allow them to cure for 4-6 weeks.
Tips for Success
- Stick to Measurements: Accurate measurements of both oils and lye are crucial for success.
- Check temperatures: Ensure both the lye solution and oils are within 95°F to 105°F for optimal emulsification.
- Use a soap calculator: Always confirm your lye amount using a reliable soap calculator tailored to your specific oils and their weights.
Common Mistakes to Avoid
- Using Improper Measurements: Always weigh your ingredients; using volume can lead to inaccurate measurements and unwanted results.
- Skipping Safety Gear: Never handle lye without protective eyewear and gloves. Safety is paramount!
- Rushing the Process: Allow each step to progress naturally, especially during curing.
Variations and Customization Ideas
Feel free to experiment! Here are some ideas:
- Add Other Oils: Consider blending in oils like jojoba or argan for additional skin benefits.
- Incorporate Colors: Infuse natural colorants like turmeric for a warm hue or spirulina for green tones.
- Include Exfoliants: Oats or poppy seeds can add texture and exfoliating properties to your soap.
Storage and Shelf Life
Store your finished bars in a cool, dry place away from direct sunlight, ideally in a ventilated box or basket. Properly cured soap can last for over a year if kept dry.
Safety Tips
- Always handle lye with extreme care. Work in well-ventilated areas and keep it out of reach of children and pets.
- Be aware of any allergies you or your potential recipients may have, especially regarding essential oils.
Frequently Asked Questions
1. Can I use a different type of essential oil?
Yes! You can substitute peppermint or eucalyptus with any other essential oil you enjoy. Just ensure to use a total of 2 oz of essential oils in your recipe.
2. How do I know if my soap has reached trace?
When your soap mixture thickens enough to leave a slight trail or a "trace" on the surface as you stir, it has reached the desired consistency.
3. Why do I need to cure the soap for 4-6 weeks?
Curing allows excess water to evaporate and the soap to become milder and better for your skin. It also ensures that the lye has completely saponified.
4. Can I make soap without lye?
Cold process soap requires lye (sodium hydroxide) as it is essential for saponification, the chemical reaction that creates soap.
5. What can I do if my soap doesn’t harden?
If your soap remains soft, it may need additional time to cure. Moreover, ensure your measurements were correct—this directly affects the saponification process.
6. How can I customize the scent intensity?
You can adjust the amount of essential oils, but be cautious not to use too much as it can irritate the skin. Start with recommended amounts and tweak according to preference.
Conclusion
Making your own cold process peppermint eucalyptus soap at home is a rewarding project that can enhance your skincare routine and make for delightful gifts. With just a few natural ingredients and careful attention to detail, you can create beautifully scented bars that are as gratifying to use as they are to create. So grab your ingredients, get settled in your workspace, and start whipping up some luxurious homemade soap today! Enjoy the process, and don’t hesitate to experiment with different scents and ingredients along the way. Happy soaping!