
Create a Refreshing Handmade Soap that Smells Like a Spruce Forest
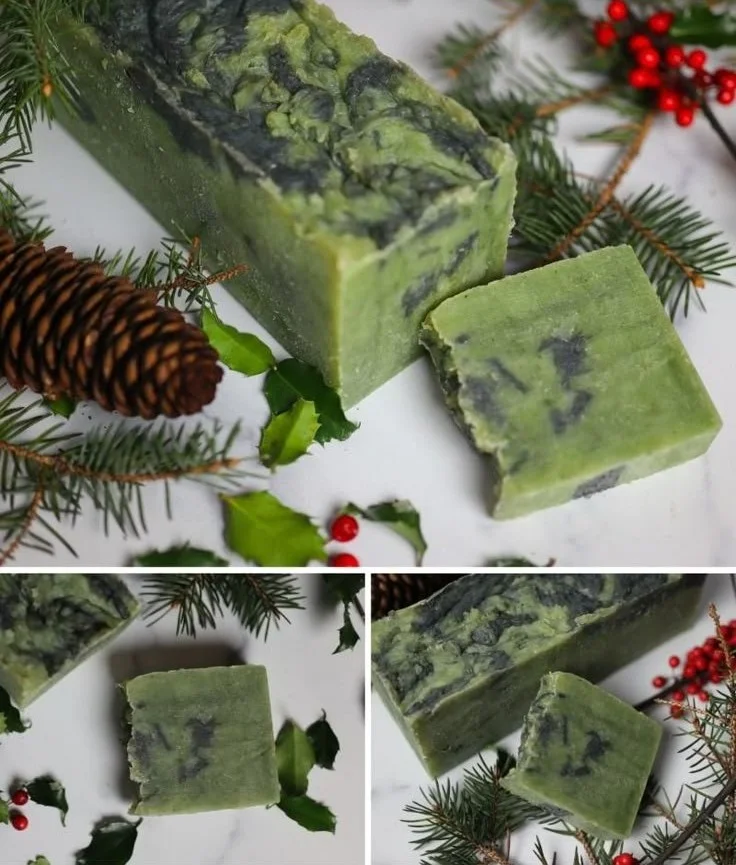
Imagine breathing in the crisp aroma of a spruce forest on a winter day, the freshness invigorating your senses. Now, why not capture that essence in a beautiful handmade soap? This refreshing DIY soap not only smells wonderful but also provides a delightful lather and clean hand feel. It’s perfect for holiday gifting or simply treating yourself. In this guide, we’ll walk you through making this lovely soap using the hot process method.
Why You Will Love This Recipe
Making your own soap at home can be a rewarding experience. This specific recipe allows you to create a fragrant, natural soap that evokes the beauty of nature. The hot process method is straightforward and more forgiving than cold process soap making, making it ideal for beginners. Plus, the result is a lovely, rustic bar of soap that you can proudly share with friends and family.
Ingredients
For this refreshing spruce forest soap, you will need the following ingredients:
Oils and Fats:
- 10 oz (280 g) Olive Oil
- 10 oz (280 g) Coconut Oil
- 10 oz (280 g) Palm Oil
- 5 oz (140 g) Castor Oil
Lye Solution:
- 7 oz (200 g) Sodium Hydroxide (lye) (handle with care!)
- 15 oz (425 g) Distilled Water
Fragrance and Color:
- 1 oz (28 g) Essential Oil Blend (Spruce, Pine, and Cedarwood)
- Optional: Green clay or natural colorants for a rustic look
Equipment
Before you start, gather the following equipment:
- Digital kitchen scale
- Heat-resistant glass or plastic container
- Stick blender
- Safety goggles and gloves
- Soap mold (silicone or wooden)
- Thermometer
- Measuring spoons
- Spatula
- Parchment paper for lining the soap mold (if using a wooden mold)
Step-by-Step Instructions
Preparation Steps
Safety First: Put on your safety goggles and gloves. Always work in a well-ventilated area while handling lye.
Prepare Lye Solution: Measure 15 oz of distilled water in a heat-resistant container. Slowly add 7 oz of sodium hydroxide to the water, stirring gently until dissolved. This mixture will heat up rapidly; set it aside to cool.
Measure Oils: In a separate container, measure out all your oils (olive, coconut, palm, and castor) using the digital scale.
Heat Oils: In a pot, combine your measured oils and gently heat them to approximately 100°F (38°C).
Combining Lye and Oils
Mix Lye and Oils: Once the lye solution and oils are each around 100°F, slowly pour the lye solution into the oils, using the stick blender to combine.
Blend to Trace: Blend the mixture until you reach “trace,” which means it thickens to the point where a drizzle leaves a trail on the surface. This may take a few minutes.
Add Fragrance and Color: If you’re using a colorant, add it to the mixture now, blending until evenly mixed. Then add your essential oils and stir well.
Pouring into Mold
Pour into Mold: Carefully pour the soap mixture into the prepared mold.
Insulate the Soap: Cover the mold with a towel to insulate it and allow the soap to saponify. Leave it undisturbed for 24 hours.
Cutting and Curing
Cut the Soap: Once the soap has cooled and firmed up (after 24 hours), carefully remove it from the mold and cut it into bars.
Cure the Soap: Allow the bars to cure in a cool, dry place for 4-6 weeks. This allows the soap to complete the saponification process and ensures it will be gentle on the skin.
Tips for Success
- Measure Accurately: Precision is crucial in soap making. Always use a kitchen scale for accurate measurements.
- Stay Calm: If your mixture doesn’t reach trace after several minutes, continue blending—patience is key!
- Test Fragrance Strength: If you’re unsure about the scent potency, start with a smaller amount of essential oils and test.
Common Mistakes to Avoid
- Incorrect Lye Measurements: Always double-check your calculations. Using incorrect amounts can result in a less-than-ideal soap.
- Not Wearing Safety Gear: Handling lye is serious business. Never skip safety equipment.
- Skipping the Cure Time: Curing properly is essential for a safe and effective soap.
Variations and Customization Ideas
- Scent Variations: Experiment with different essential oil blends. Consider adding lavender, eucalyptus, or citrus oils for a unique twist.
- Additives: You can also add dried herbs or exfoliants like oatmeal for texture.
- Color Alternatives: Use natural colorants such as beet powder or turmeric for different looks.
Storage and Shelf Life
Store your finished soap bars in a cool, dry place away from direct sunlight. Properly cured soap should last approximately 1-2 years. Keep them wrapped in eco-friendly packaging to maintain freshness.
Safety Tips
- Always handle lye with extreme caution. Never mix lye in an enclosed space; work in a well-ventilated area.
- Make sure to keep lye and finished soaps out of reach of children and pets.
- If lye comes into contact with skin or eyes, rinse immediately with plenty of water and seek medical attention.
Frequently Asked Questions
1. Can I use a different type of oil instead of palm oil?
Yes, you can substitute other oils, but make sure to recalculate your lye amount for the new oils. Each oil has a different saponification value.
2. How do I know if my soap is fully cured?
Cured soap will feel hard and have a neutral scent. If it feels soft or has a strong odor, it may not be safe to use.
3. Can I add color to my soap?
Absolutely! You can incorporate natural colorants like herbal powders or botanical extracts. Just remember to blend thoroughly.
4. How should I package my soap for gifts?
Consider wrapping the soap in brown paper or linen and tying it with twine for a rustic look. Include a label with ingredients for your recipients.
5. What if my soap turned out too soft?
Soft soap may indicate insufficient saponification. Ensure to follow lye measurements accurately next time and consider extending the curing time.
Conclusion
Creating your own scented handmade soap that captures the essence of a spruce forest can be an incredibly gratifying experience. By following these steps and tips, you’ll not only produce a beautiful product but also take your first steps into the delightful world of DIY soap making. Whether for yourself or as a thoughtful Christmas gift, this soap will surely be a hit. Embrace your creativity and dive into this aromatic adventure. Happy soap making!