
Create Stunning DIY Scented Candles for Your Home
If you’re looking to elevate your home décor with a personal touch, DIY scented candles are a fantastic choice. Not only do they fill your space with delightful aromas, but they also make thoughtful handmade gifts for friends and family. In this guide, you’ll learn how to craft your own beautiful scented candles, complete with tips and tricks for success. So let’s dive in!
Why You Will Love This Recipe
Creating your own scented candles allows you to customize every aspect, from fragrance to color, and even the container. It’s a rewarding process that results in stunning decor that adds warmth to any room. Plus, there’s something magical about lighting a candle you made yourself, knowing the scent can uplift your mood and create a cozy ambiance.
Ingredients
- Wax: 2 pounds (approximately 32 oz) of soy or paraffin wax
- Fragrance Oil: 4 oz (you can adjust based on scent strength preference)
- Candle Dye (optional): A few drops, if you want to add color to your candle
Equipment
- Double boiler or a microwavable pouring pitcher
- Thermometer (ideal range is approximately 170°F–180°F)
- Candle wicks (with appropriate size for your container)
- Containers (glass jars or metal tins are excellent choices)
- Wick holder or popsicle sticks to hold the wick in place
- Scale (for accurate measurements)
- Stirring stick (wooden or silicone)
- Safety gloves (to handle hot wax)
Step-by-Step Instructions
Preparation Time: 10 minutes
Making Time: 30-45 minutes
Yield: About 4 candles (depending on container size)
Set Up Your Work Environment:
- Cover surfaces with newspaper or an old cloth to catch wax spills.
- Gather all the ingredients and equipment you’ll need.
Melt the Wax:
- If using a double boiler, fill the bottom pot with water and let it simmer. Place the wax in the top pot, stirring as it melts.
- If using a microwave, place the wax in a pouring pitcher and heat in 30-second intervals, stirring between each until fully melted.
Add the Fragrance:
- Once the wax reaches around 170°F (77°C), remove it from heat. Stir in your fragrance oil thoroughly to ensure it’s evenly mixed. The amount can be adjusted depending on how strong you want the scent to be.
Add Dye (if using):
- If you’d like to color your candles, add a few drops of candle dye and stir until you achieve the desired shade.
Prepare the Containers:
- While the wax cools slightly, secure the wick at the bottom of your container using a bit of melted wax or a wick sticker. Use a wick holder to keep the wick centered.
Pour the Wax:
- When the wax cools to about 140°F (60°C), carefully pour it into the prepared containers. Leave a little space at the top.
Secure the Wick:
- Ensure the wick stays centered while the wax solidifies. You can use a popsicle stick laid across the top of the container for support.
Let It Set:
- Allow the candles to cool and harden completely, which may take 1–2 hours at room temperature.
Trim the Wick:
- Once fully hardened, trim the wick to about ¼ inch above the wax surface before lighting.
Tips for Success
- Temperature Matters: Too high temperatures can burn off the fragrance, while pouring at too low a temperature can affect the wax’s appearance. Always use a thermometer!
- Choose Quality Fragrance Oils: For the best scent throw, opt for high-quality fragrance oils designed for candle-making.
Common Mistakes to Avoid
- Overheating the Wax: This may lead to burning or discoloration. Take your time!
- Not Centering the Wick: If the wick isn’t centered properly, the candle won’t burn evenly.
Variations and Customization Ideas
- Fragrance Combinations: Experiment with different fragrance oils. Try mixing lavender with eucalyptus for a calming scent.
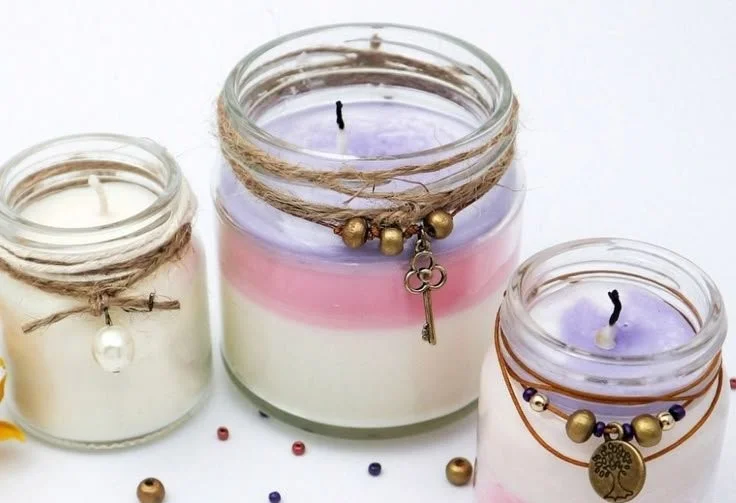
- Layered Candles: Pour different colors of wax in layers to create a beautiful, multi-colored effect.
- Decorative Elements: Add dried flowers, herbs, or spices into the wax before pouring for added texture and looks. Just ensure they’re safe for burning.
Storage and Shelf Life
Store your candles in a cool, dry place away from direct sunlight. Properly made candles can last up to a year in storage, but for the best fragrance experience, use them within six months.
Safety Tips
- Always work in a well-ventilated area when melting wax.
- Wear safety gloves when handling hot materials.
- Keep the wax away from children and pets to prevent accidents.
Frequently Asked Questions
Q1: Can I use regular cooking wax for candle-making?
A1: It’s not recommended. Cooking wax (like paraffin for food) isn’t designed for burning as candles and may emit harmful fumes.
Q2: How can I make my scented candle smell stronger?
A2: Increase the amount of fragrance oil (keeping the manufacturer’s recommended limits) or use oils specifically designed for candle making.
Q3: What type of wick should I use for my candle?
A3: The choice of wick depends on the type of wax and container. A general rule is to use a cotton wick for soy candles, though you should test different sizes to find what works best for your specific situation.
Q4: Can I reuse old candle containers?
A4: Absolutely! Just make sure to clean them thoroughly to remove any residual wax and scent.
Q5: Why is the top of my candle uneven?
A5: This could be due to rapid cooling. You can re-melt the top layer and smooth it out if you’re not satisfied with its appearance.
Conclusion
Crafting your own DIY scented candles is not only satisfying but also a delightful way to customize your home with aromas you love. Whether you’re looking to create a calming atmosphere or seeking a unique gift, these candles are sure to impress. So gather your ingredients, follow the steps, and enjoy the process of creating something amazing. Give it a try, and happy candle-making!