
Homemade Soap and Candle Making: A Beginner’s Guide
Creating your own homemade soap and candles can be a rewarding hobby that not only sparks creativity but also allows you to personalize your gifts for friends and family. This guide will walk you through the basics of DIY soap and candle making with practical, step-by-step instructions that are easy to follow. You’ll feel equipped and inspired to make your own products before you know it!
Why You Will Love This Recipe
Homemade soap and candles offer a unique touch that store-bought versions can’t replicate. You’ll love the satisfaction of crafting something from scratch that is not only beautiful but also functional. Plus, these projects are perfect for beginners, providing an opportunity to explore your creativity while enjoying a fun, hands-on activity.
The Benefits of Making Your Own Soap and Candles
- Personalization: Choose your own scents, colors, and designs.
- Cost-Effective: Over time, making your own can save money.
- Unique Gifts: Handmade items make thoughtful, memorable gifts.
- Stress Relief: The process is meditative and rewarding.
Ingredients
For Homemade Soap (Melt and Pour Method)
- Soap Base: 1 pound (choose glycerin, shea butter, or goat’s milk)
- Colorants: Optional, as needed
- Fragrance Oils: 1 oz (essential oils or fragrance oils)
- Additives: 1-2 tablespoons (dried flowers, oats, etc.)
For Homemade Candles
- Wax: 1 pound (soy, paraffin, or beeswax)
- Wicks: Pre-tabbed wicks suitable for your chosen container
- Fragrance Oils: 1 oz (optional)
- Color Dyes: Optional, as needed
Equipment
Soap Making Equipment
- Microwave-safe container or double boiler
- Soap mold (silicone molds work best)
- Spoon or spatula
- Measuring cups or scale
Candle Making Equipment
- Double boiler or pouring pot
- Thermometer
- Wick centering device
- Stirrer or spoon
- Candle containers (jars, tins, etc.)
Step-by-Step Instructions
Homemade Soap (Melt and Pour)
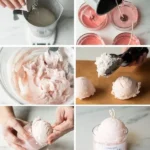
- Prep the Workspace: Ensure your area is clean and organized. Gather all your materials.
- Melt the Soap Base:
- Cut your soap base into small cubes.
- Place them in a microwave-safe container and heat in 30 seconds intervals until fully melted (around 1-2 minutes).
- Add Fragrance and Color:
- Once melted, stir in your fragrance oil and any colorants. Mix thoroughly.
- Additives:
- Stir in any extras like dried flowers or oats.
- Pour into Molds:
- Carefully pour the mixture into your molds. Allow cooling for at least 1-2 hours until fully set.
- Unmold and Enjoy:
- Once hardened, gently pop the soaps out of the molds.
Homemade Candles
- Melt the Wax:
- Measure out 1 pound of wax.
- Using a double boiler, melt the wax on low heat (around 170°F to 180°F).
- Add Fragrance:
- Once the wax is melted, add 1 oz of fragrance oil and stir thoroughly.
- Prepare the Wick:
- Secure the wick to the bottom of your container with a dab of melted wax or hot glue.
- Pour the Wax:
- Let the wax cool slightly (around 150°F), then slowly pour it into the container, leaving a bit of space at the top.
- Secure the Wick:
- Use a wick centering device or simply hold the wick in place until it sets.
- Cool and Cure:
- Allow your candles to cool completely (around 4 hours) before trimming the wick to about 1/4 inch.
Tips for Success
- Soap Making: Avoid overheating the soap base as it can bubble and distort.
- Candle Making: Use a thermometer to ensure the wax is at the appropriate temperature when adding fragrance.
Common Mistakes to Avoid
- Soap: Avoid adding too much fragrance or color—it can affect the soap’s texture and lather.
- Candle: Don’t pour the wax too hot or it may shrink away from the sides of the container when cooled.
Variations and Customization Ideas
For Soap
- Scents: Experiment with different essential oils (like lavender for soothing soap).
- Colors: Use natural colorants like turmeric for yellow or activated charcoal for black.
For Candles
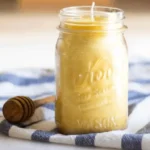
- Containers: Try different jars, teacups, or decorative tins.
- Scent Blends: Blend fragrances (like vanilla and sandalwood) for a unique scent.
Storage and Shelf Life
- Soaps: Store in a cool, dry place away from direct sunlight. Properly wrapped, homemade soap can last for several months.
- Candles: Store candles upright and away from heat or direct sunlight to maintain scent and color quality. They can last for up to a year when stored correctly.
Safety Tips
- Soap Making: If using lye (sodium hydroxide), always wear gloves, goggles, and a mask. Work in a well-ventilated area and read all safety instructions on the lye packaging.
- Candle Making: Use a thermometer to prevent overheating the wax. Never leave lit candles unattended, and ensure they are placed on a stable, heat-resistant surface.
Frequently Asked Questions
Can I use kitchen utensils for soap and candle making?
- It’s best to designate specific tools for these projects to avoid contamination.
What is the best type of wax for beginners?
- Soy wax is beginner-friendly as it’s easy to work with and produces a clean burn.
How do I know how much fragrance to add?
- A good rule of thumb is about 1 oz of fragrance oil per pound of wax or soap.
Why did my candle sink in the middle?
- This may occur from pouring too hot or too quickly. Avoid pouring while the wax is too hot.
What essential oils can be used in soaps?
- Most essential oils are safe, but avoid citrus oils if you plan to use the soap for the face, as they can be irritating.
How do I achieve a consistent scent in candles?
- Always measure your oils carefully, and stick to the proportions recommended in your recipe.
Conclusion
Making homemade soap and candles opens up a world of creativity, customization, and fun. Whether you’re looking to craft the perfect gift or indulge in a new hobby, the skills you’ll develop through this process are invaluable. Remember, practice makes perfect, and with every soap or candle you create, you’ll gain confidence and finesse. So gather your supplies, roll up your sleeves, and enjoy the delightful art of DIY!