
Create Beautiful Beeswax Candles in Thrifted Jars: A Beginner-Friendly Guide
Making your own beeswax candles is a delightful way to create ambiance in your home while also giving you the chance to repurpose thrifted jars into beautiful and functional decor. In this step-by-step guide, you’ll learn how to make your own beeswax candles using simple ingredients and tools. Perfect for anyone interested in DIY projects, this recipe is ideal for making handmade gifts or eco-friendly home decor.
Why You Will Love This Recipe
Beeswax candles offer a warm, natural glow and a subtle honey scent that can enhance any space. Unlike synthetic candles, beeswax is a natural material that burns cleanly, producing negative ions that may help purify the air. Additionally, making candles in thrifted jars not only reduces waste but also adds a unique charm to your finished product. Whether you’re a beginner or an experienced crafter, this project is sure to bring joy.
Ingredients
- Beeswax: 1 pound (about 450 grams)
- Fragrance oil (optional): 1 ounce (about 28 grams) – choose natural scents that complement beeswax, such as lavender or citrus essential oils.
- Wicks: Pre-waxed cotton or wooden wicks (the size will depend on your jar size)
- Dye (optional): Yellow or another natural color (if you want to add color, use candle-safe dyes).
Equipment
- Thrifted jars: Any heat-safe glass container will do!
- Double boiler: You can also use a heat-safe bowl over a pot of simmering water.
- Thermometer: A kitchen thermometer to check wax temperature.
- Stirring utensil: A wooden stick or spoon.
- Wick holders: You can use a chopstick or a pencil to hold the wick in place while the wax sets.
- Pouring pitcher: A heat-safe container for pouring wax easily.
- Scale: To measure ingredients accurately.
Step-by-Step Instructions
Preparation Time: 15 minutes
Making Time: 1 hour
Yield: Approximately 2-3 medium-sized candles
Prepare Your Jars: Clean your thrifted jars thoroughly and ensure they’re dry. If they have labels, soak them in warm, soapy water and scrub off any residue.
Measure Beeswax: Weigh 1 pound of beeswax using your kitchen scale.
Set Up the Double Boiler: Fill the bottom pot with water and place it on the stove over medium heat. Place your beeswax in the top pot or heat-safe bowl.
Melt the Beeswax: Allow the beeswax to melt gently, stirring occasionally until it’s fully liquefied. Use a thermometer to check the temperature; it should be about 160°F (71°C).
Add Fragrance (if using): Once melted, if you want to add fragrance, remove the wax from heat and add 1 ounce of your chosen fragrance oil. Stir gently to combine.
Prepare the Wicks: While the wax is cooling slightly, secure your wicks to the bottom of the jars using a glue dot or a drop of melted wax.
Pour the Wax: Carefully pour the melted wax into your prepared jars, leaving about half an inch of space at the top.
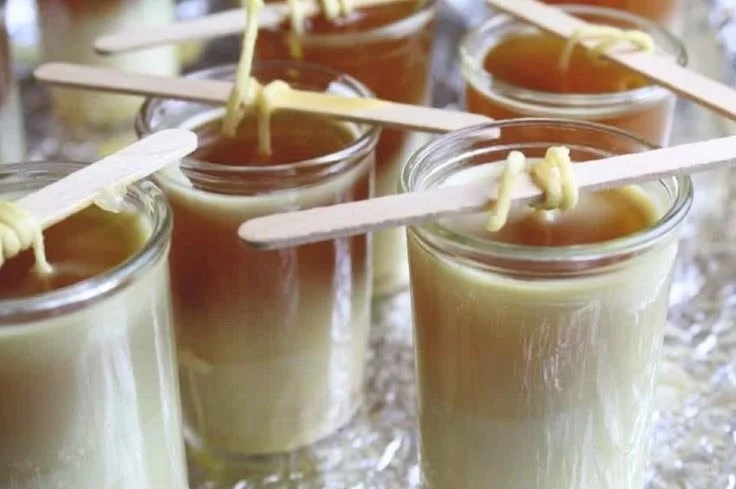
Secure the Wick: Use a chopstick or pencil to hold the wick in the center while the wax hardens.
Let Candles Cool: Allow the candles to cool completely at room temperature, which may take several hours.
Trim Wicks: Once the candles are set, trim the wick to about ¼ inch above the wax surface.
Tips for Success
- Use a thermometer to monitor the temperature of your wax. If it gets too hot, it may lose its scent or discolor.
- When pouring, do it slowly and carefully to avoid air bubbles.
- Keep your workspace tidy to easily manage spills.
Common Mistakes to Avoid
- Overheating the Wax: Beeswax can scorch if overheated. Stick to gentle melting.
- Skipping Wick Testing: Make sure to use the right wick size for your jar to ensure an even burn.
- Ignoring Safety Guidelines: Always handle hot wax with care to prevent burns.
Variations and Customization Ideas
- Layered Candles: Pour different colors of beeswax in layers for a beautiful effect.
- Essential Oil Blends: Experiment with mixing different essential oils for unique scents.
- Container Variety: Use different sizes and shapes of jars to create a varied candle collection.
Storage and Shelf Life
Store your finished candles in a cool, dark place, away from direct sunlight. Beeswax candles can last for several years but may soften in high temperatures.
Safety Tips
- Work in a well-ventilated area to avoid inhaling any smoke or strong scents.
- Do not leave candles burning unattended.
- Ensure that the container you use is safe for heat, and avoid any plastic containers.
Frequently Asked Questions
1. Can I use other types of wax for this recipe?
Yes! You can use soy or paraffin wax, but the process and settings may vary slightly.
2. How can I tell if my wick is the right size?
Your candle should have a gentle, even flame. If the flame is too small or too large, adjust the wick size accordingly.
3. What should I do if my wax has air bubbles?
To remove air bubbles, give the surface a gentle stir with a skewer just after pouring. If the bubbles persist, consider re-melting and pouring again.
4. How long do beeswax candles burn?
Beeswax candles burn longer than paraffin candles. A typical beeswax candle can last up to 2–3 times longer depending on its size.
Conclusion
Creating beautiful beeswax candles in thrifted jars is a fun and rewarding DIY project suitable for all skill levels. With this beginner-friendly guide, you can craft personalized, eco-friendly gifts or home décor items, all while enjoying the therapeutic process of candle making. So gather your materials, tap into your creative side, and enjoy illuminating your spaces with the warm glow of homemade beeswax candles! Give this project a try, and let the beautiful light and soothing fragrances fill your home.