
Discover Creative Ideas to Craft Your Own Handmade Candles Using Wax Sand
Creating homemade candles can be an incredibly rewarding experience. Not only do you end up with beautifully crafted objects to brighten your space, but you also gain the satisfaction of creating something unique. Utilizing wax sand is a delightful twist on the traditional candle-making process, allowing you to recycle old containers and unleash your creativity. Whether you’re a DIY enthusiast or someone passionate about natural living, this guide will help you make your own stunning candles. Let’s get started!
Why You Will Love This Recipe
The charm of making candles at home lies in the ability to customize them to fit your personal style and preferences. By using wax sand and recycled containers, you’re not just crafting candles; you’re also promoting sustainability. This DIY project is perfect for anyone looking to add a personal touch to their home or create handmade gifts for friends and family.
Ingredients
- Wax Sand: 1 cup (available at craft stores or online)
- Container Wax: 1 ½ cups (Natural soy wax or paraffin wax)
- Fragrance Oil (optional): 1 oz (Ensure it’s specifically meant for candle making)
- Dye Chips or Liquid Dye (optional): As desired for color
- Wicks: 2–3 wicks (Choose cotton or wood wicks suitable for container candles)
- Wick Sustainers: To hold the wick in place
Equipment
- Double Boiler or Melting Pot: For melting the wax
- Thermometer: Digital or candy thermometer to monitor wax temperature
- Stirring Spoon: Wooden or silicone
- Pouring Pitcher or Jug: For pouring the melted wax
- Heat-resistant Surface: To place your candle containers on while the wax sets
- Containers: Old jars, tin cans, or any heat-resistant vessel
- Safety Gloves: To protect your hands while handling melted wax
Step-by-Step Instructions
Prepare Your Workspace: Cover your surfaces with newspaper or old cloth, and gather all equipment and ingredients.
Melt the Wax:
- Fill your double boiler with water and place it on medium heat.
- Add the container wax to the upper compartment of the double boiler.
- Use the thermometer to monitor the temperature, aiming for about 170°F (77°C).
Add Fragrance and Color:
- Once the wax is melted, remove it from heat.
- Stir in the fragrance oil and dye (if using) until thoroughly combined.
Attach the Wick:
- Secure the wick at the bottom of your container using the wick sustainer. You can also use a dab of melted wax to hold it in place.
Combine with Wax Sand:
- In a large mixing bowl, combine the melted wax with the wax sand. Stir gently until the mixture is well incorporated.
Pour Into Containers:
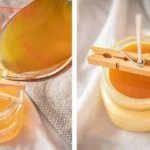
- Carefully pour the wax-sand mixture into your prepared containers, leaving a small amount of space at the top.
Center the Wick:
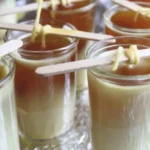
- Use a pencil or chopstick to hold the wick in place while the wax sets.
Cool and Set:
- Allow your candles to cool completely at room temperature (about 4–6 hours) until solid.
Trim the Wicks:
- Once set, trim the wicks to approximately ¼ inch above the surface of the candle.
Tips for Success
Temperature Control: Keeping the wax at the right temperature is crucial for achieving the perfect candle consistency and scent throw. Always use a thermometer, and avoid overheating the wax.
Experiment with Fragrances: Try blending different fragrance oils to create a unique scent that suits your taste or the season.
Testing Wicks: If you’re unsure which wick to use, test different wick sizes to find the one that gives a steady flame without excessive soot.
Common Mistakes to Avoid
- Overheating Wax: This can affect the quality and safety of your candle. Always stick to the recommended temperatures.
- Not Waiting for the Wax to Cool Properly: Pouring the wax while it’s too hot can cause cracks or air bubbles. Always let it cool slightly first.
- Ignoring Scent Load: Adding too much fragrance oil can lead to sooting. Sticking to around 1 oz per 1 ½ cups of wax is ideal.
- Packaging and Wick Issues: Ensure your wick is centered; otherwise, your candle may burn unevenly.
Variations and Customization Ideas
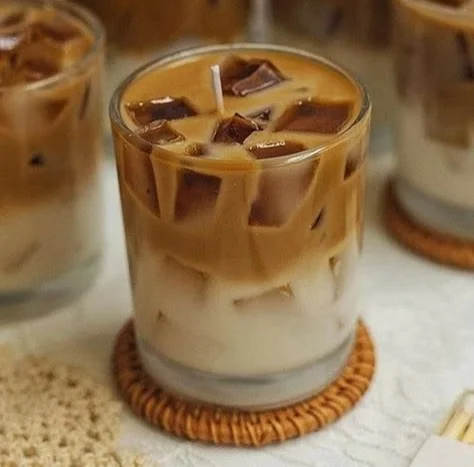
- Layered Candles: Create layers by pouring different colors and letting each layer solidify before adding the next.
- Seasonal Scents: Experiment with seasonal fragrances, such as pumpkin spice in autumn or peppermint in winter.
- Personalized Containers: Decorate your containers with paints, twine, or labels to create a truly unique piece.
Storage and Shelf Life
Store your homemade candles in a cool, dry place away from direct sunlight to maintain their longevity. They can last up to one year if stored correctly without compromising their quality.
Safety Tips
- Always work in a well-ventilated area to avoid inhaling fumes from hot wax or fragrances.
- Wear safety gloves when handling hot materials.
- Keep flammable materials away from your candle-making area and while burning candles.
- Never leave burning candles unattended and always place them on a stable, heat-resistant surface.
Frequently Asked Questions
Q1: Can I use essential oils instead of fragrance oils?
Yes, but make sure the essential oils you choose are safe for candle-making, as not all essential oils are suitable.
Q2: How do I know which wick to choose?
Wick size depends on your container diameter and type of wax. Typically, thicker containers need thicker wicks.
Q3: What do I do if my candle is burning unevenly?
This might occur due to wick size or placement. If your wick is too small, consider switching to a larger size for a controlled burn.
Q4: Can I reuse old candle jars?
Absolutely! Just make sure to clean them thoroughly to remove any leftover wax residue or fragrance.
Q5: How can I make my candles last longer?
Trimming the wick regularly and burning the candle for several hours at a time can help achieve a more even burn.
Conclusion
Crafting your own homemade candles using wax sand is a wonderful way to express your creativity while embracing sustainable practices. With simple ingredients, tools, and your personal touch, you can produce beautiful candles that add warmth and fragrance to your space. Dive into this fulfilling DIY project and let your imagination guide you as you create custom candles that reflect your individual style. Happy candle-making!