
Orange Clove Soap Recipe – Easy Melt and Pour DIY Soap
Making your own soap at home can be a fun and rewarding experience, especially when you can create delightful scents and textures that suit your style. Today, we’re diving into a wonderfully fragrant orange clove soap recipe using the simple melt and pour method. This technique is perfect for beginners and requires minimal equipment while allowing you to customize your soaps with the scents and additives you love.
Why You Will Love This Recipe
Not only does this orange clove soap smell amazing, but it’s also visually appealing! The blend of sweet orange and warm clove creates a comforting and inviting aroma, making it perfect for everyday use or as a thoughtful homemade gift. The melt and pour method allows you to skip the complexity of lye handling and focus purely on creating your soap.
Ingredients
For this orange clove soap, you will need the following ingredients:
- 1 pound (16 ounces) of clear or white melt and pour soap base
- 1 tablespoon of orange essential oil (or fragrance oil)
- 1 teaspoon of clove essential oil (or fragrance oil)
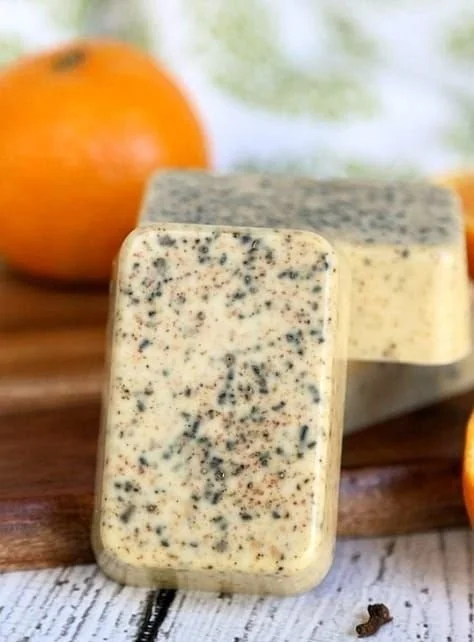
- 1 tablespoon of dried orange peel (optional, for texture)
- 1 teaspoon of dried cloves (optional, for decoration)
- Colorant (optional) – a few drops of orange soap colorant for hue
Equipment
Before you start, gather your equipment to ensure a smooth soap-making experience:
- A microwave-safe container or double boiler
- A heatproof measuring cup or bowl
- A soap mold (silicone molds work great)
- A stirring tool (like a spatula or stick blender)
- Rubbing alcohol in a spray bottle (to remove bubbles)
- A kitchen scale (for precise measurements if you adjust the recipe)
Step-by-Step Instructions
Making your orange clove soap is straightforward. Follow these steps:
Prepare Your Workspace: Clean your work area and gather all supplies. Lay out your soap mold, ensuring it’s ready to receive the soap.
Melt the Soap Base:
- Chop the melt and pour soap base into small, even pieces for faster melting.
- Place the pieces in a microwave-safe container and heat in the microwave. Heat for 30-second intervals, stirring in between until completely melted. If you’re using a double boiler, melt over low heat while stirring occasionally.
Add Scent and Color:
- Once melted, remove the soap base from heat. Let it cool for a minute, then add the orange and clove essential oils. Stir gently for a few seconds to evenly distribute the fragrance.
- If you wish to add color, now is the time! Add a few drops of orange soap colorant and mix until the color is blended.
Incorporate Texture and Decoration:
- If using dried orange peel, sprinkle it into the melted soap and stir to combine.
- If you want a decorative touch, add dried cloves into the soap mold before pouring the soap mixture.
Pour Into the Mold:
- Slowly and carefully pour the soap mixture into your mold. Fill to the desired level and avoid overfilling.
Remove Bubbles:
- To get rid of any air bubbles, lightly mist the surface of the soap with rubbing alcohol and let it settle for a minute.
Cool & Unmold:
- Allow the soap to cool at room temperature for 1-2 hours, or until fully hardened. Once solid, gently remove the soap from the mold.
Tips for Success
- Be Patient: If using colorants or additives, smaller amounts work better; you can always add more, but you can’t take away.
- Use a Thermometer: If you’re unsure about the melting temperature, using a thermometer can help ensure you don’t overheat the soap base.
- Safety First: Although melt and pour is relatively safe, exercise caution while handling hot containers.
Common Mistakes to Avoid
- Overheating the Soap Base: This can cause the base to scorch, resulting in an unpleasant odor and color.
- Not Stirring Enough: Failing to mix the oils well can lead to separation and uneven scent.
- Pouring Too Quickly: This can create air bubbles in your soap. Take your time as you pour.
Variations and Customization Ideas
- Different Scents: Play around with other essential oils like cinnamon for a spicier aroma or peppermint for a refreshing scent.
- Additives: Consider adding skin-loving elements like oatmeal, honey, or shea butter for added benefits.
- Mold Shapes: Use different mold shapes like flowers or animals for themed soaps, perfect for gifts or special occasions.
Storage and Shelf Life
Store your completed orange clove soap in a cool, dry place. If wrapped in plastic or stored in an airtight container, your soap can last for up to six months. Avoid placing it in direct sunlight, as this can degrade the quality.
Safety Tips
- Essential Oils: Always conduct a skin patch test with the essential oils you use, especially if you have sensitive skin.
- Workspace: Ensure your work area is clean and free of contaminants that could mix with your soap.
Frequently Asked Questions
1. Can I use other essential oils instead of orange and clove?
Yes, you can substitute any essential oils you prefer! Just keep in mind that the fragrance intensity might vary.
2. How can I adjust the soap color?
You can use soap-specific colorants or even natural colorants like turmeric or beet powder. Just remember to start with tiny amounts and adjust as needed.
3. Is there a recommended age for kids to start soap making?
While kids can safely participate in soap making with supervision, it’s best for ages 8 and up under a responsible adult’s guidance.
4. Can I add exfoliants to this soap?
Absolutely! You can mix in a small amount of sugar or salt for exfoliating properties. Just ensure it doesn’t overpower the soap’s lather.
5. How do I clean up after making soap?
Use hot, soapy water to clean your tools and workspace. Soap residue can often be easily wiped away when soaked.
6. Can I use a different base for this soap?
Certainly! You can opt for a glycerin base, goat milk base, or even a shea butter base, depending on your desired outcome.
Conclusion
Creating your own orange clove soap is a delightful and easy project that’s perfect for beginners. With just a few simple steps, you can enjoy the benefits of crafting your own homemade soap, designed to please your senses. Don’t hesitate to experiment with various fragrances and textures!
Gather your materials, turn on your favorite music, and let your creativity flow. Enjoy the process and share your creations with friends and family. Happy soap making!