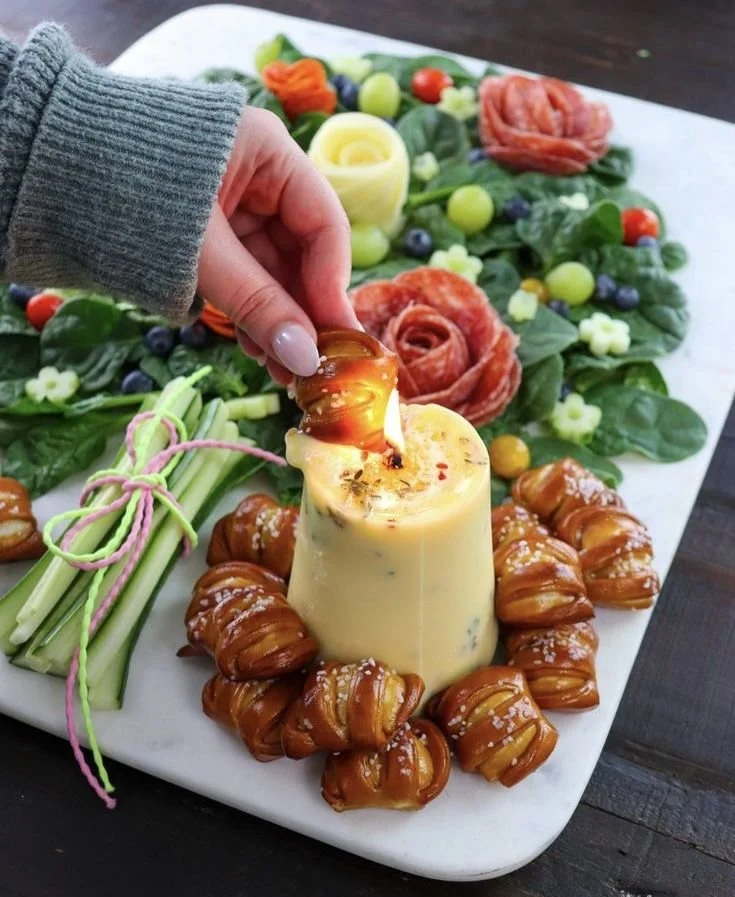

Create Your Own Rustic Herb Butter Candle
In the world of DIY projects, creating your own candles can be one of the most rewarding and enjoyable experiences. Not only do homemade candles add warmth and charm to any room, but they also make thoughtful gifts. Today, I’ll walk you through making a Rustic Herb Butter Candle that is simple to make and extraordinarily fragrant. Let’s get started!
Why You Will Love This Recipe
This Butter Candle recipe is not only easy and quick to prepare but also adds a delightful rustic vibe to your home. The Tastefully Simple Rustic Herb seasoning gives it a unique scent profile, reminiscent of fresh herbs and cooking. Whether you place it on your dining table, use it for a cozy night in, or gift it to a friend, this candle is sure to impress. Plus, it’s an excellent way to incorporate seasonal flavors into your decor.
Ingredients
To make your Rustic Herb Butter Candle, you will need the following ingredients:
- 16 oz. unsalted butter: This serves as the base for your candle, providing it with a creamy texture and rich scent.
- 1 1/2 capfuls of TS Rustic Herb seasoning: This unique blend of herbs will infuse your candle with a warm, aromatic fragrance.
- 1 Edible wick: Make sure to use a wick that is safe for consumption and can handle the heat of the melted butter.
- 1 Paper cup: This will serve as the mold for your candle.
Equipment
Gather the following equipment for making the Rustic Herb Butter Candle:
- Double boiler or microwave-safe bowl: For melting the butter safely.
- Cooking utensil (spoon or spatula): For stirring the butter and seasoning.
- Scissors: To cut the wick if needed.
- Refrigerator: To allow the candle to set.
Step-by-Step Instructions
Preparation Time: 10 minutes
Making Time: 30 minutes
Cooling Time: 2 hours
Approximate Yield: 1 candle
Melt the Butter: Place the unsalted butter in a double boiler over low-medium heat. If you don’t have a double boiler, you can use a microwave-safe bowl and melt the butter in short increments, stirring in between, until fully melted.
Add the Seasoning: Once the butter is melted, add the 1.5 capfuls of TS Rustic Herb seasoning. Stir the mixture thoroughly until the seasoning is evenly incorporated into the butter.
Prepare the Wick: Cut a small hole in the bottom of the paper cup. String a length of the edible wick through the hole from the inside of the cup, allowing enough length to remain accessible above the top of the cup.
Fill the Cup: Carefully fill the cup with the melted butter mixture, making sure that the wick stays centered as you pour.
Chill: Place the filled cup in the refrigerator and allow it to cool for about two hours or until the butter has firmed up completely.
Remove the Candle: Once the candle has set, gently flip the cup upside down to release your butter candle. You may need to give it a little tap to help it come out.
Enjoy or Gift: Your Rustic Herb Butter Candle is now ready to be enjoyed or gifted!
Tips for Success
- Choose Quality Ingredients: Using high-quality unsalted butter and fresh seasoning will enhance the fragrance and overall quality of your candle.
- Keep the Wick Centered: It’s important to keep your wick centered while pouring in the mixture to ensure an even burn.
- Observe Melting Times: If melting in the microwave, start with short bursts of 15-20 seconds to avoid overheating.
Common Mistakes to Avoid
- Using Salted Butter: Stick with unsalted butter for the best results, as salted butter can affect the fragrance and burning quality.
- Not Allowing to Cool Completely: Ensure the candle is fully set before attempting to remove it from the cup; otherwise, it might break apart.
- Overheating the Butter: Always melt butter on low heat to avoid scorching, which can change the butter’s aroma and texture.
Variations and Customization Ideas
- Scent Variations: Feel free to experiment with different seasonings or herbs. Consider rosemary, thyme, or sage for a unique twist.
- Color Additives: Although the butter will naturally give a yellowish hue, you could add food-safe colorants to create a customized look.
- Container Choices: Instead of a paper cup, use ceramic or glass containers for a more decorative finish.
Storage and Shelf Life
Store your Rustic Herb Butter Candle in a cool, dry place away from direct sunlight. If kept properly, it should last for about 1-2 months.
Safety Tips
- Electrical Safety: If using a microwave, be cautious about the heat and ensure your bowls are microwave-safe.
- Fire Safety: Always place your candle on a heat-resistant surface and never leave it unattended while lit. Do not let the wick burn down too low to avoid a fire hazard.
- Wick Length: Ensure the wick isn’t excessively long once the candle is made, as a long wick can lead to an uneven or dangerous burn.
Frequently Asked Questions
1. Can I use other oils besides butter?
Yes! You can use coconut oil or beeswax for different textures and scents, but keep in mind that the burning properties may vary.
2. How do I ensure my candle burns evenly?
Make sure the wick is centered throughout the entire process and trim it to about 1/4 inch before lighting.
3. What should I do if my butter is too runny?
If your butter mixture is too runny after melting, allow it to cool slightly in the refrigerator before pouring it into the cup to thicken it.
4. How do I clean up if I spill melted butter?
Act quickly by wiping it up with paper towels, then wash the surface with warm soapy water to remove any greasy residue.
5. Are there any health risks related to burning butter candles?
While burning a butter candle is generally safe, be cautious of allergies to dairy. Always monitor the candle as it burns.
Conclusion
Making your own Rustic Herb Butter Candle is an enjoyable and aromatic DIY project that can brighten your home or serve as a heartfelt gift. With a few simple ingredients and easy-to-follow steps, anyone can create a beautiful and practical decorative item. So gather your materials and start crafting; you might just find a new favorite hobby in candle-making! Happy crafting!