
How to Make Natural Sea Salt Soap Hand and Body Bars
Creating your own sea salt soap bars at home is a delightful and satisfying project. With a few naturally nourishing ingredients like pink Himalayan sea salt and moisturizing shea butter, you can craft beautiful and effective soap bars perfect for your skin. This guide will walk you step-by-step through an easy DIY sea salt soap recipe that’s beginner-friendly and results in luxurious hand and body bars.
Why You Will Love This Recipe
- Skin Benefits: Sea salt is known for its exfoliating properties, making it beneficial for conditions such as acne and eczema while also helping to soothe dry skin.
- Ease of Use: This recipe employs the melt-and-pour method, which is straightforward and safe for beginners.
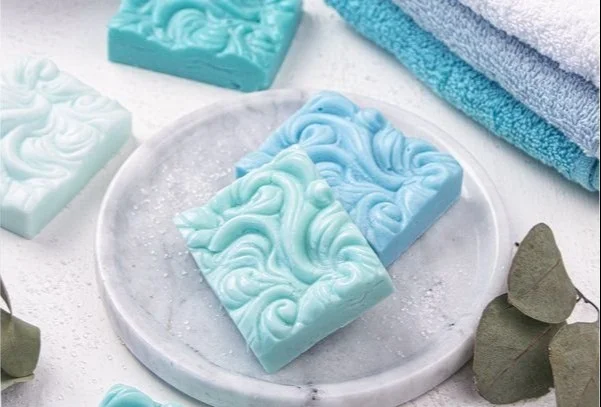
- Customization: You can easily add your favorite essential oils, natural colors, or decorative swirls to personalize your soap.
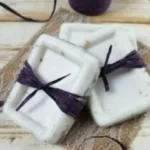
- Great for Gifting: Homemade soap bars make wonderful gifts for friends and family, especially with unique packaging.
Ingredients
For approximately 6 soap bars, you will need:
- Base:
- 1 lb (16 oz) of soap base (goat’s milk or vegetable glycerin)
- Exfoliant:
- 1 cup pink Himalayan sea salt
- Oils:
- 1/4 cup shea butter
- Fragrance:
- 20-30 drops of essential oil (such as lavender, tea tree, or eucalyptus)
- Optional:
- Skin-safe colorant (if desired)
Equipment
- Microwave-safe measuring cup or bowl
- Soap molds (silicone molds work best)
- Mixing spatula or spoon
- Soap cutter (optional)
- Rubbing alcohol in a spray bottle (to eliminate bubbles)
- Measuring spoons
- Scale (if needed for precise measurements)
Step-by-Step Instructions
Step 1: Prepare Your Workspace
Clear a designated area in your kitchen or crafting space to ensure you have room to work. Gather all your ingredients and tools.
Step 2: Melt the Soap Base
- Cut your soap base into small, even cubes to allow for quicker melting.
- Place the cubes in a microwave-safe bowl.
- Heat in the microwave in intervals of 30 seconds, stirring in between until fully melted. Be careful not to overheat, as it can scorch.
Step 3: Add She Butter
- Once the soap base is melted, add the shea butter.
- Stir gently until the shea butter has completely melted and incorporated into the mixture.
Step 4: Mix in the Sea Salt and Essential Oils
- Add the pink Himalayan sea salt and mix thoroughly. The salt adds a gentle exfoliant that will help rejuvenate your skin.
- Add your chosen essential oils and mix well. You can adjust the amount based on personal fragrance preference.
- If using a colorant, add a few drops now, mixing until the desired color is achieved.
Step 5: Pour the Mixture Into Molds
- Carefully pour the soap mixture into your molds. Fill them to the brim or leave a little space for swirls if desired.
- For a smooth finish, lightly spray the surface of the soap with rubbing alcohol to eliminate any bubbles.
Step 6: Let the Soap Bars Set
- Allow the soap to harden at room temperature for about 1-2 hours, or until completely solid.
- Once set, gently remove the soap bars from the molds. If they are difficult to remove, you can place them in the freezer for about 10-15 minutes to contract them slightly.
Tips for Success
- Temperature Matters: Keep an eye on the temperature while melting the soap base. If it gets too hot, it can lose its beneficial properties.
- Essential Oil Safety: Ensure you are using skin-safe essential oils; always check for allergies before applying to the skin.
- Clean Tools: Clean your tools and workspace immediately after use to prevent soap remnants from hardening.
Common Mistakes to Avoid
- Overheating the Soap Base: This can affect the color and properties of your final soap.
- Not Mixing Enough: Ensure all the ingredients are thoroughly mixed to prevent clumps of salt or butter.
- Using Reactive Molds: Avoid metal molds; silicone molds work best for easy release and flexibility.
Variations and Customization Ideas
- Additive Ingredients: Consider adding dried herbs or flower petals for extra texture and visual appeal.
- Color Swirls: For swirls, separate part of the melted base and color it differently before pouring together.
- Fragrance Combinations: Experiment with different essential oil blends to create unique scents.
Storage and Shelf Life
Once your sea salt soap bars are prepared, allow them to cure for a day or two in a cool, dry place. Store the finished soap in a dry location away from direct sunlight, in a breathable container. Properly stored, they can last for 6-12 months.
Safety Tips
- Always work in a well-ventilated area when using essential oils.
- If you decide to use any dyes or colorants, ensure they are skin-safe and suited for soap making.
- While this method doesn’t involve lye, be cautious when handling hot soap bases.
Frequently Asked Questions
Q: Can I use table salt instead of pink Himalayan salt?
A: While you can, pink Himalayan salt provides additional minerals and a unique aesthetic. Table salt may dissolve quicker and offer different exfoliating properties.
Q: How do I know if my soap bars are ready to use?
A: Soap bars are ready once they feel completely solid and have a smooth surface.
Q: Can I add more essential oils if I want a stronger scent?
A: Yes, but be cautious. Overusing essential oils can lead to skin irritation.
Q: What if I can’t find goat’s milk soap base?
A: Vegetable glycerin soap base is an excellent alternative if goat’s milk is unavailable.
Q: How can I package my soap bars as gifts?
A: Consider wrapping them in colorful paper or using decorative boxes with natural twine for a rustic touch.
Q: Are these soap bars safe for children?
A: Yes, as long as skin-safe ingredients are used. Always patch-test first.
Conclusion
Making your own sea salt soap hand and body bars is not only a fun DIY project but also a way to tailor skincare to your needs with natural ingredients. With a few simple steps, you can create stunning, nourishing soap bars perfect for personal use or gifting. Don’t hesitate to experiment with fragrances, colors, and textures to make these soap bars uniquely yours. Happy soap making!